Onboarding
How do I create business into HB GST software?
Step 1: After successful login, you will be redirected to HostBooks Account Customer Portal Home Page. Which contains following details.
- Account details
- Business/Company details (Create Business & Edit Business)
- Profile details
- HostBooks products
- User Management details
- Settings
- Support Tickets.
- Admin & User Dashboard
- Activity logs.
Step 2: Once customer is registered then this page is displayed on first screen while they login. This is Business creation page, enter the following details to add a business.
- Organization / Client type.
- Name of Client / Business
- Business legal name
- Industry type
- PAN or Other information related to PAN
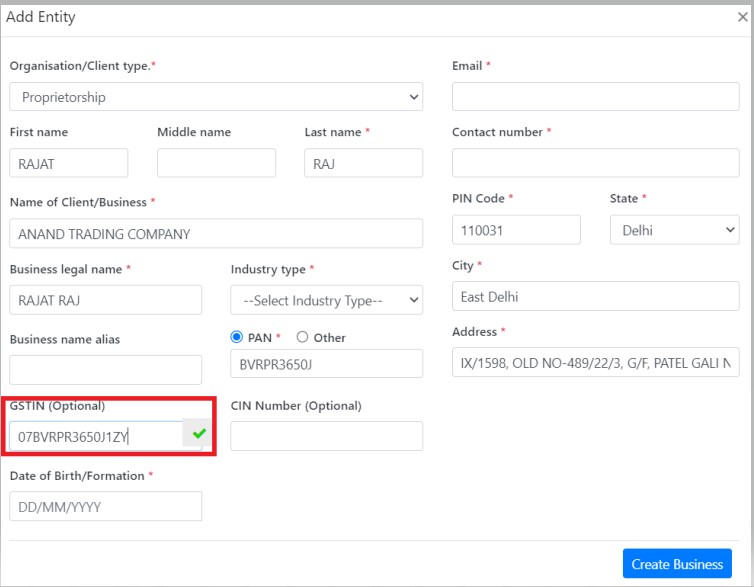
- GSTIN (When User enter the GSTIN number then GSTIN details fetched automatically).
- CIN Number(Optional)
- Contact number
- Pin code
- State
- City
- Address
- Click on 'Create Business' button
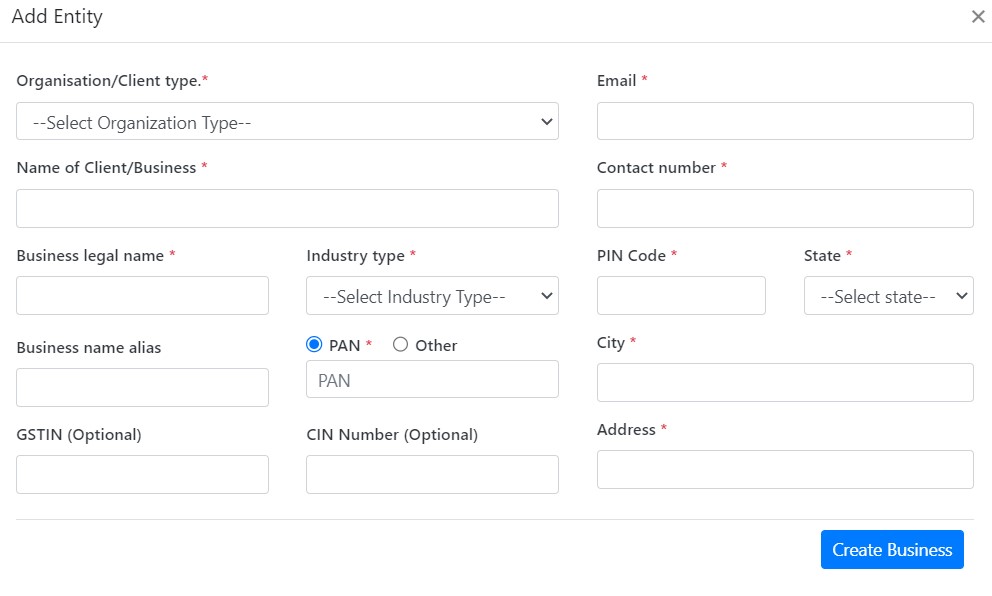
Or, user can enter only GSTIN and almost all the fields except email and mobile will get auto-filled based on entered GSTIN.
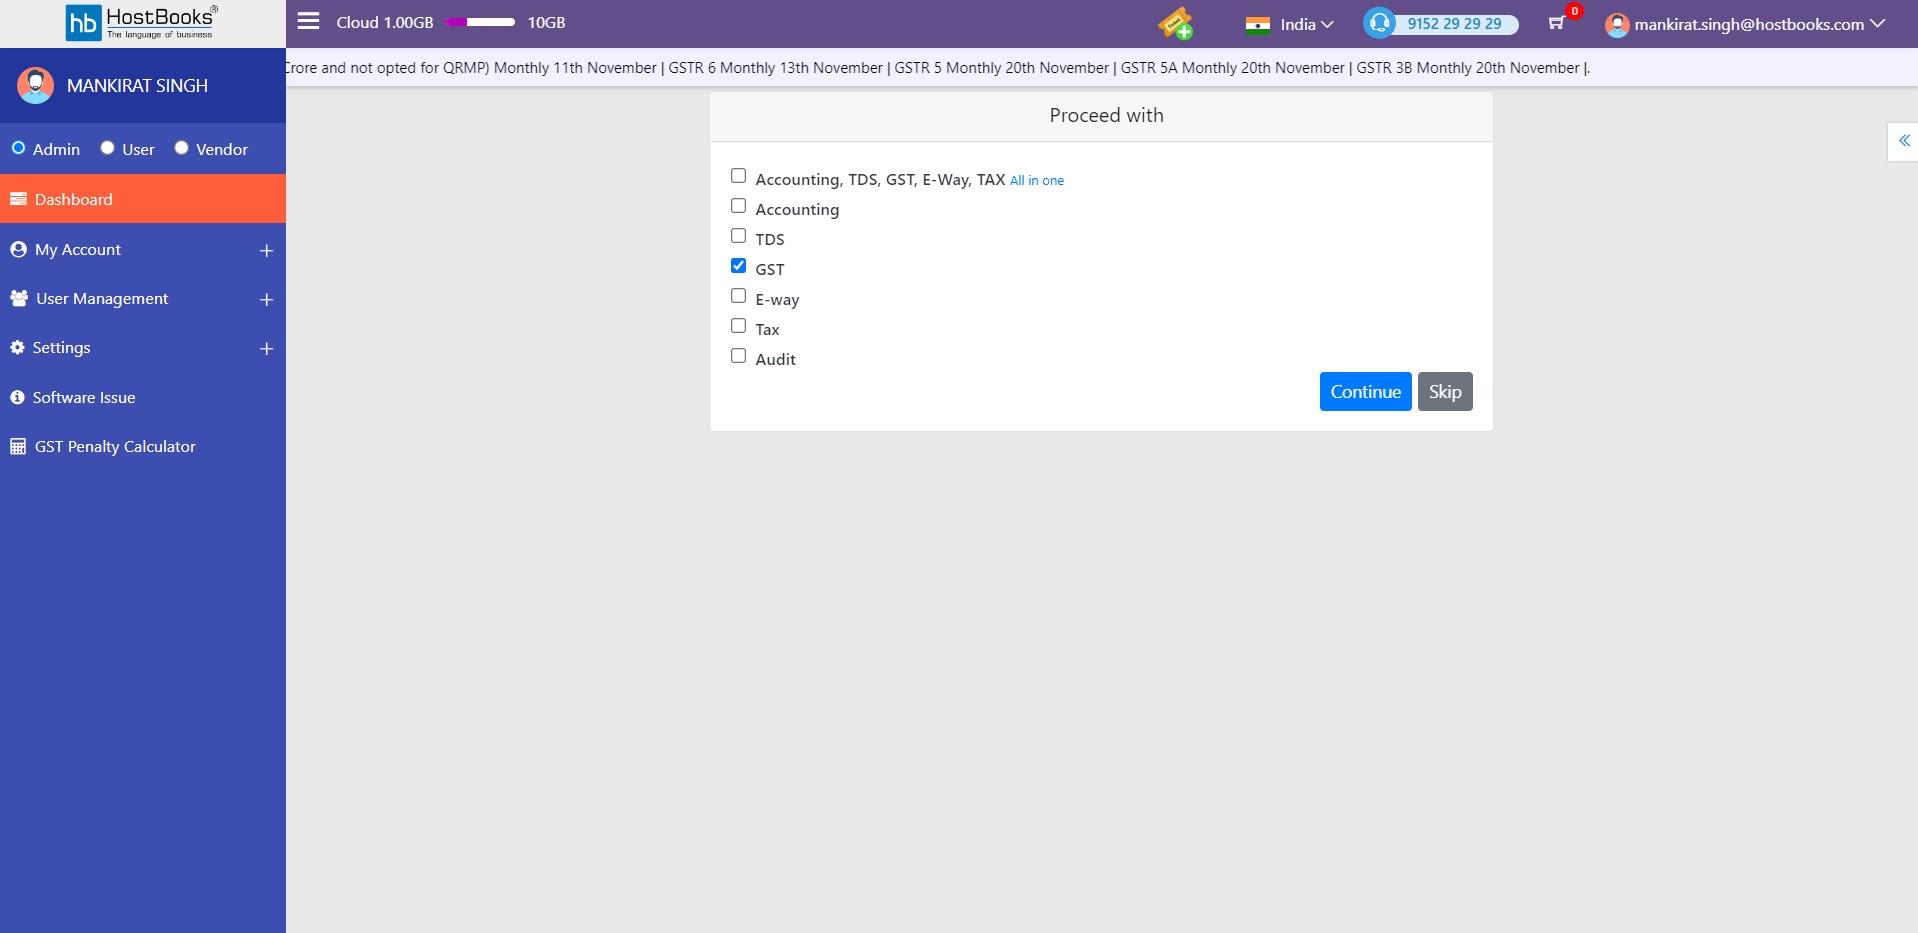
Step 3: On clicking on "Create Business" button you will redirect product selection page, click on the 'GST' checkbox and 'Continue' to proceed
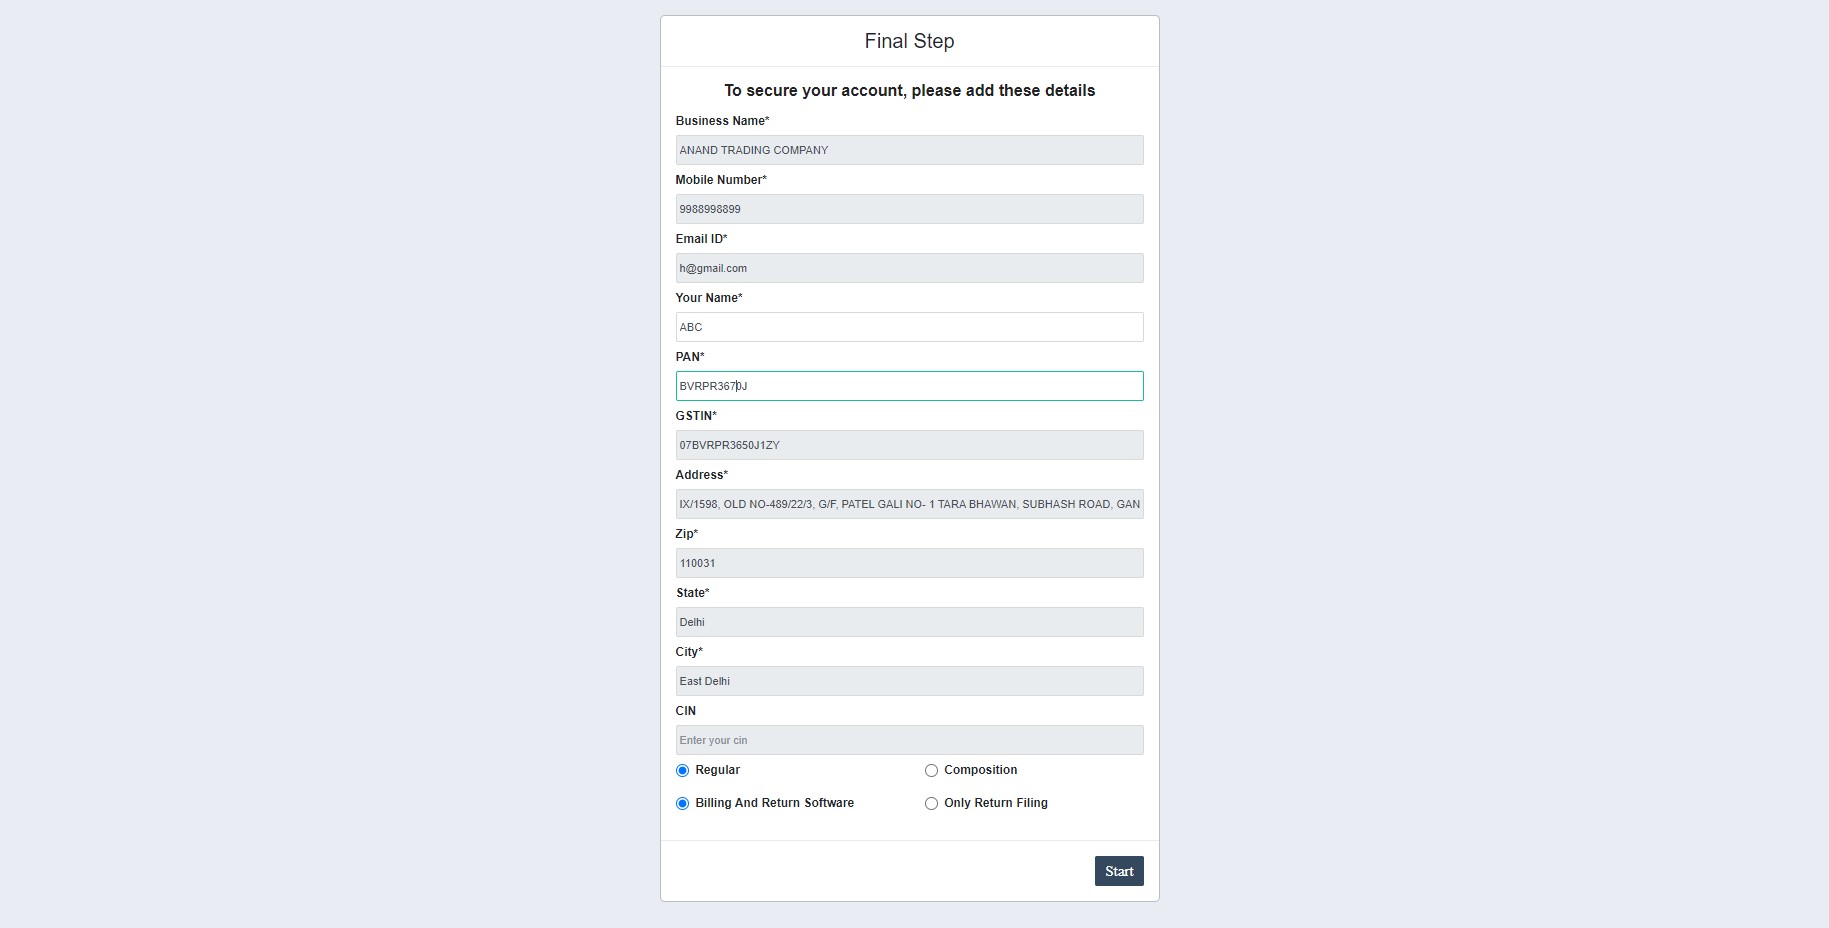
Step 4: If the user entered GST Number on business creation page then the details fetched automatically or user can enter in the below screen as well. Click on 'Save' button a 'Continue' to proceed.

Step 5: Click on highlighted ICON to enter GST Dashboard of the added business.
Step 6: Verify the details and select the GSTR Return type and Software type. Click on 'Start' button
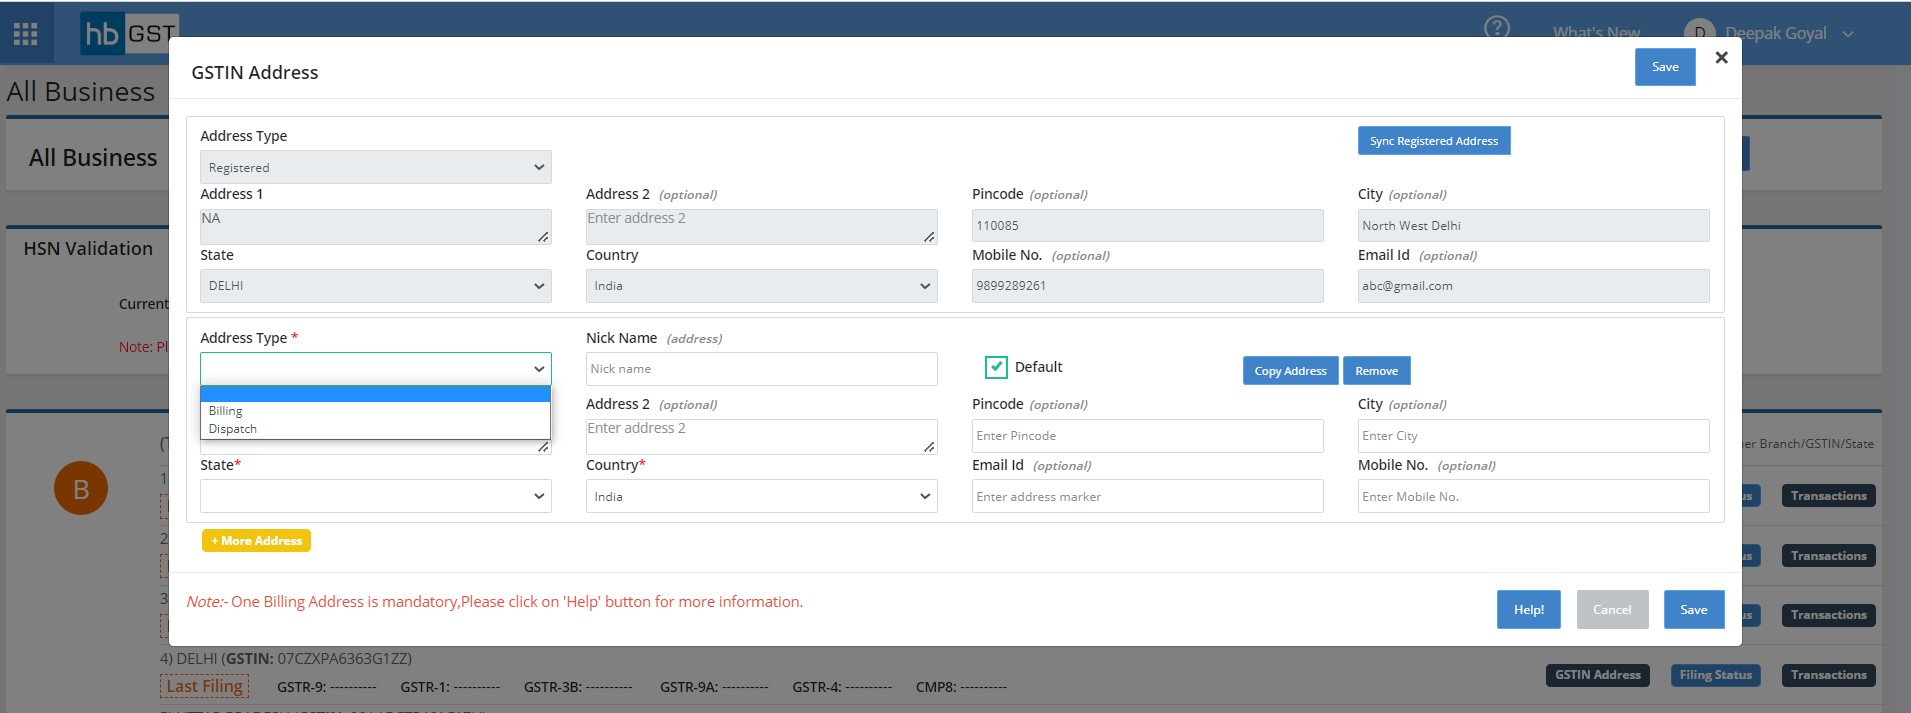
Step7: Click on the GSTIN Address and add the Billing Address before navigate into the software.
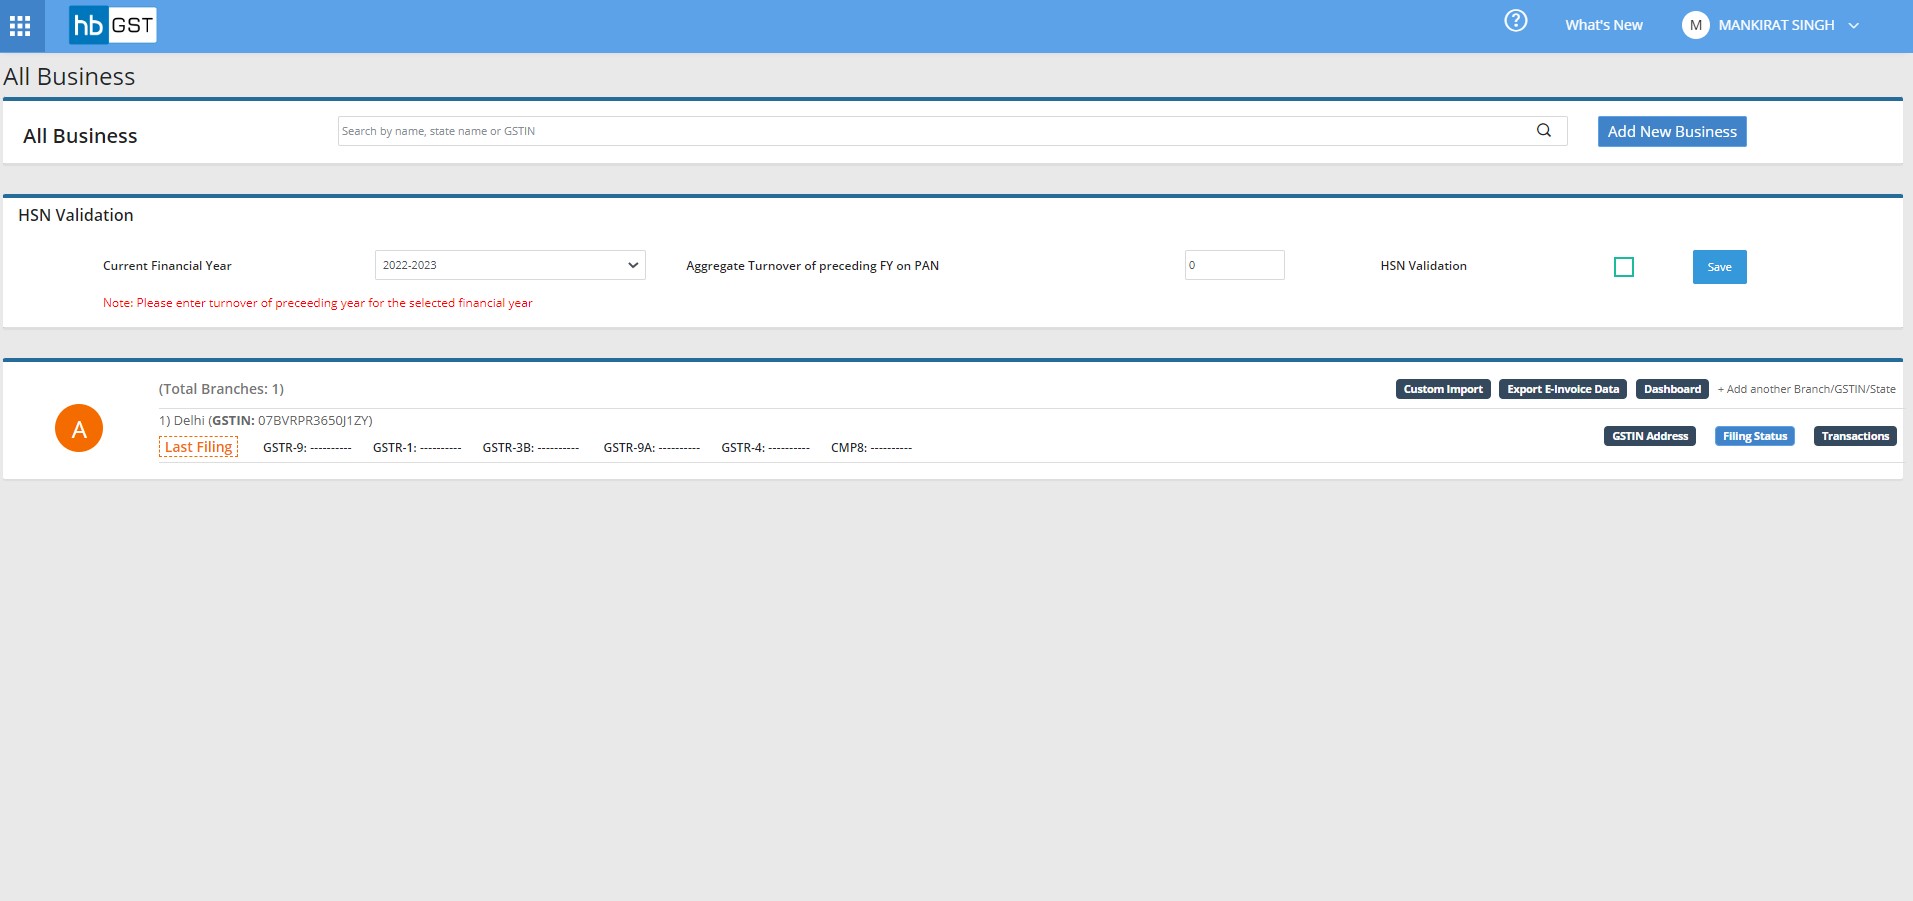
Step 8: Click on the Transactios button to navigate into the software.
How to Edit Business Details?
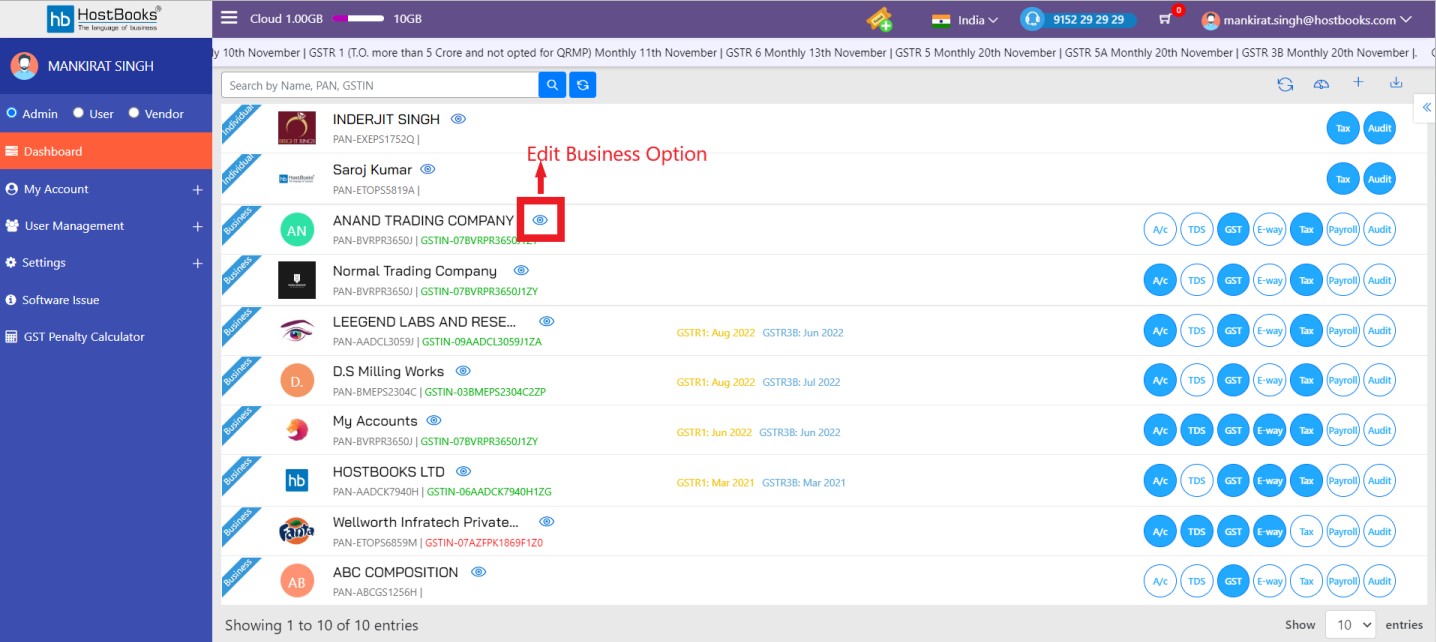
Step 1: Click on edit button right to business name. This will navigate to business information page.
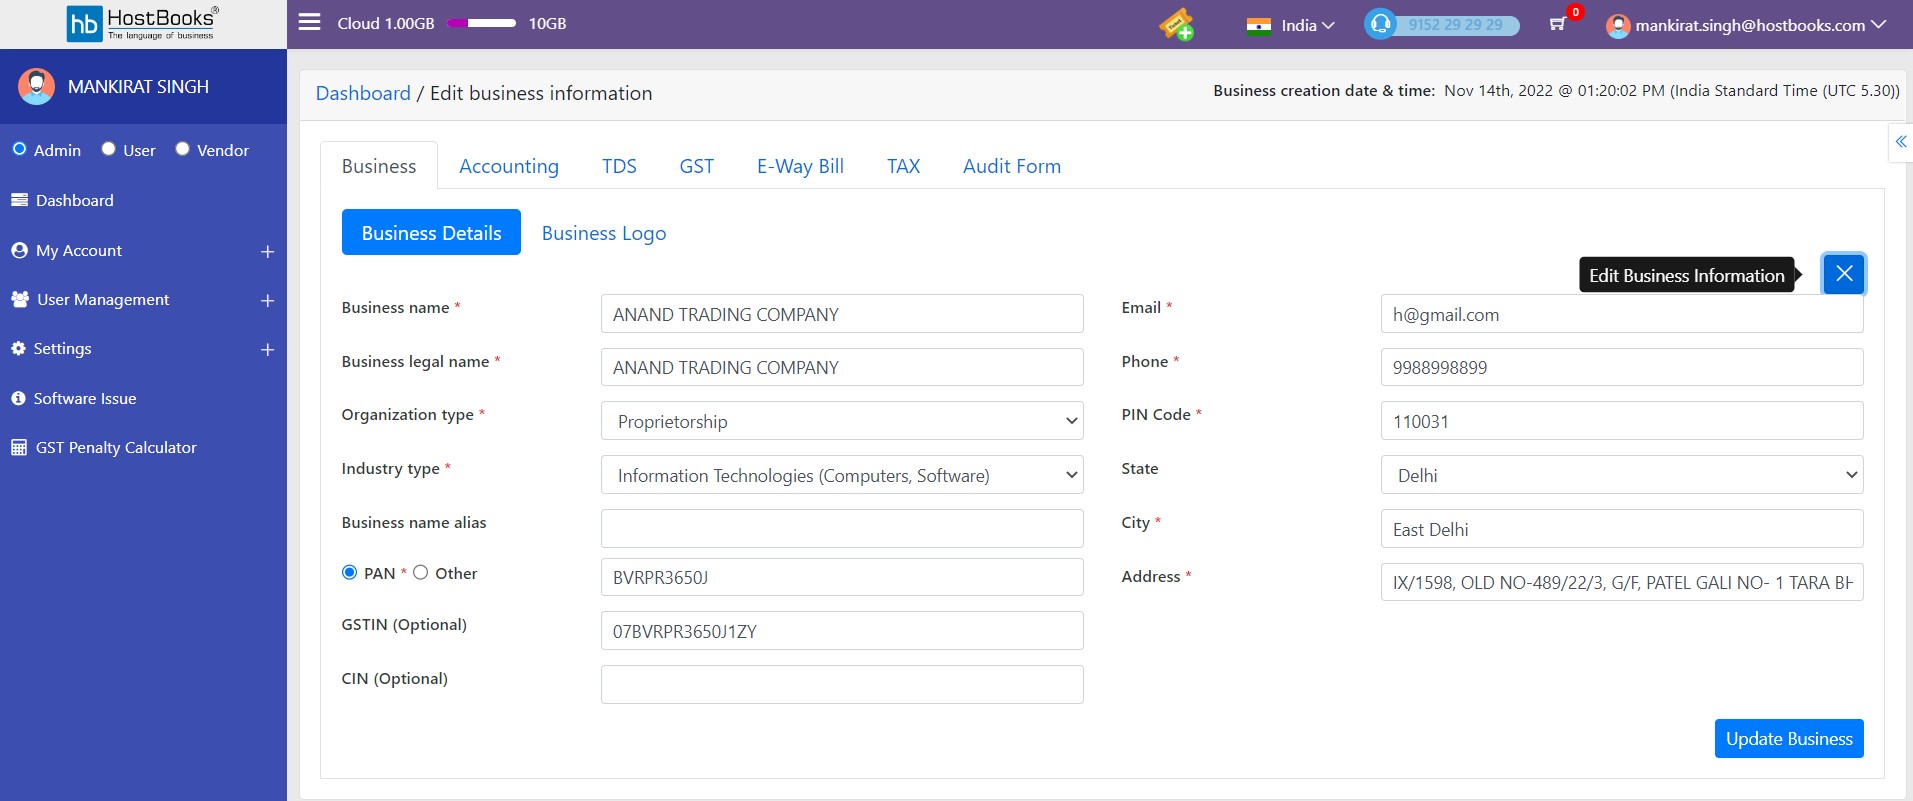
Step 2: Go to the relevant tab and click 'Edit' Icon.
Step 3: Update the relevant fields and click on 'Update Business' button to update the business details.
Step 4: Click on the Sync HostBooks Business button from GST Dashboard to update the changed address in Business details.

Contents of GST Software Homepage
Once a user logs on to HB GST he shall be on the business page i.e. GST Dashboard or GST Home Page. Following details can be seen into the HB homepage or GST business page:
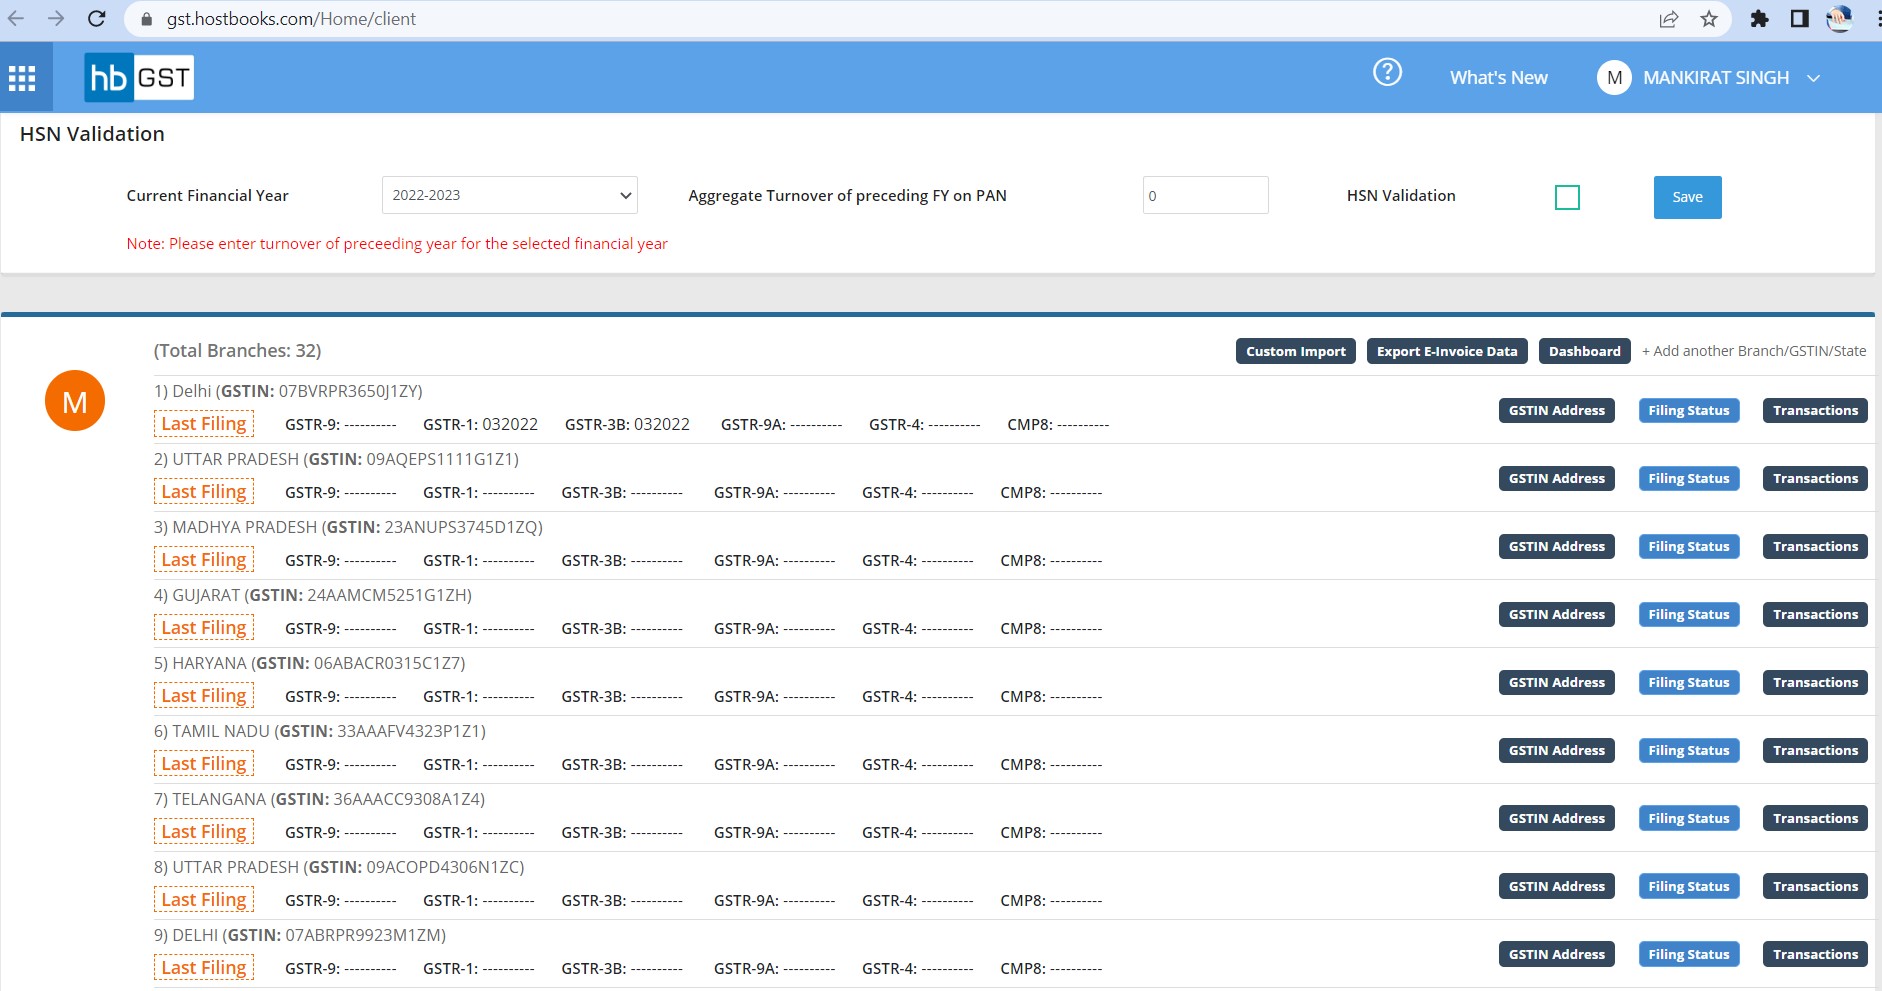
- HSN Validation: Here you can define Aggregate Turnover of preceding FY on PAN. Based on this software will apply HSN validation rules in the invoices to prevent omission of HSN number from invoices (4 digit or 6 digit HSN code) as the case maybe.
- Custom Import: Here you can import the custom sales invoice template in GST Software.
- Export E-Invoice Data: Option to download Excel for Sale and Credit/Debit Note Generated/Not Generated list.
- Dashboard: Here you can check Connector ID for each GSTIN, enter E-way Bill Portal Credential
- GSTIN Address: Here you can define multiple billing and dispatch address of the business.
- Return Filing Status: Filing status provide option to the user to see return filing status of the GSTIN. A pop-up window will be opened on click of 'Filing Status' button. HB GST here fetch live status from GST portal for the selected GSTIN for selected period. User can export filing status in Excel file.
- Transactions: Click here to navigate to transaction screen for adding transactions & filing returns
- Add another branch/GSTIN/State: Click here to fill the GSTIN & other details to add new branch
- Help: GST application help content
- What's New: Latest updates in HB GST Software


