Master
How do I create Item Master into HB GST software?
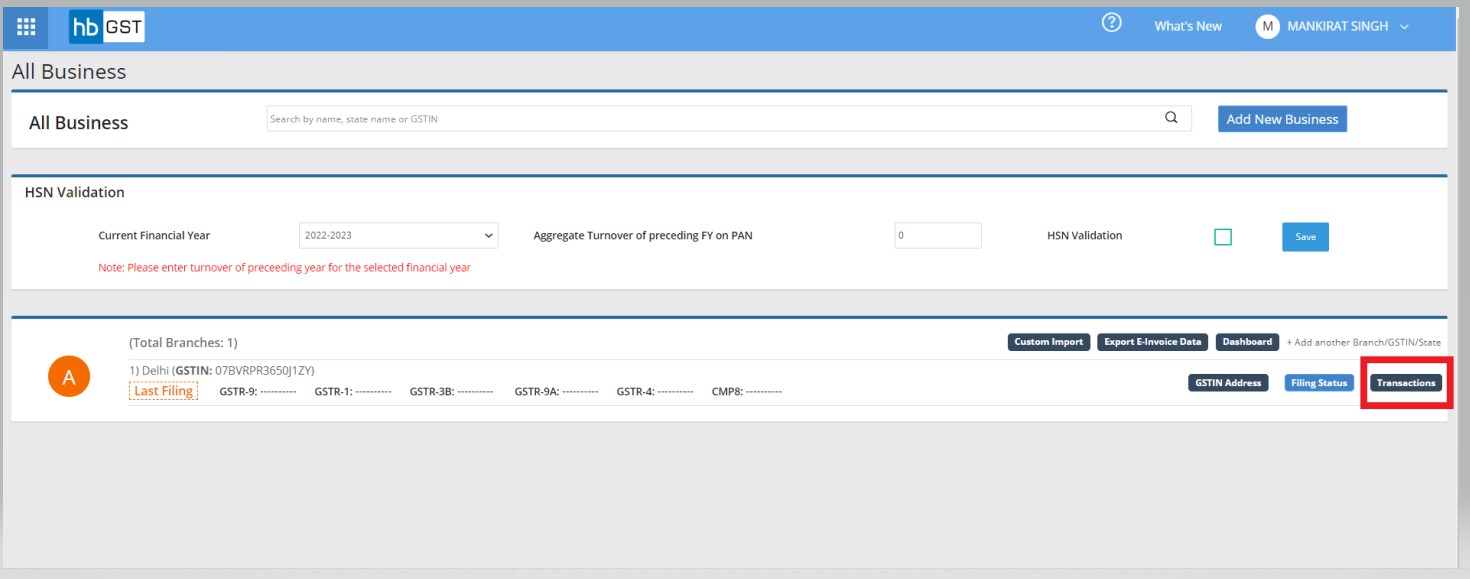
Step 1: Click on the "Transactions" button after entering into the business

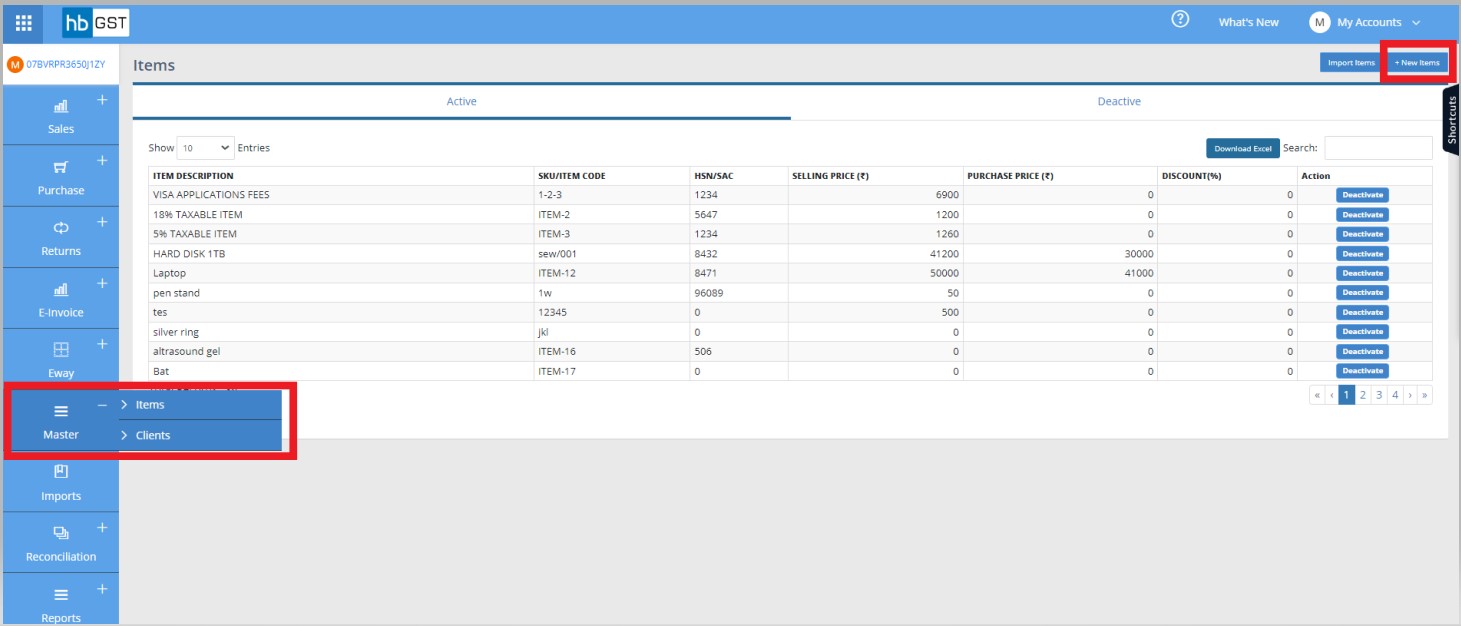
Step 2: Click on "Items" button under Master Module & further click on "+ New Items" button to add details of a new Item Master.
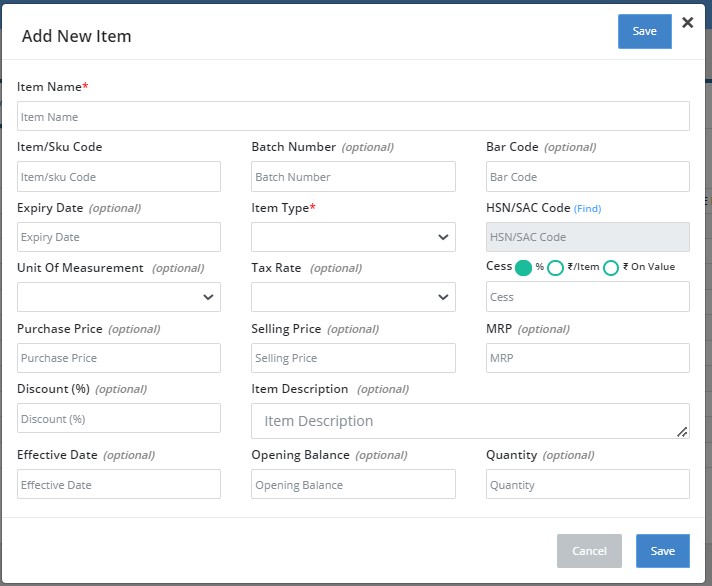
Step 3: Enter Item Details and click on "Save" button.
- Item Name
- Item/Sku Code
- Batch Number (Optional)
- Bar Code (Optional)
- Expiry Date (Optional)
- Item Type
- Item Description (Optional)
- Item Type (Goods / Service)
- HSN/SAC (HSN is an 8 digit code assigned to goods and SAC is a code assigned to services)
- UOM (Unit of measurements) (Optional)
- Purchase Price (₹)(Optional)
- Sale Price (₹) (Optional)
- MRP (Optional)
- Discount %/(₹)(Optional)
- Tax Rate (IGST or CGST/SGST)
- Cess (%) / Per-Item / On Value
- Opening Balance (Optional)
- Quantity (Optional)
- Effective Date (Optional)
How do I Import Item Master into HB GST software?
Step 1: Click on the "Transactions" button after entering into the business
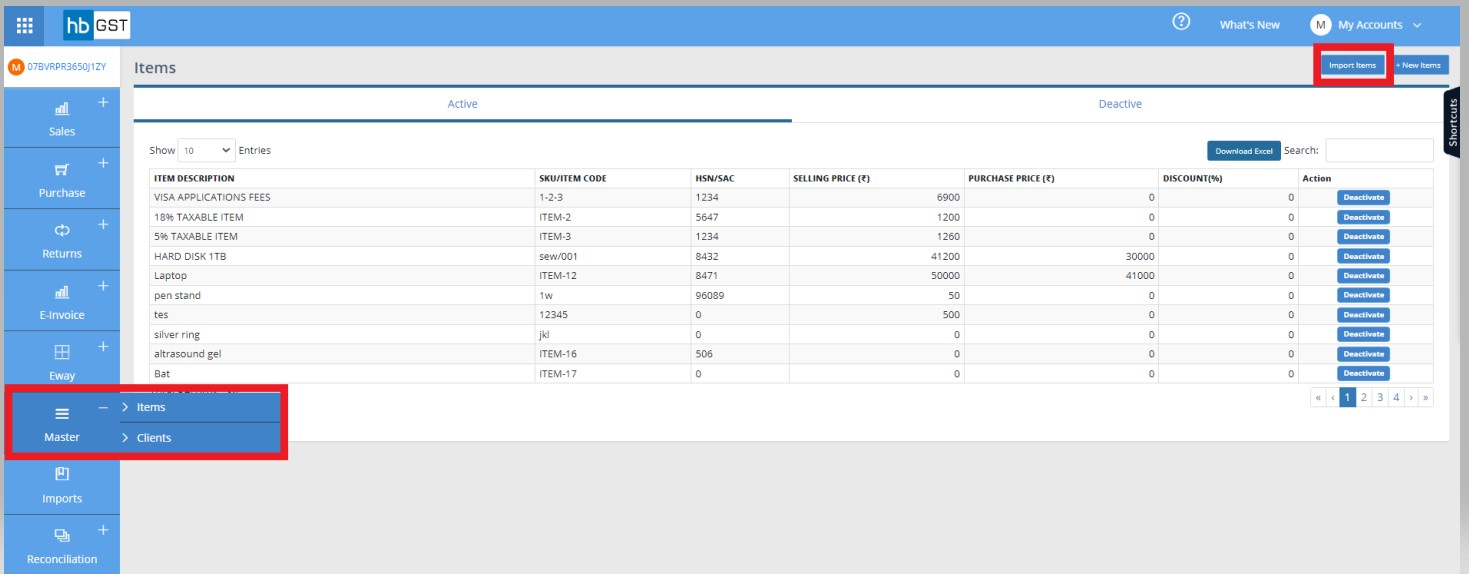
Step 2: Click on "Items" button under Master Module & further click on "Import Items" button to import Item Master.
Step 3: Download the excel template of item master by clicking on "Download a file" button. Prepare the details of item master in the excel template downloaded.

Step 4: After preparing the excel template, go to "Import Items" module & Click on "Choose Files" button to select the excel template & click on "Submit" button to upload the item master.
How do I Deactivate Item into HB GST software?
Step 1 : Click on the "Transactions" button after entering into the business

Step 2: Click on "Items" button under Master Module & item master listing page will open.
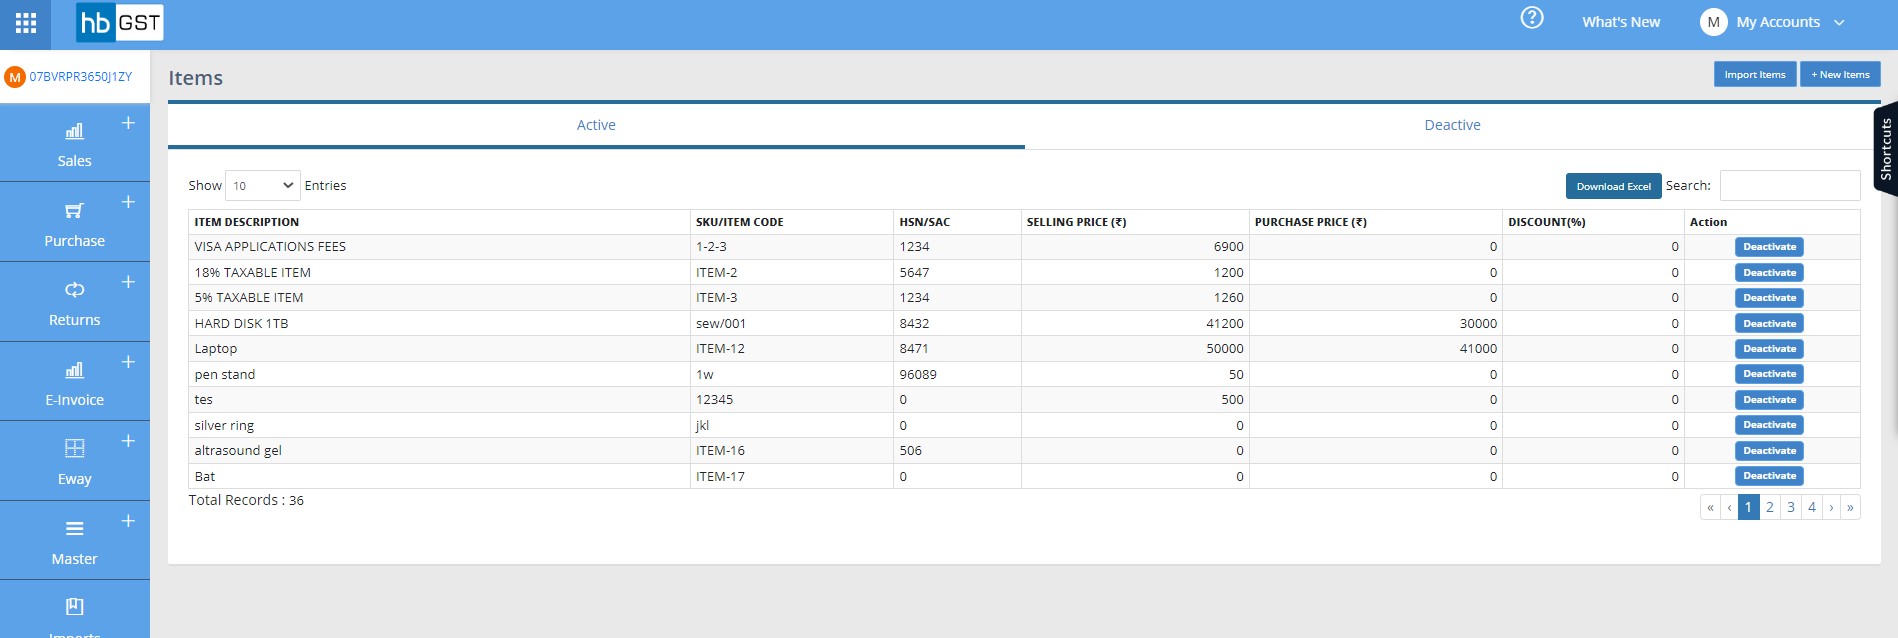
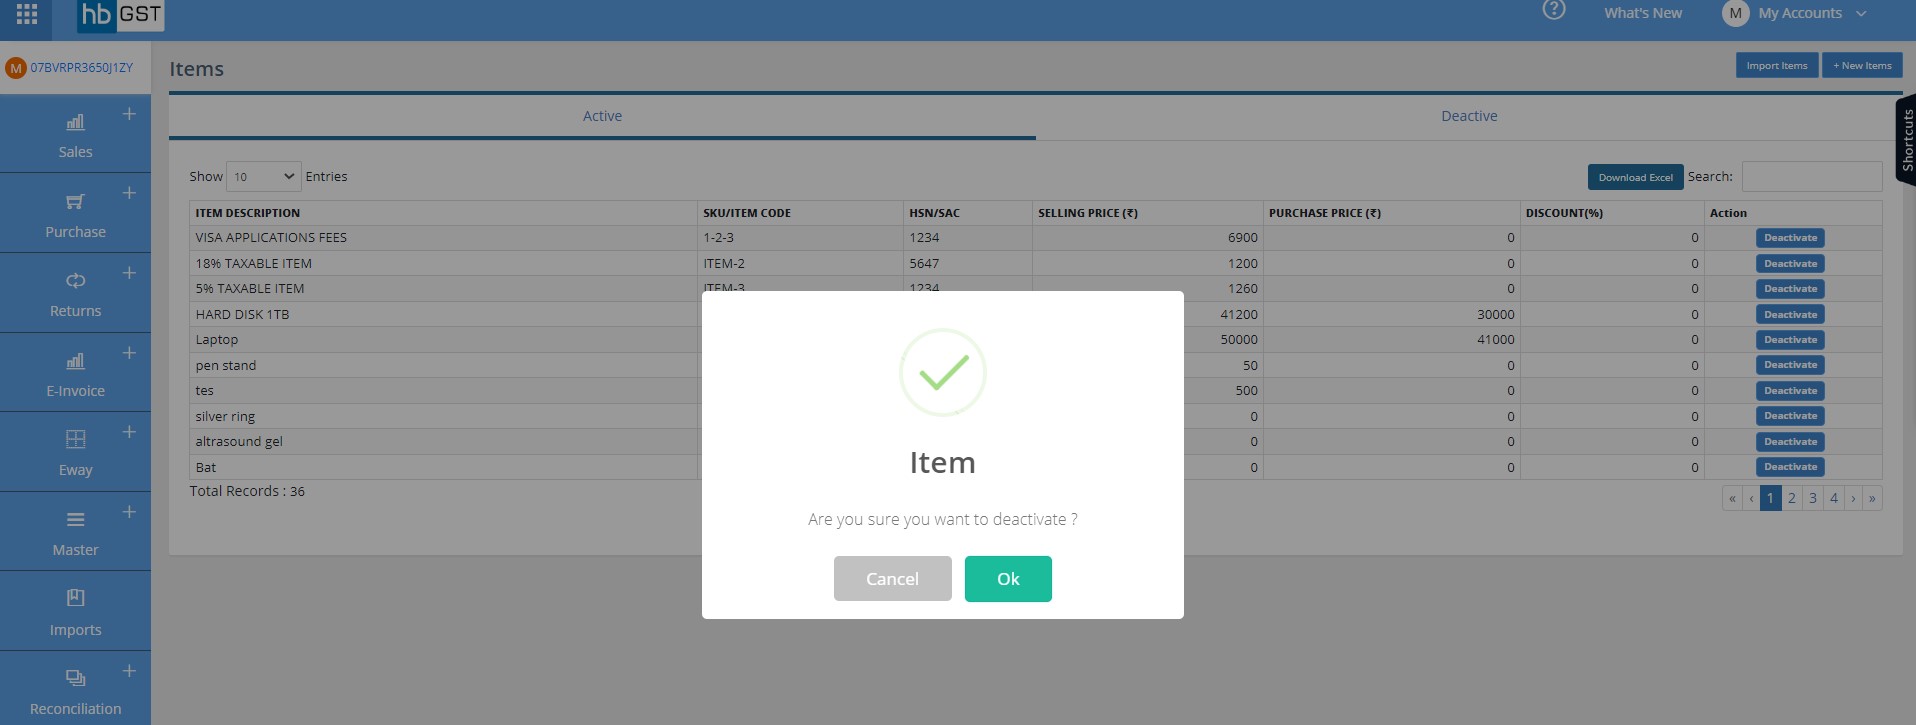
Step 3: Click on "Deactivate" button against the item which you want to deactivate & click on "Ok" and item will be deactivated.
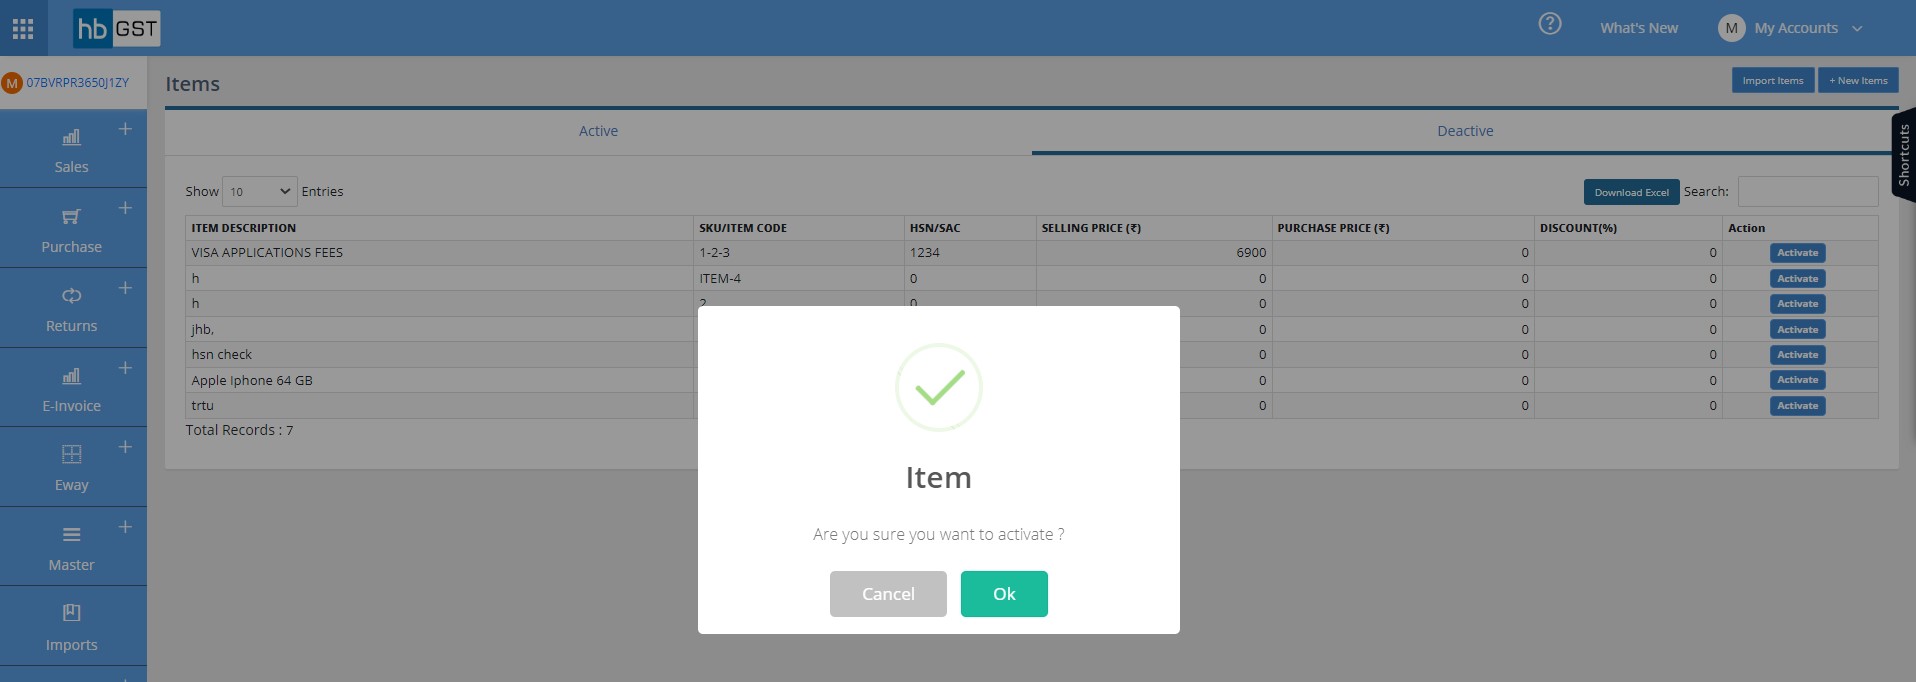
Further to activate any deactivated item, go to deactivated item section in item master module and click on "Activate" button
How do I create Client Master into HB GST software?
Step 1: Click on the "Transactions" button after entering into the business
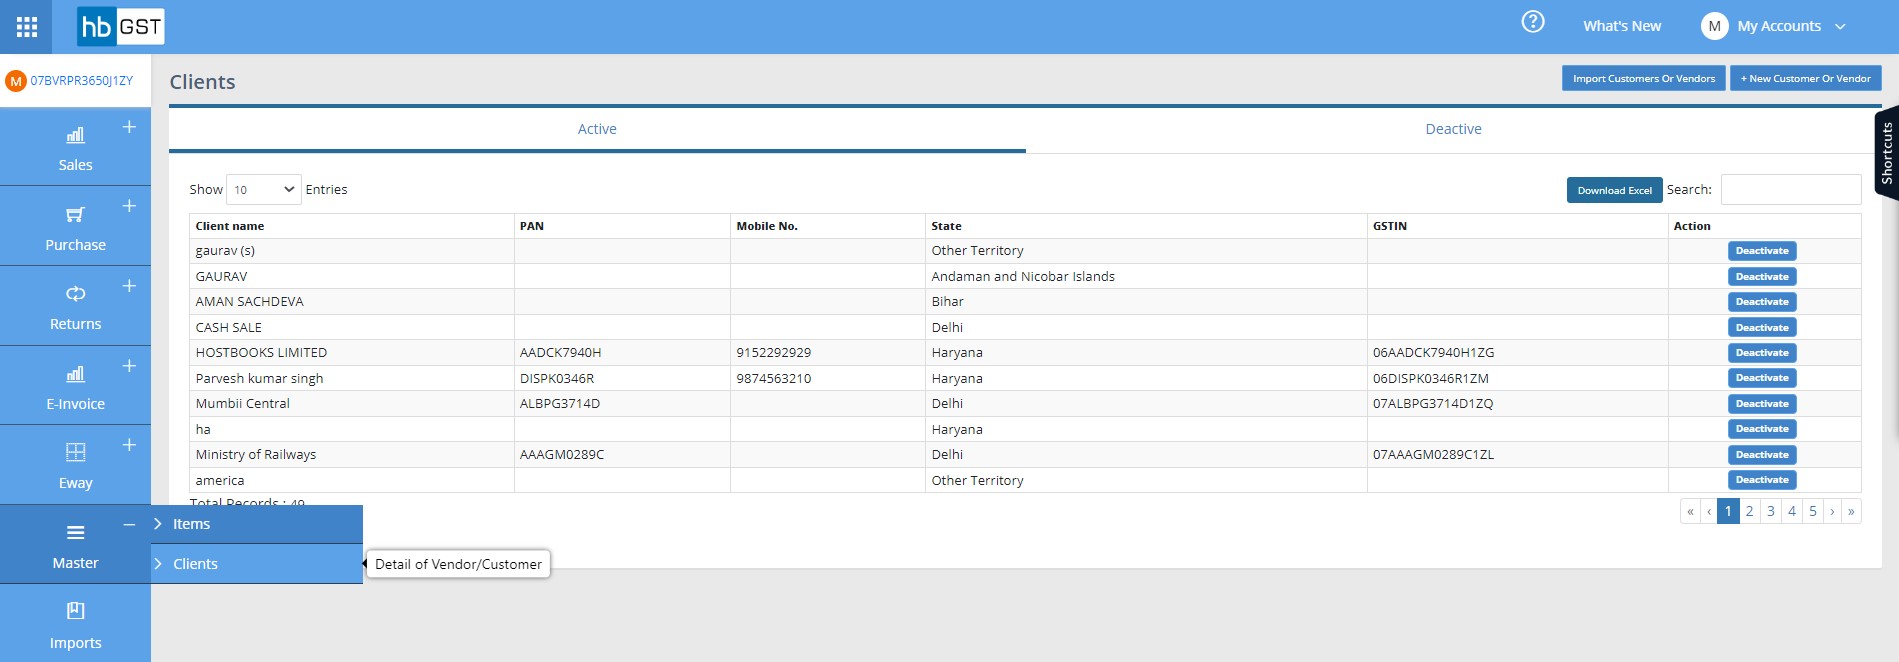
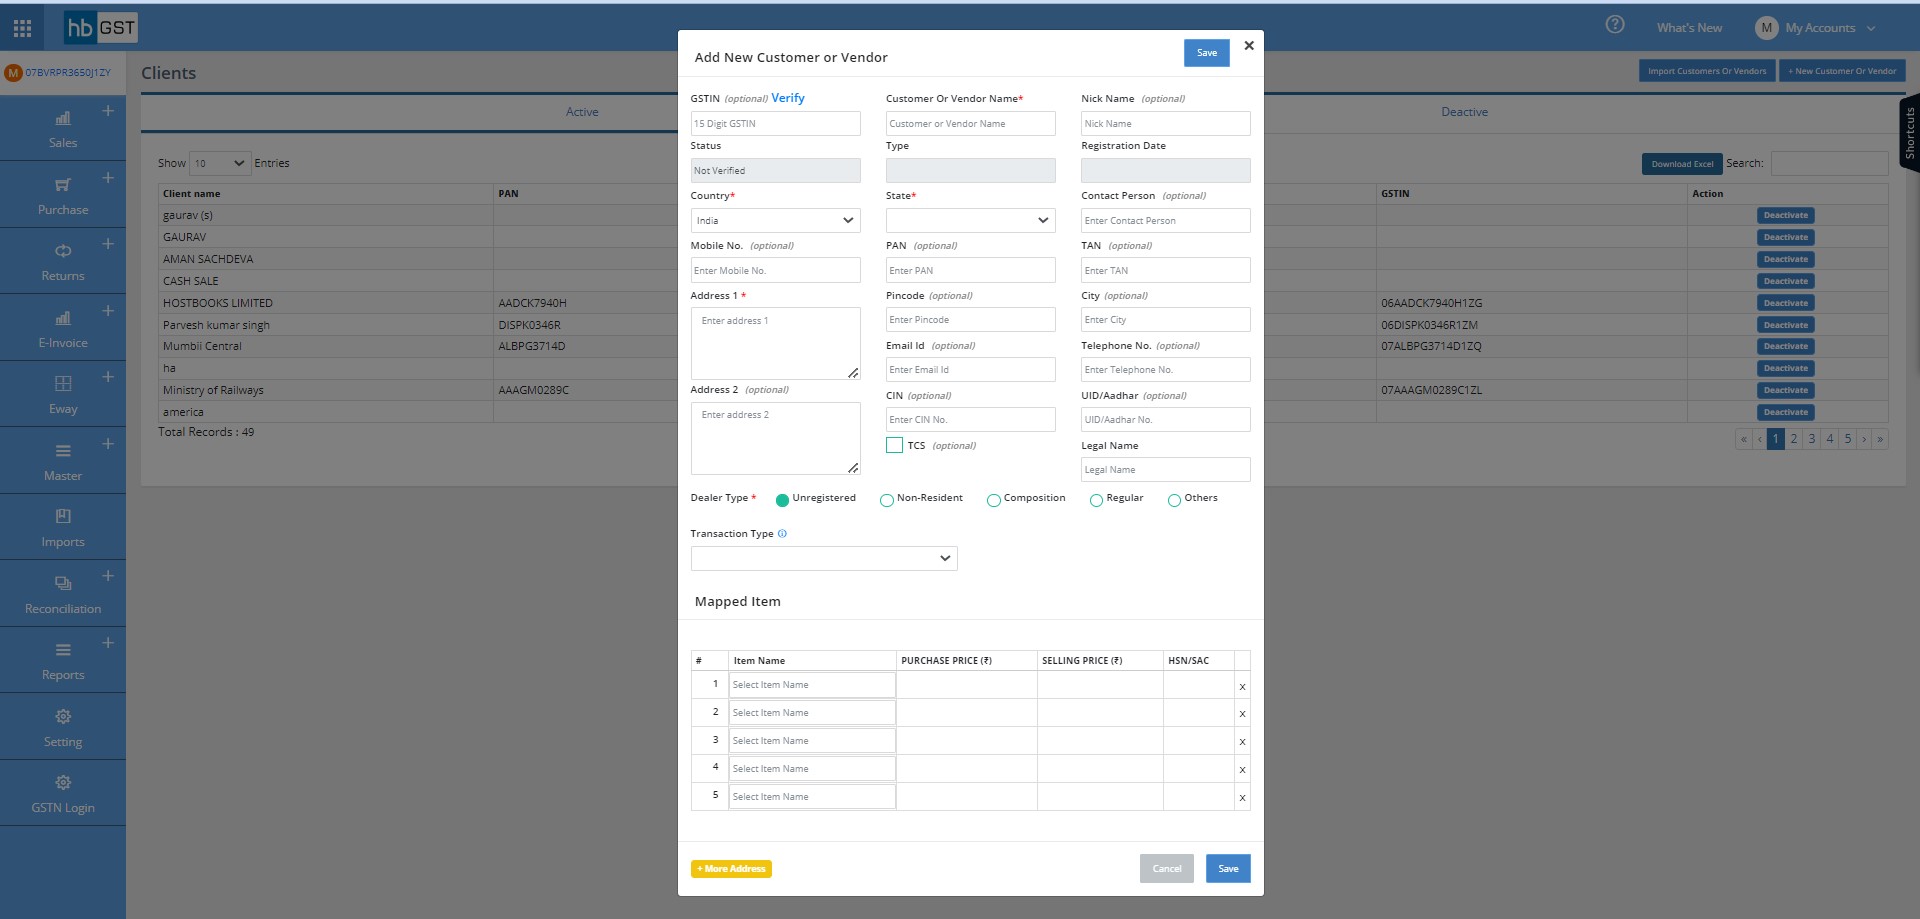
Step 2: Click on "Clients" button under Master Module & further click on "+ New Customer or Vendor" button to add details of a new Client Master.
Step 3: Enter Client details & click on save button
- Customer or Vendor Name
- GSTIN (Click on Verify button to verify GST Number & Auto-populate all details from GSTN Portal)
- Nick Name (Optional)
- Country
- State
- Contact Person (Optional)
- Mobile (Optional)
- PAN (Optional)
- TAN (Optional)
- Address 1
- Pin code (Optional)
- City (Optional)
- Address 2 (Optional)
- CIN (Optional)
- UID/Aadhar (Optional)
- TCS (Optional)
- Legal Name
- Transaction Type: Regular/Deemed Export/SEZ Supplies with payment/SEZ Supplies without payment/Intra State supplies attracting IGST
- Mapped Items (Optional)
- More Address: Billing/Shipping/Warehouse Address can be updated
How do I Import Client Master into HB GST software?
Step 1: Click on the "Transactions" button after entering into the business

Step 2: Click on "Clients" button under Master Module & further click on "Import Customer or Vendors" button to import Client Master.

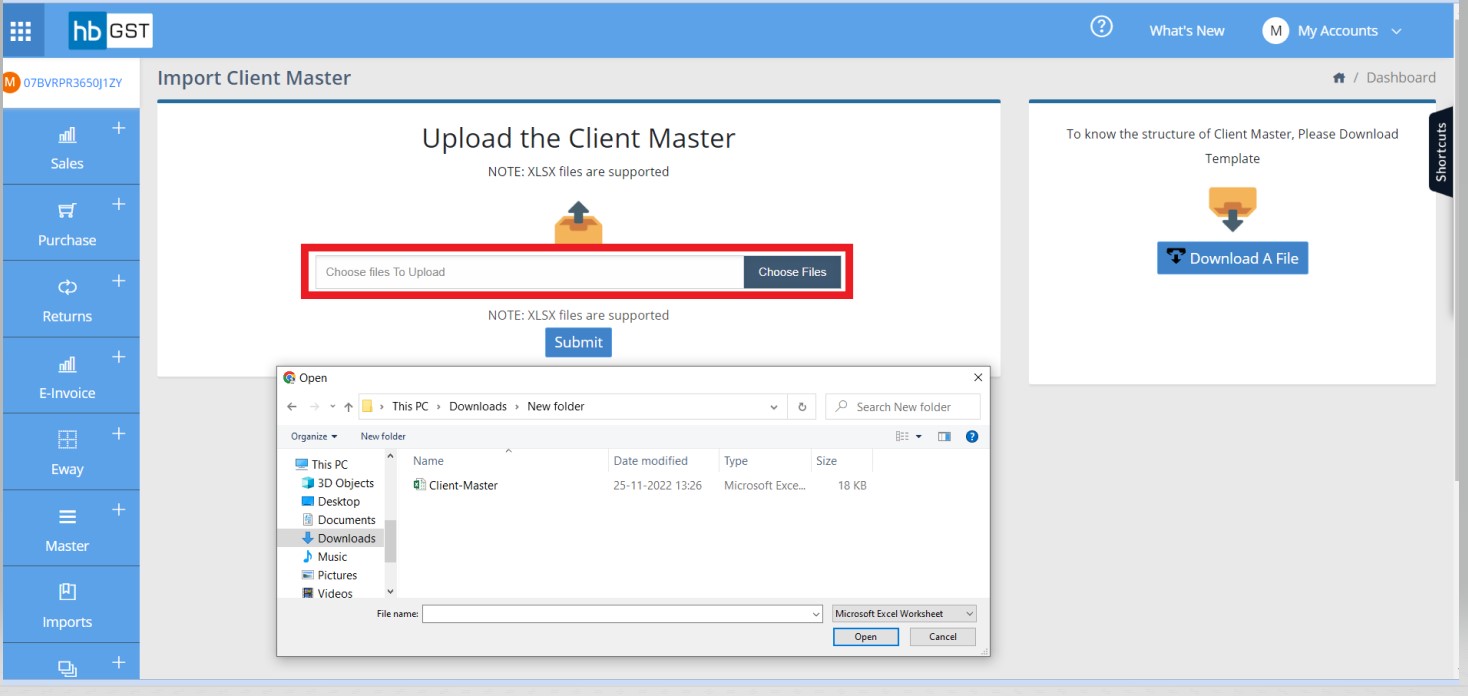
Step 3: Download the excel template of Client master by clicking on "Download a file" button. Prepare the details of Client master in the excel template downloaded.
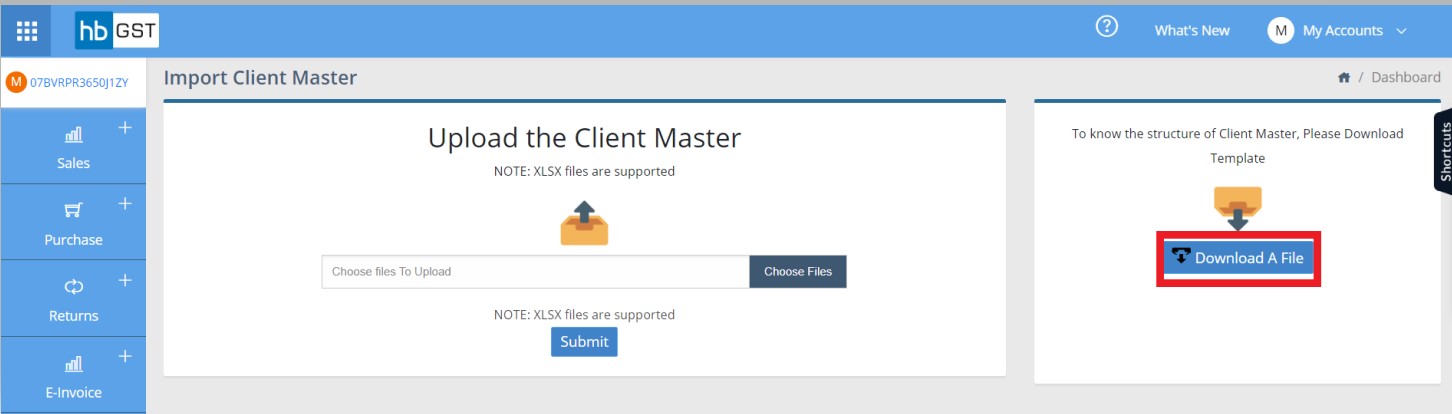
Step 4: After preparing the excel template, go to "Import Customer or Vendor" module & Click on "Choose Files" button to select the excel template & click on "Submit" button to upload the client master.
How do I Deactivate Client into HB GST software?
Step 1: Click on the "transactions" button after entering into the business
Step 2: Click on "Clients" button under Master Module & Client master listing page will open.
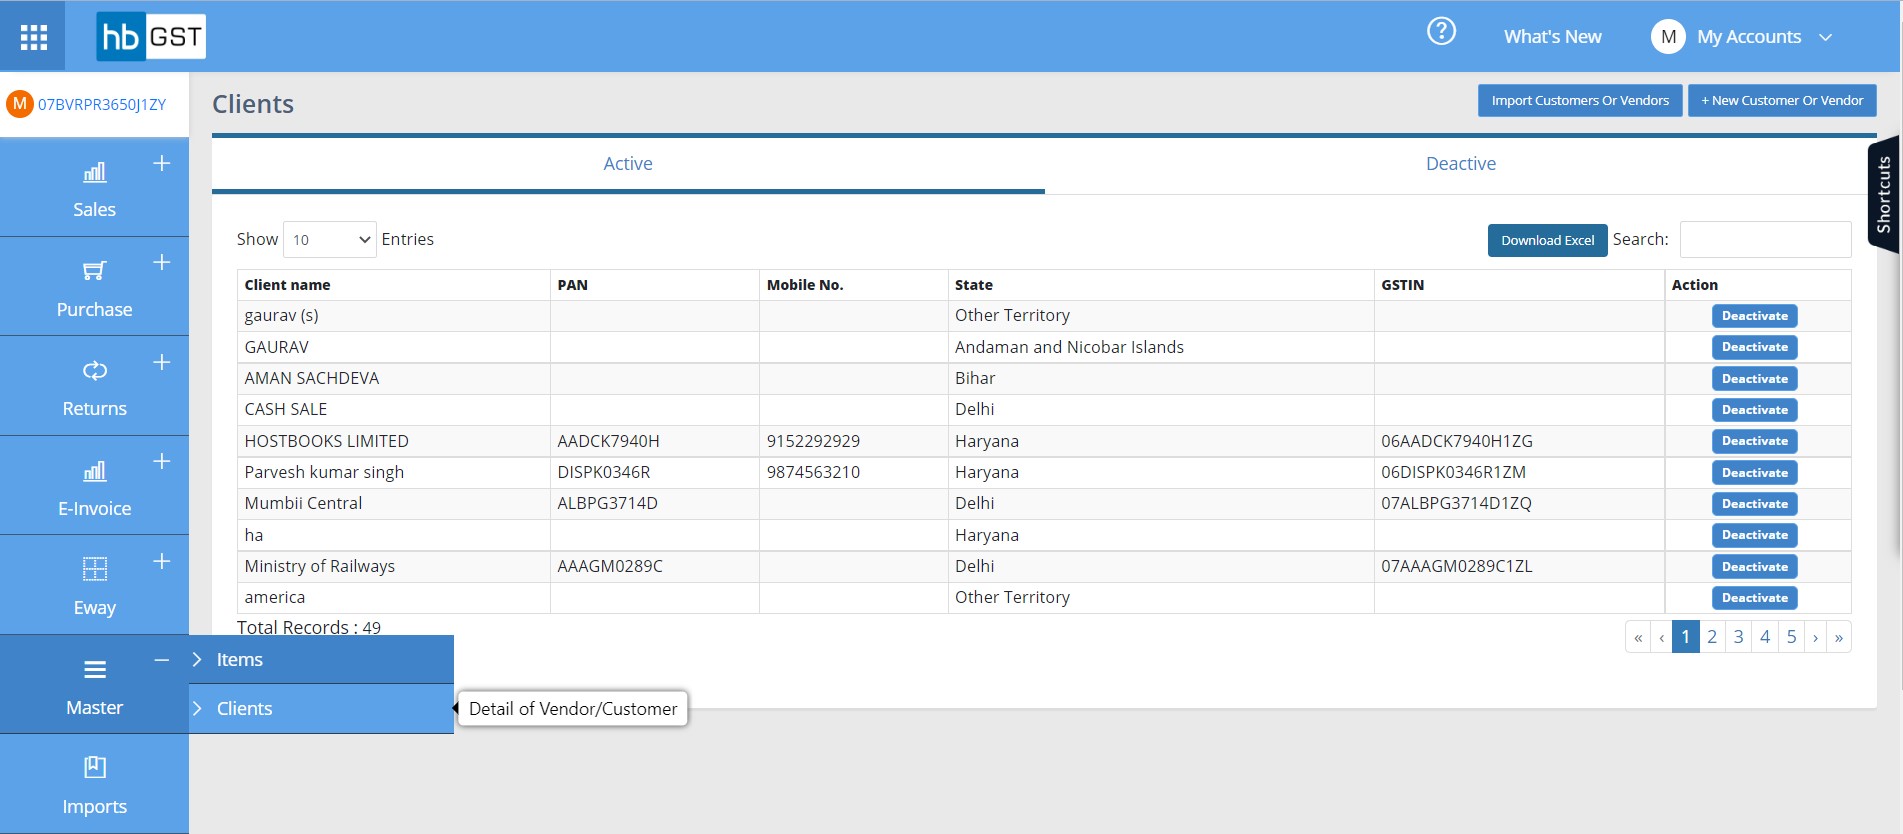
Step 3: Click on "Deactivate" button against the client which you want to deactivate & click on "Ok" and client will be deactivated.
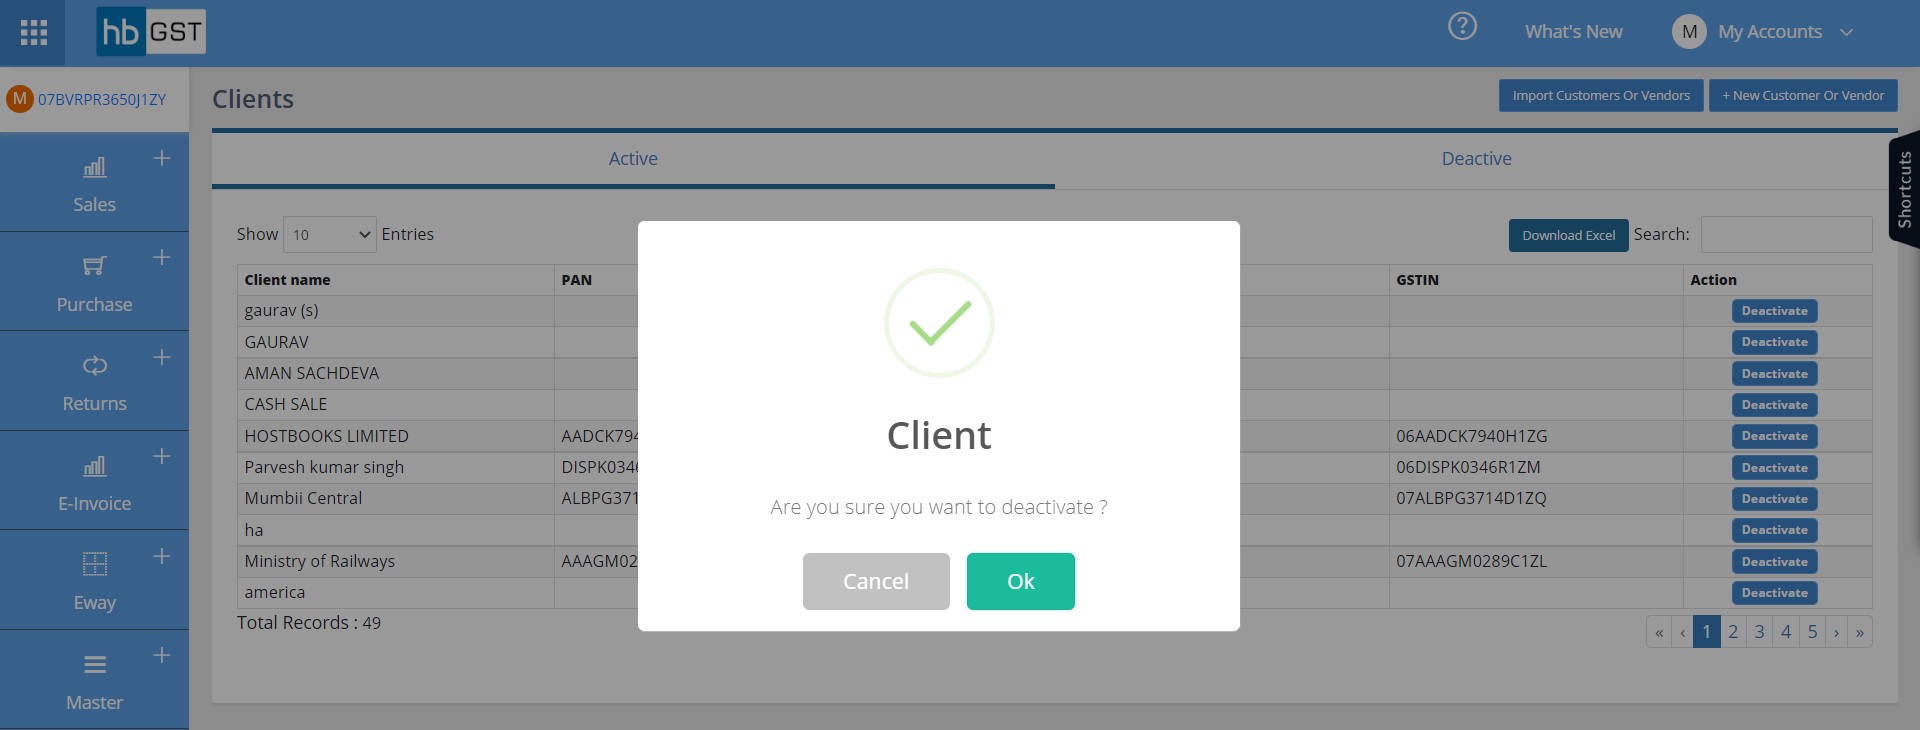
Further to activate any deactivated client, go to deactivated client section in client master module and click on "Activate" button