How to Create Correction Return?
How to Create Correction Return?
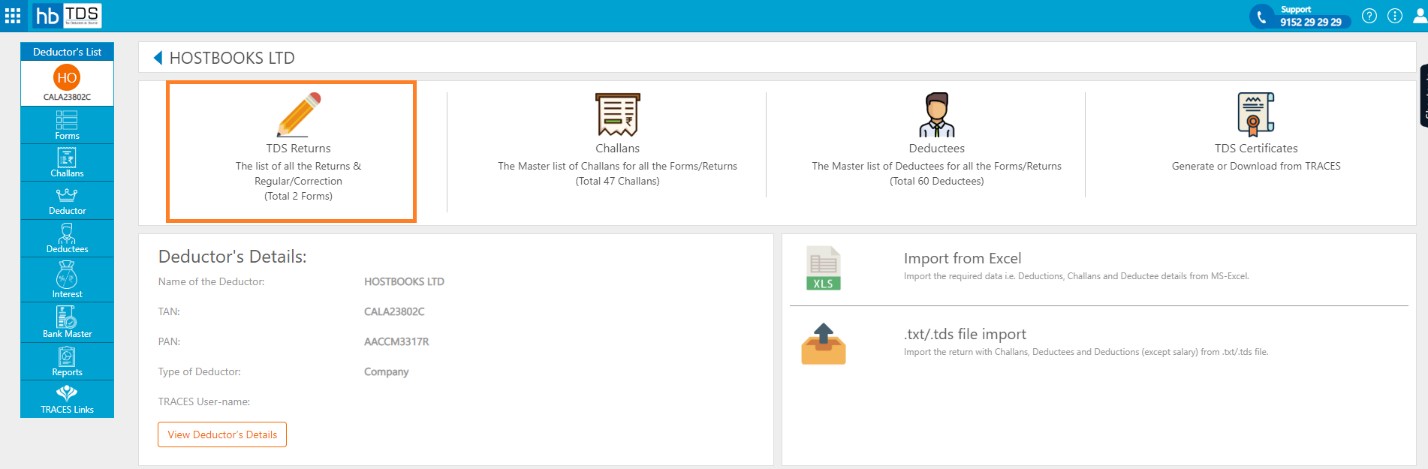
Form → Click on Forms from Deductor Dashboard.
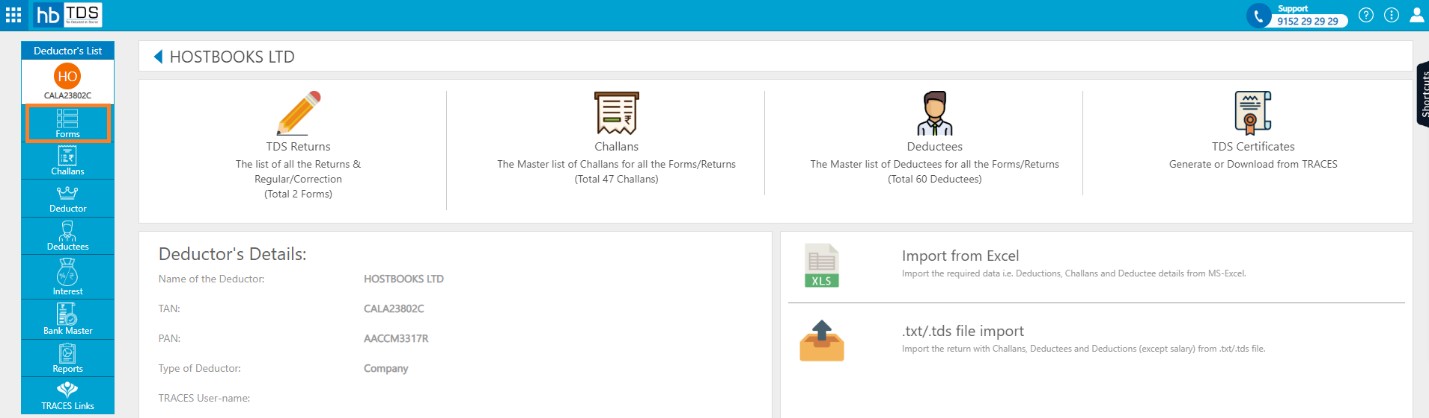
Alternatively, click on TDS Returns from Deductor Dashboard.
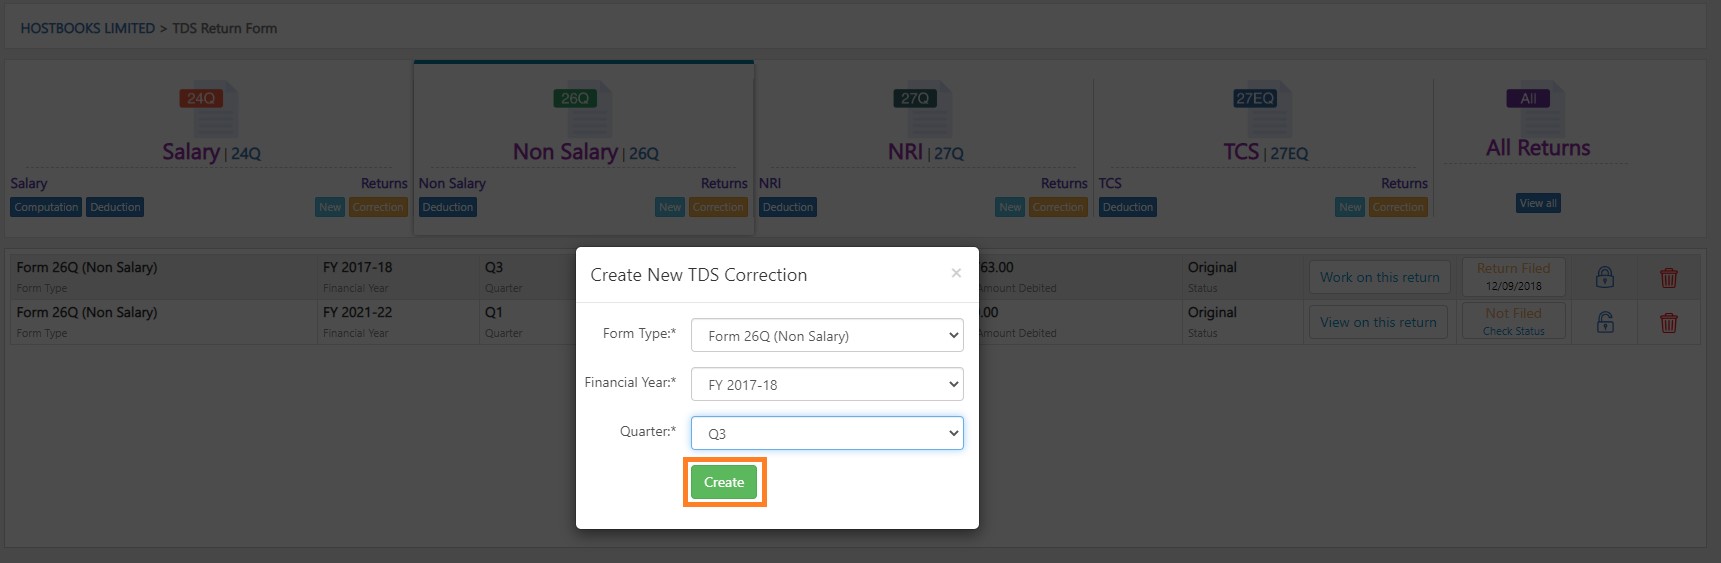
Click on the Forms "Correction" button you want to file.

You are required to select following fields:-
- Form Type : 24Q (Salary), 26Q (Non Salary), 27Q (NRI), 27EQ (TCS)
- Financial Year
- Quarter : Q1, Q2, Q3, Q4
Then click on "Create" button.
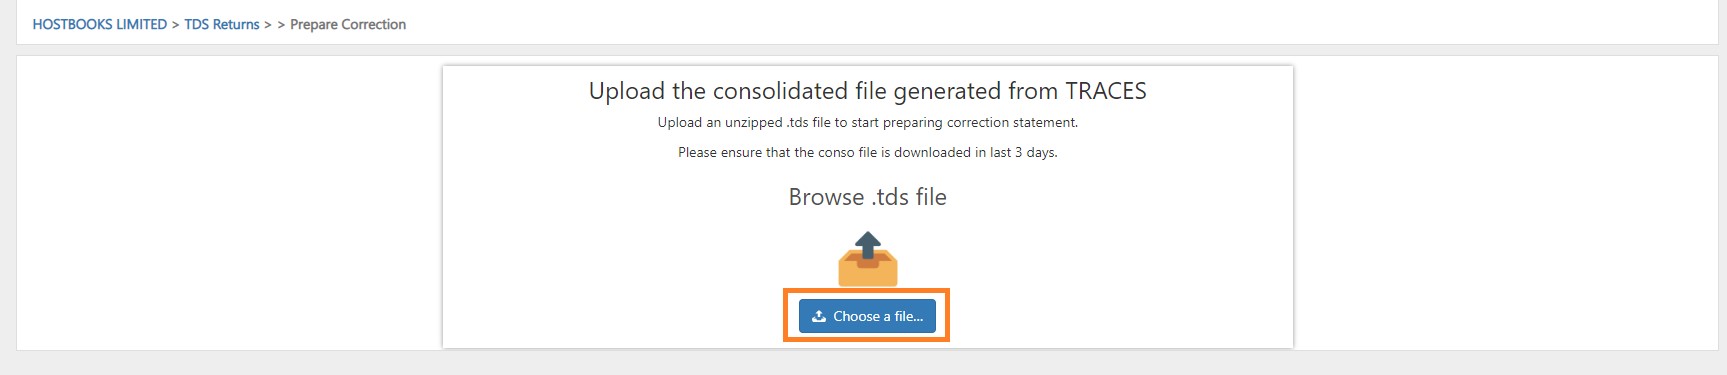
After select necessary information, click on "Choose a file"
After choose .tds file click on "Upload" button.
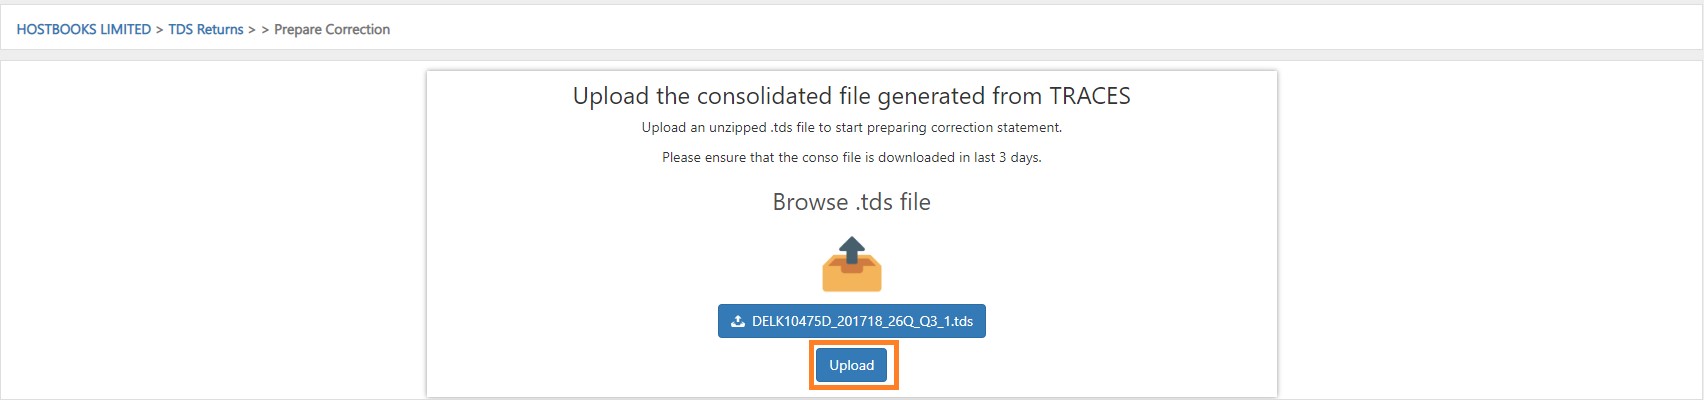
A message will appear as "Consolidated File imported successfully"

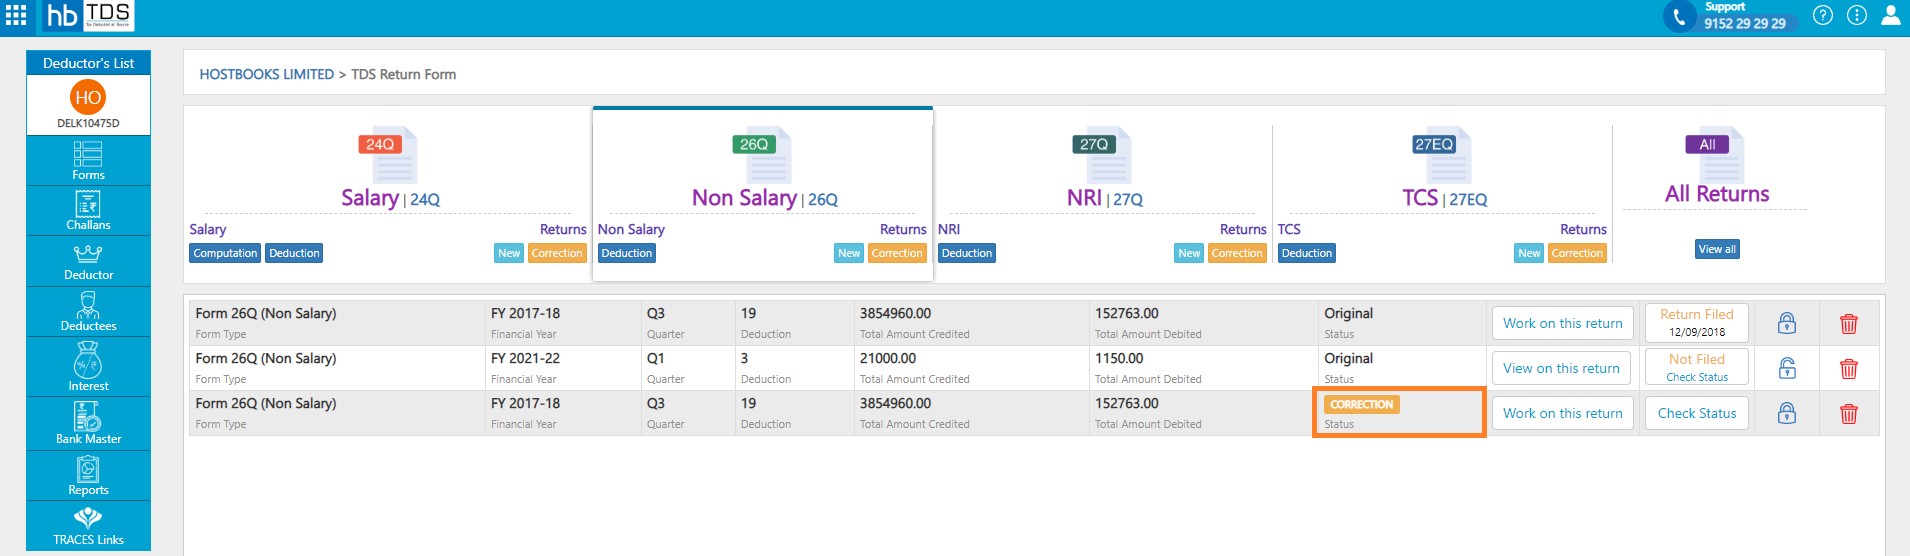
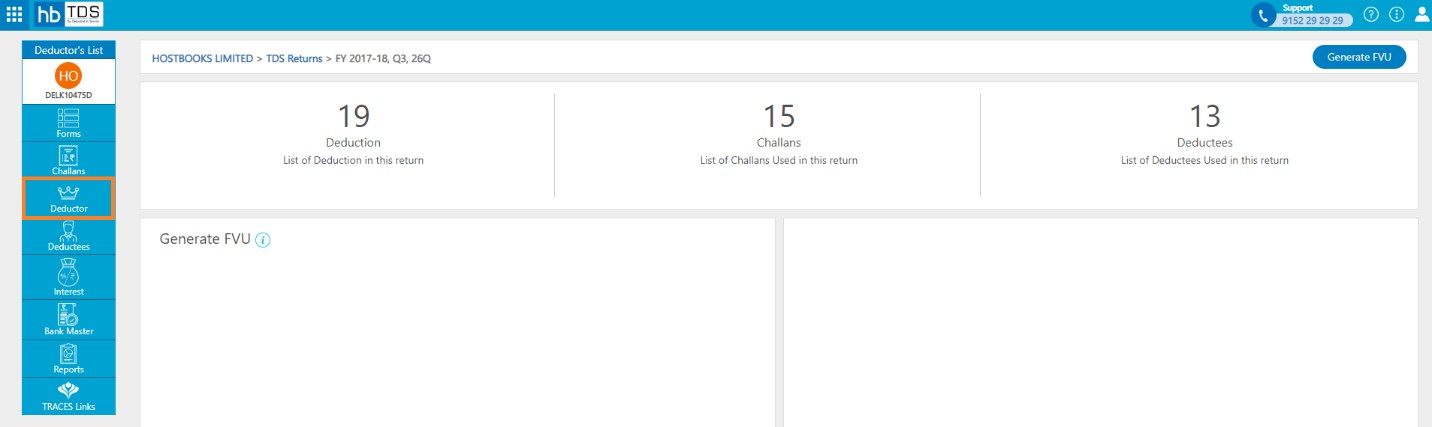
Forms -> You will see the list of all the "Correction" Returns.
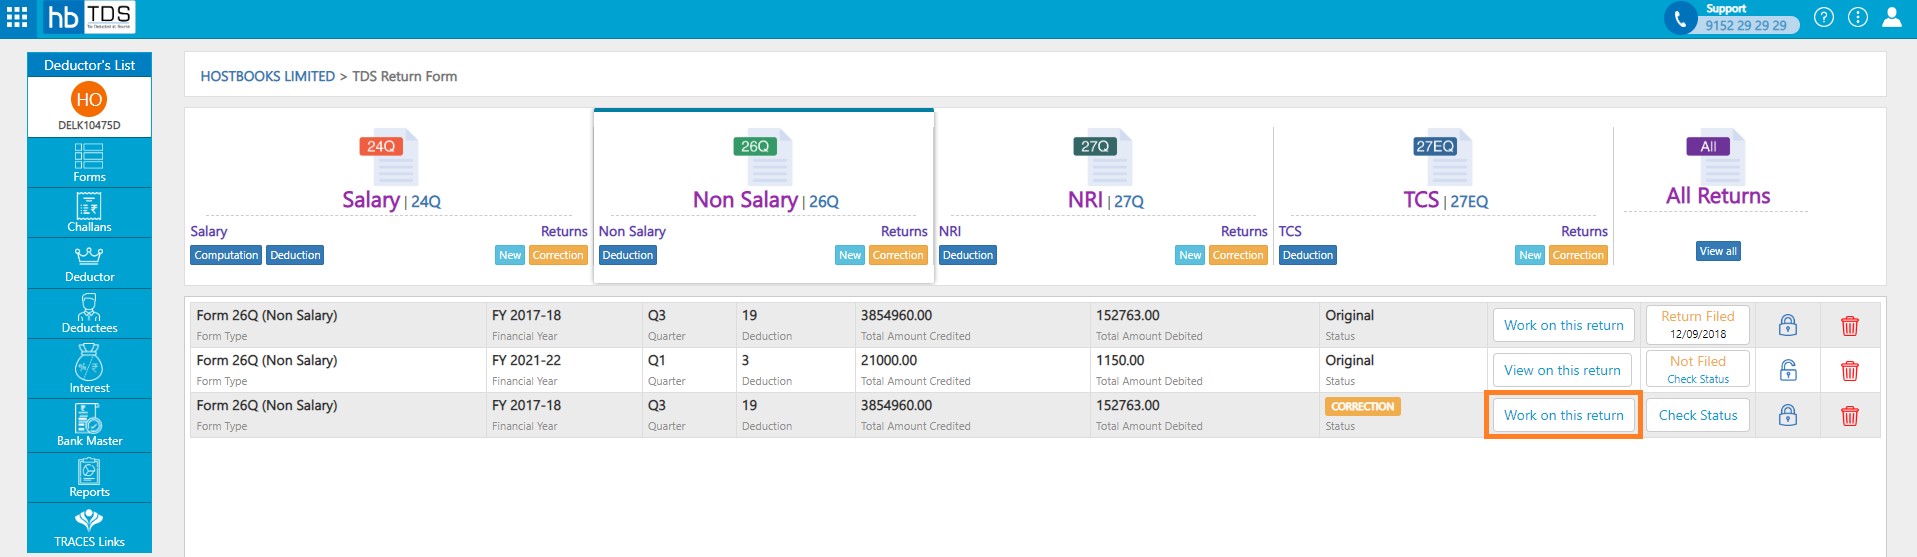
Click on "Work on this Return" from TDS Return home page.
You can do the following corrections with hbTDS software:
- C1 - Deductor Update: All details of deductor except the TAN No. can be changed.
- C2 - Challan Update: All details of the challan can be changed if challan is not booked.
- C3 - Deductions Update/Add: All details except the PAN number of the Deductee can be changed. One may add/modify a deductee in the existing challan.
- C4 - Salary Update: This type of correction is only applicable to correction of 4th Quarter statement of Form 24Q. Here there is no provision of updating the record, a record has to be deleted and a new record has to be added with updated details.
- C5 - PAN Update: In this type of correction deductee PAN is updated.
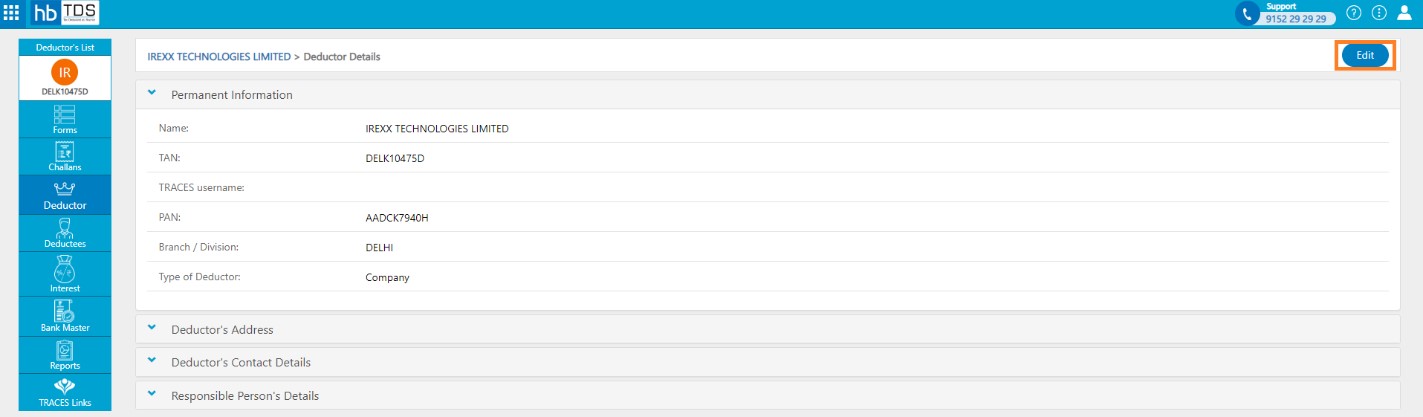
C1 - Deductor Update:-Click on "Deductor" to make corrections in the deductor details.
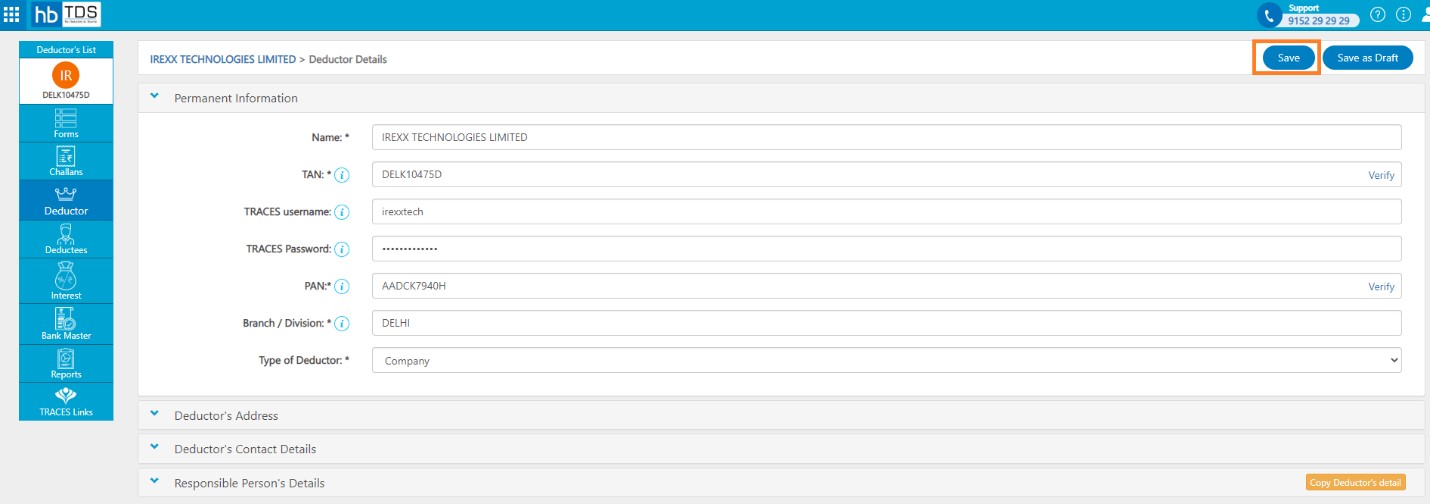
Click on "Edit" to update Deductor details, all details of deductor can be updated except TAN number.
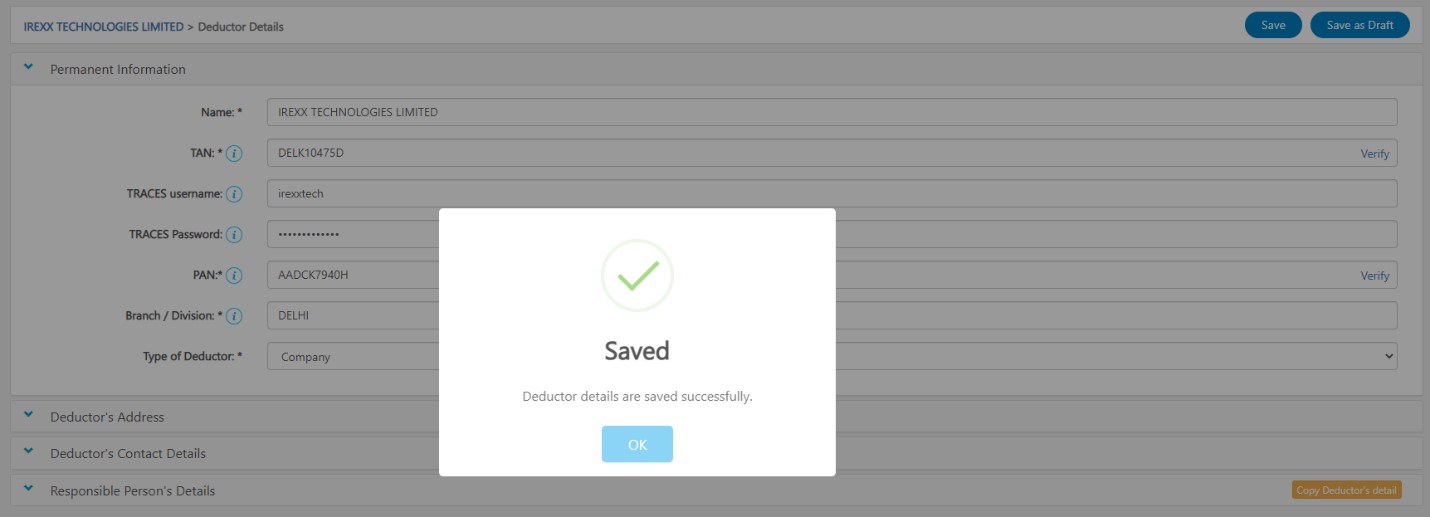
After update necessary information, click on "Save"
A message will appear as "Deductor details are saved successfully"
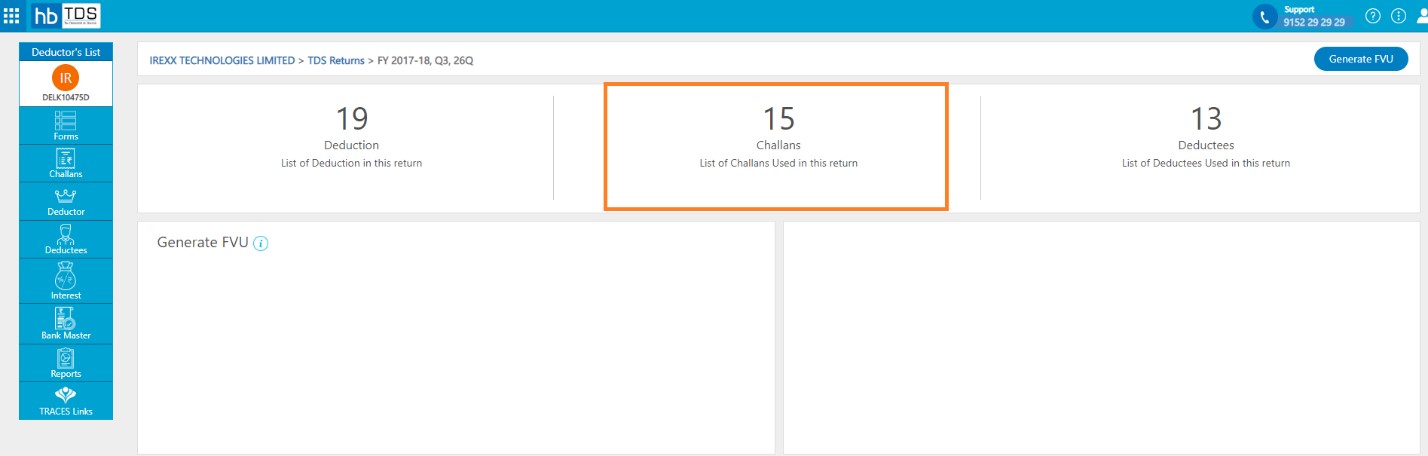
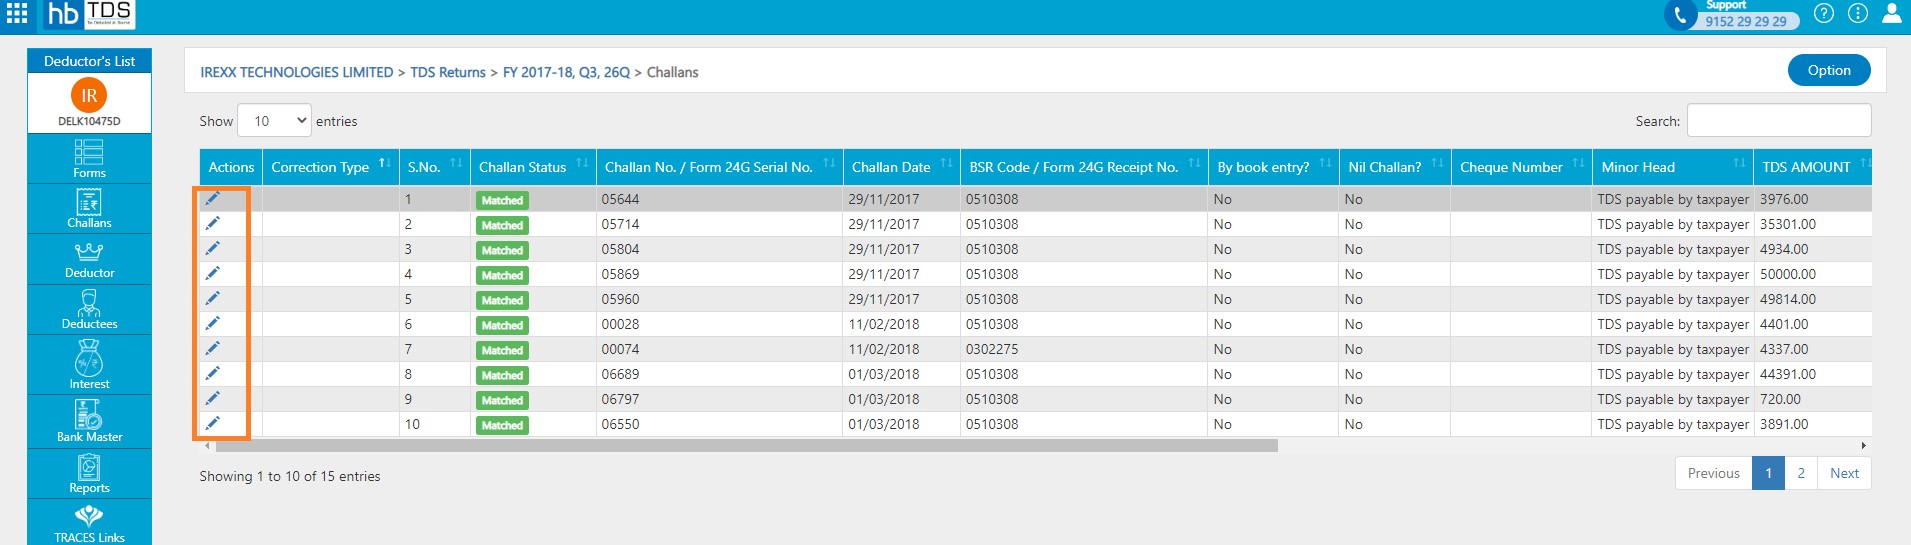
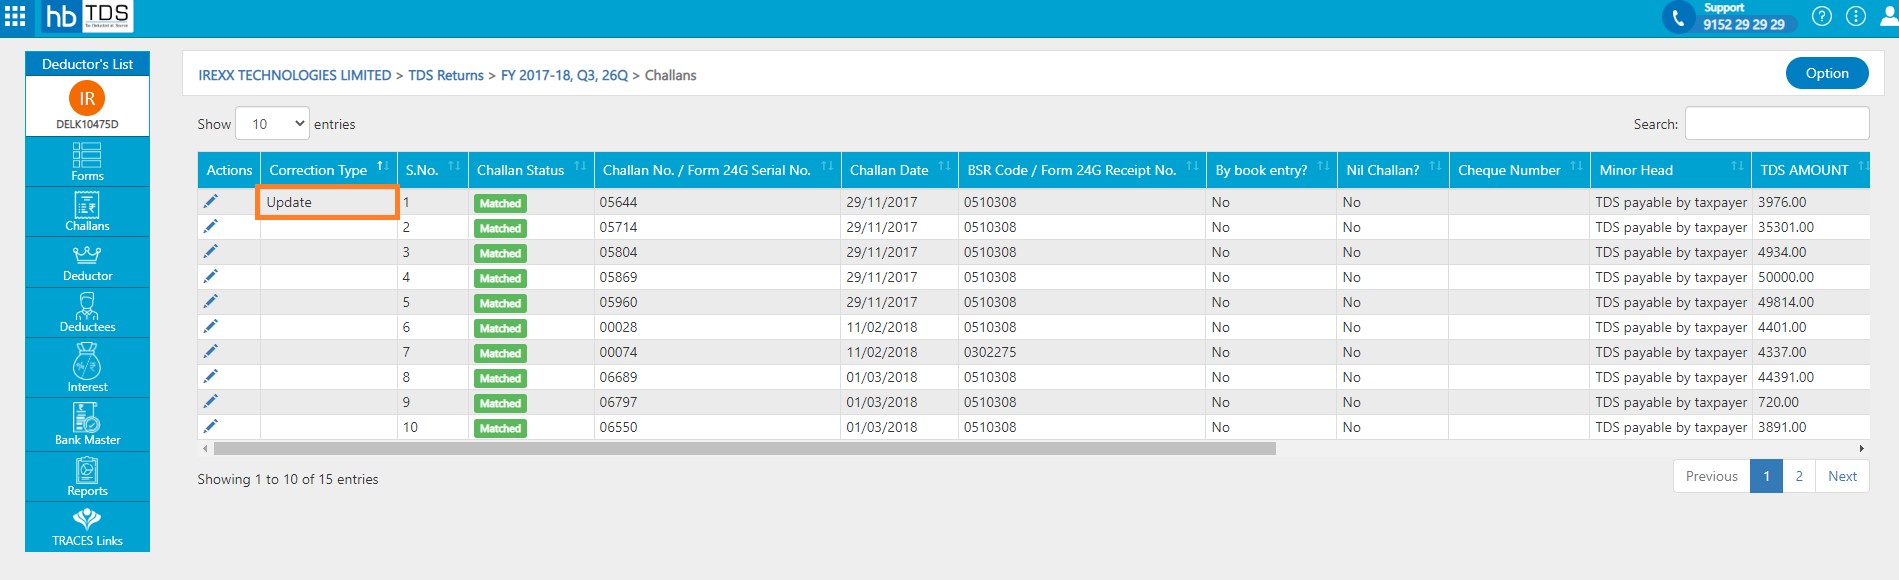
C2 - Challan Update:- Click on "Challans" to make corrections in the Challans details.
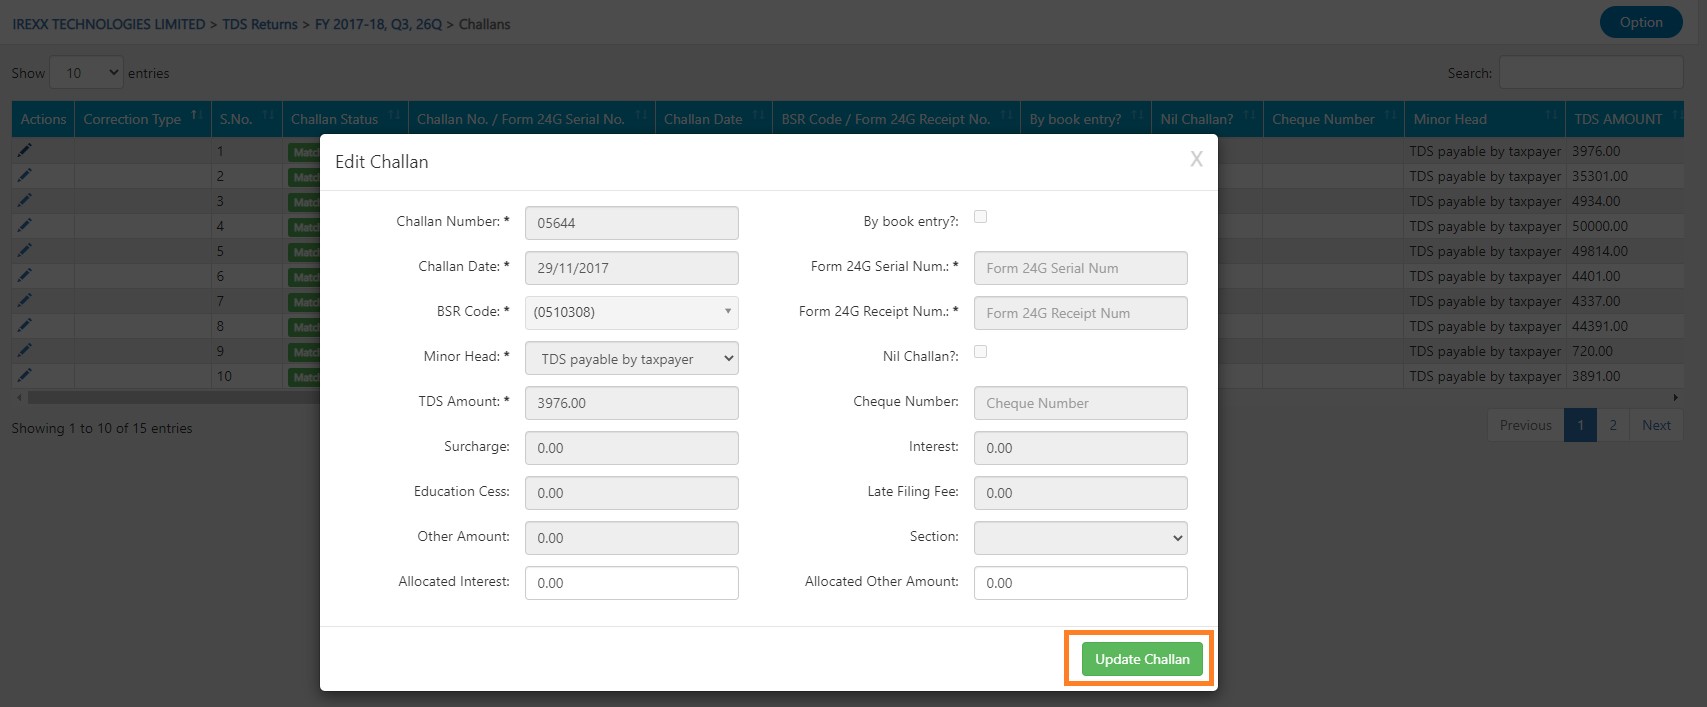
Click on "Edit" to update Challan details, All details of the challan can be changed if challan is not booked.
After update necessary information, click on "Update Challan"
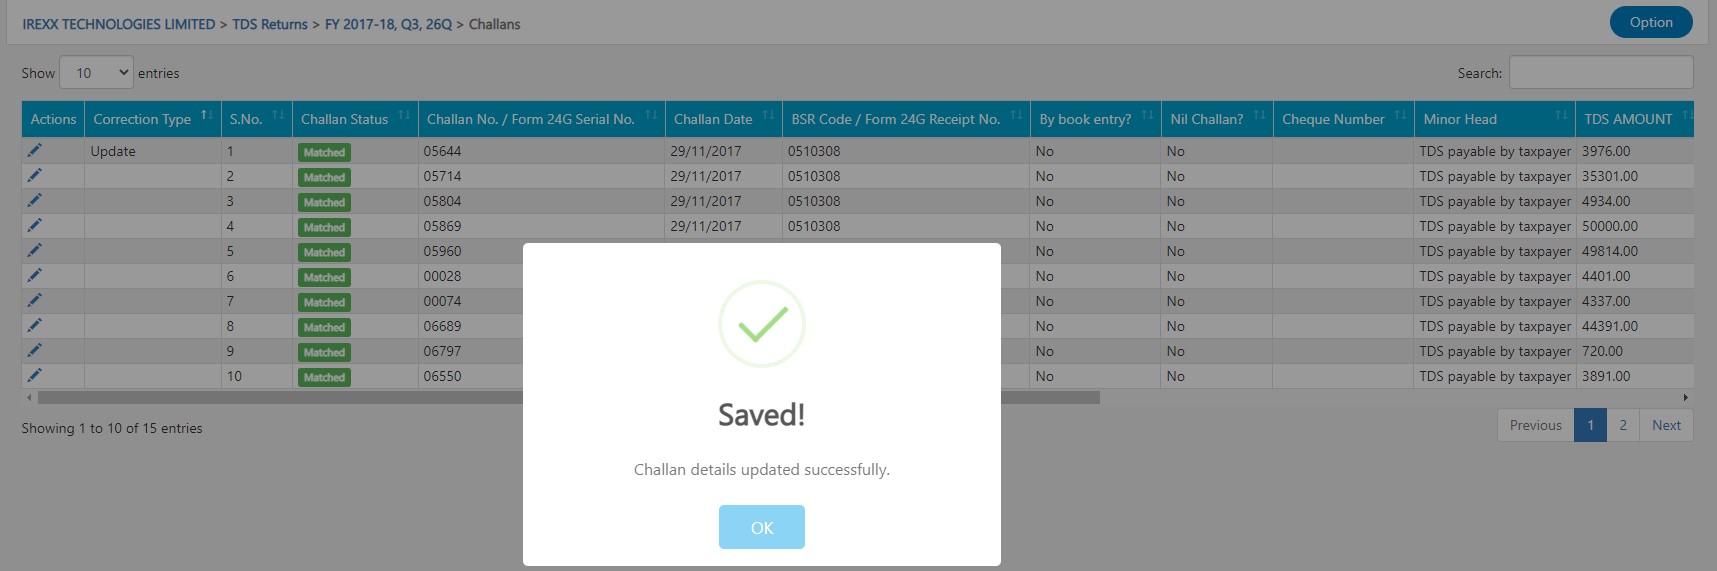
A message will appear as "Challan details saved successfully"
The Correction Status will appear on the Challan List page.
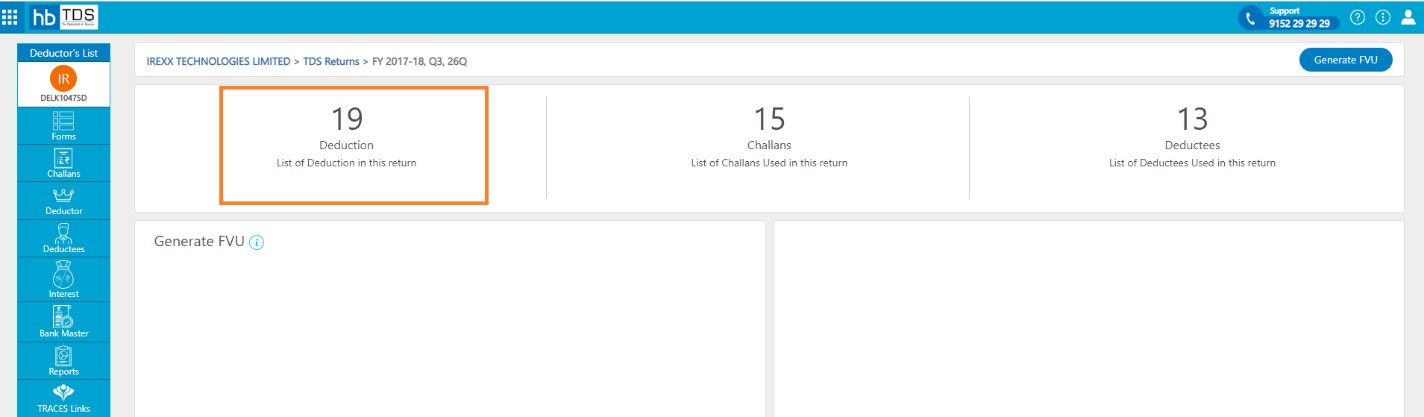
C3 - Deductions Update:-Click on “Deduction” to make corrections in the Deduction details.
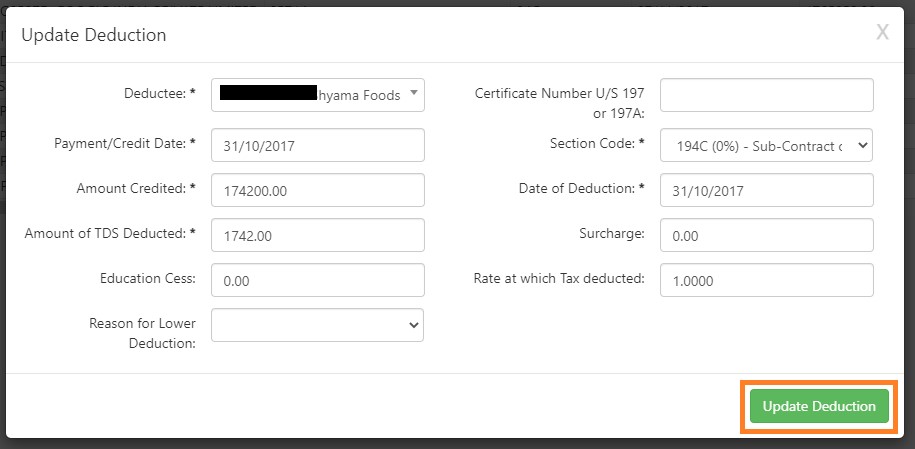
Click on "Edit" to update Deduction details, all details except the PAN number of the Deductee can be changed.

After update necessary information, click on "Update Deduction"
A message will appear as "Deduction details updated successfully"
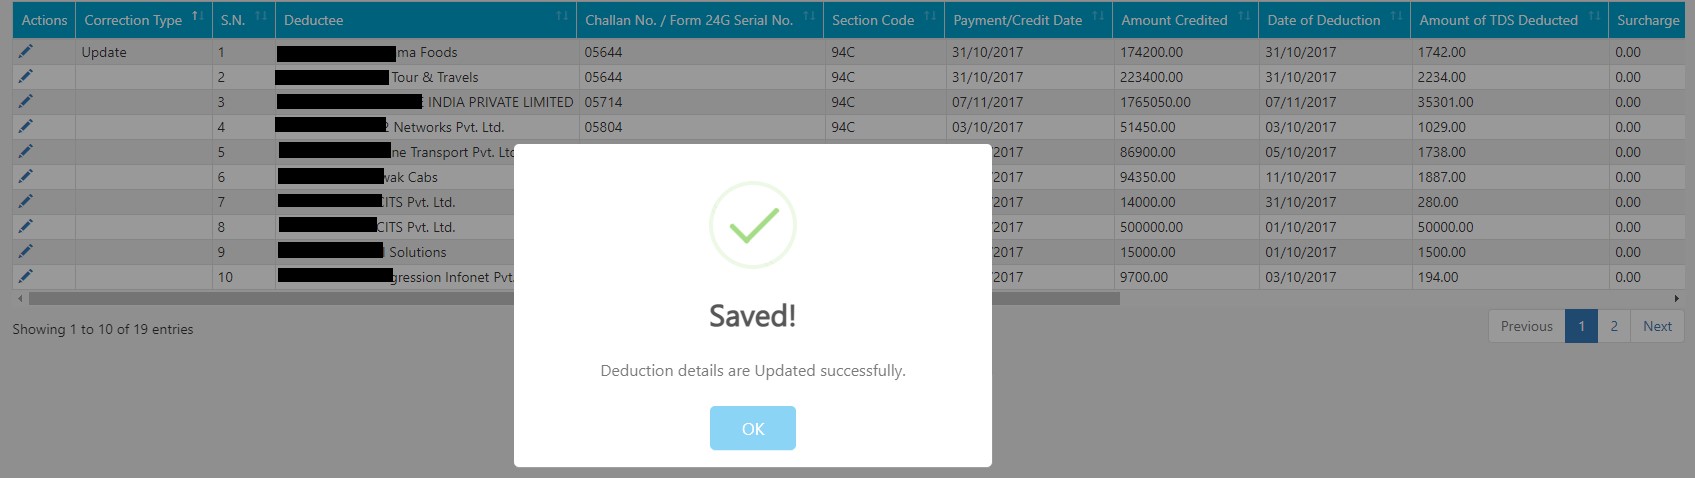
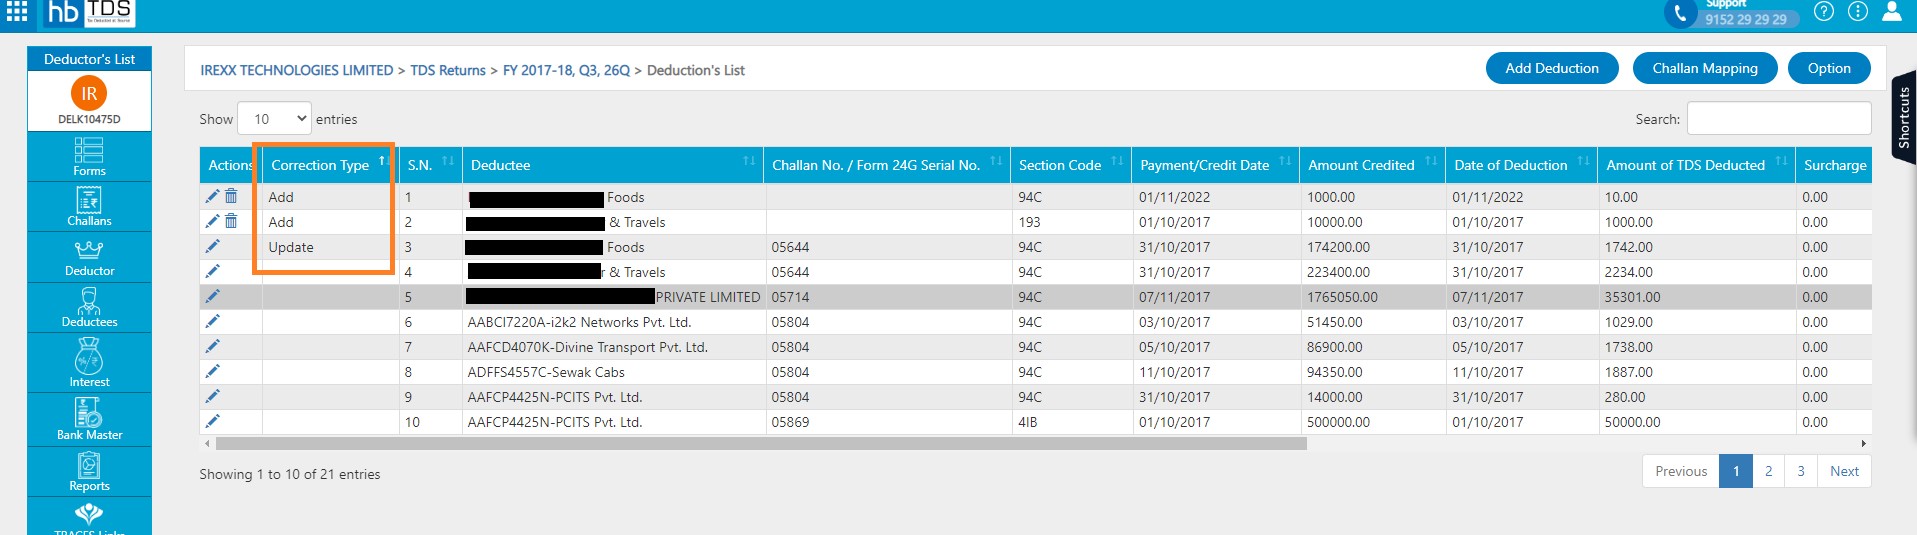
The Correction Status will appear on the Deduction List page.

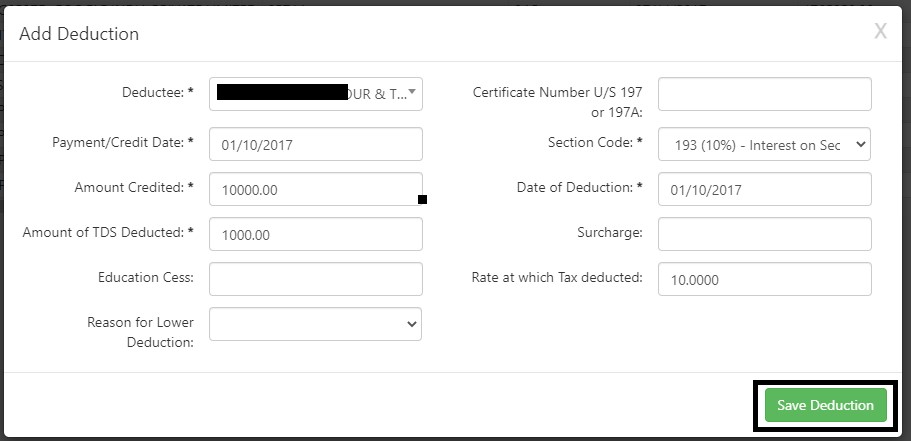
C3 - Deductions Add:- Click on "Add Deduction" to add new Deduction details.

After fill Deduction details, click on "Save Deduction"
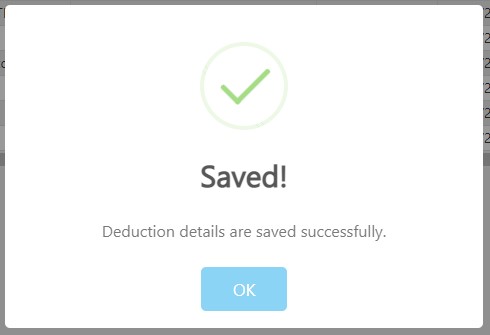
A message will appear as "Deduction details saved successfully"
The Correction Status will appear on the Deduction List page.
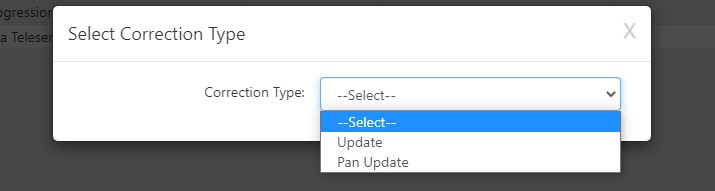
C5 - PAN Update:-Click on "Deductee" to make corrections in the Deductee PAN.
Click on "Edit" to Update Deductee PAN.

Select Correction Type "PAN Update"
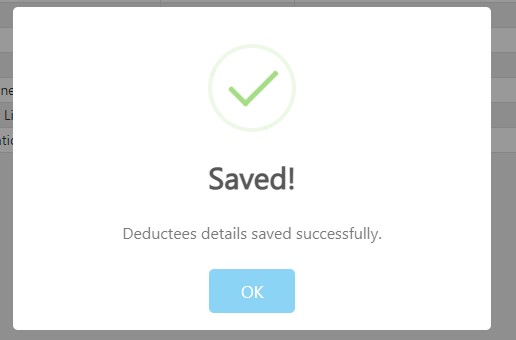
After update PAN, click on "Update Deductee"

A message will appear as "Deduction details saved successfully"
The Correction Status will appear on the Deductee List page.

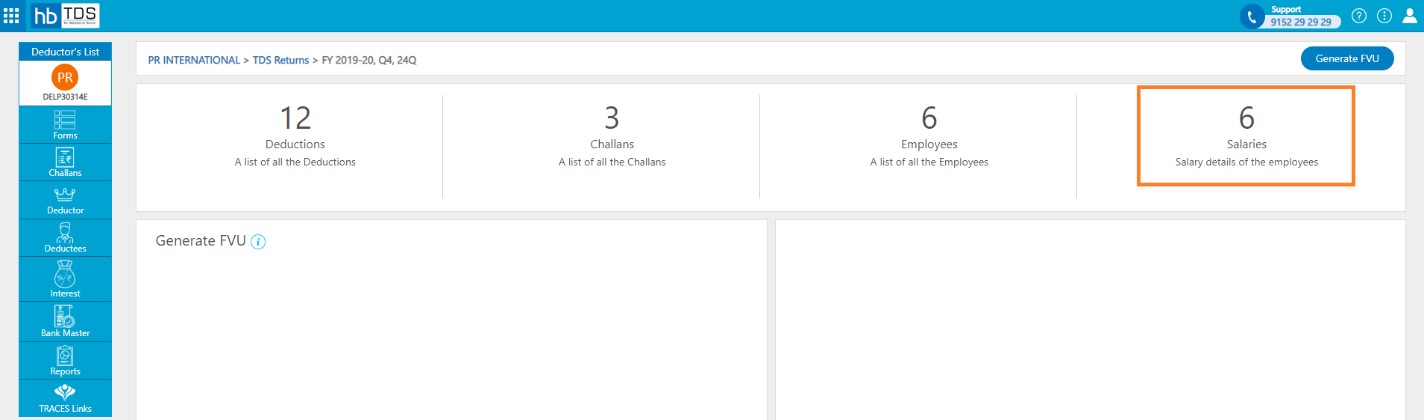
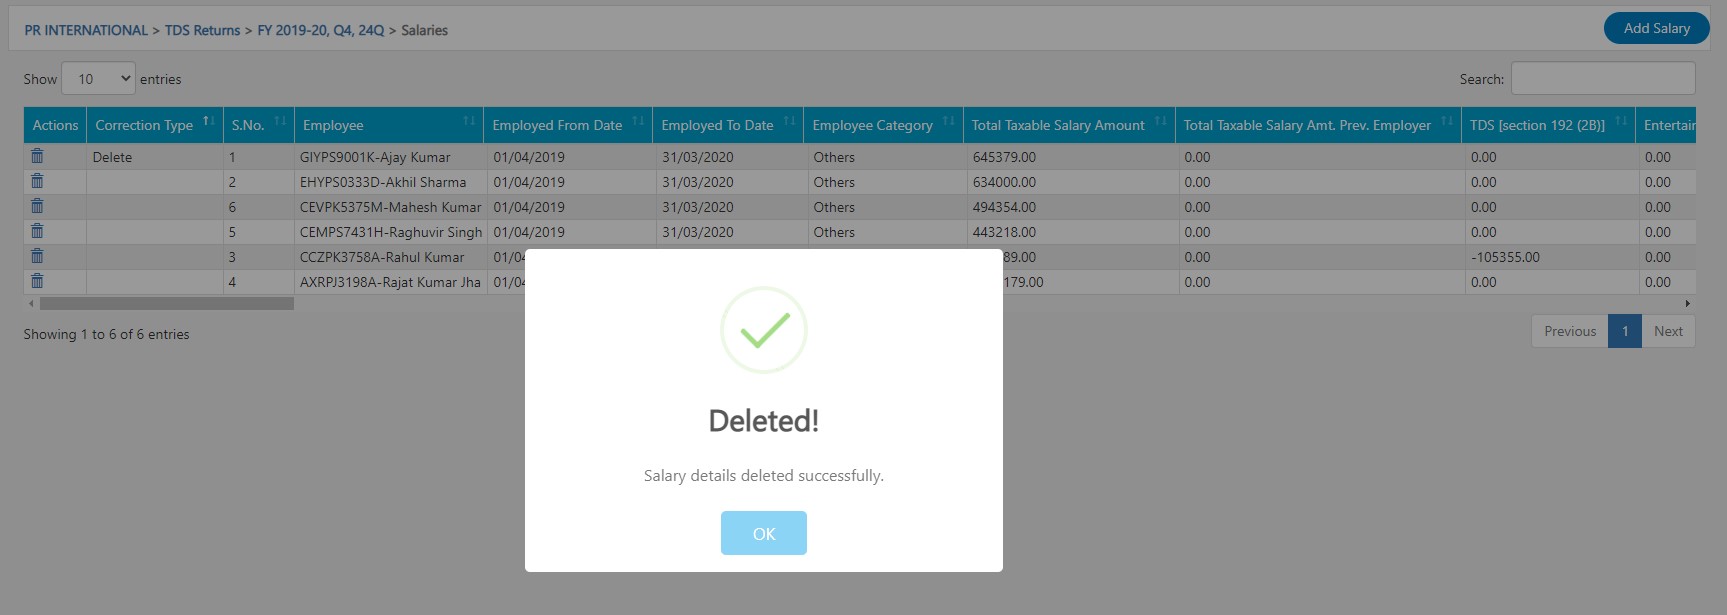
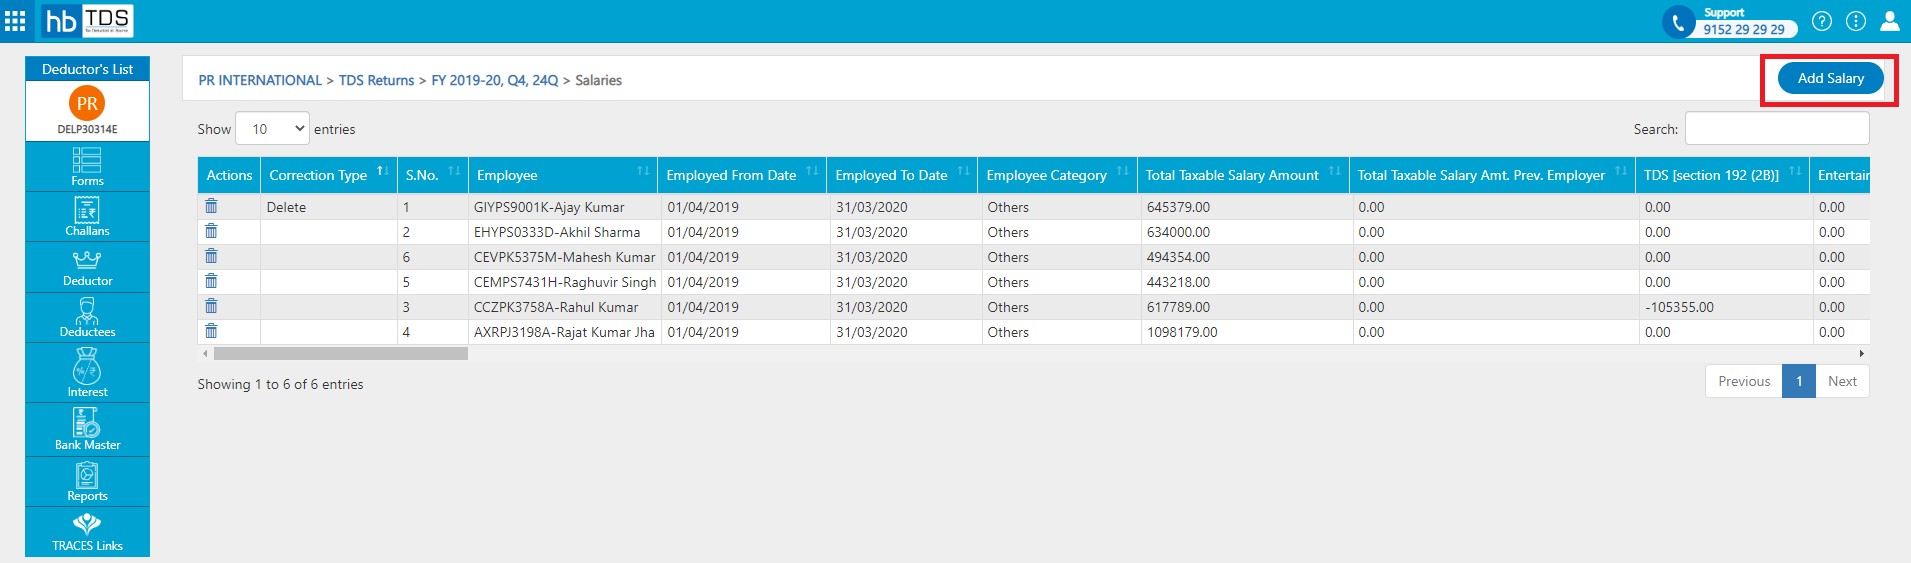
C4 - Salary Update:- Click on "Salaries" to make corrections in the Salary details.
Click on "Delete" to delete existing salary (Here there is no provision of updating the record, a record has to be deleted and a new record has to be added with updated details)
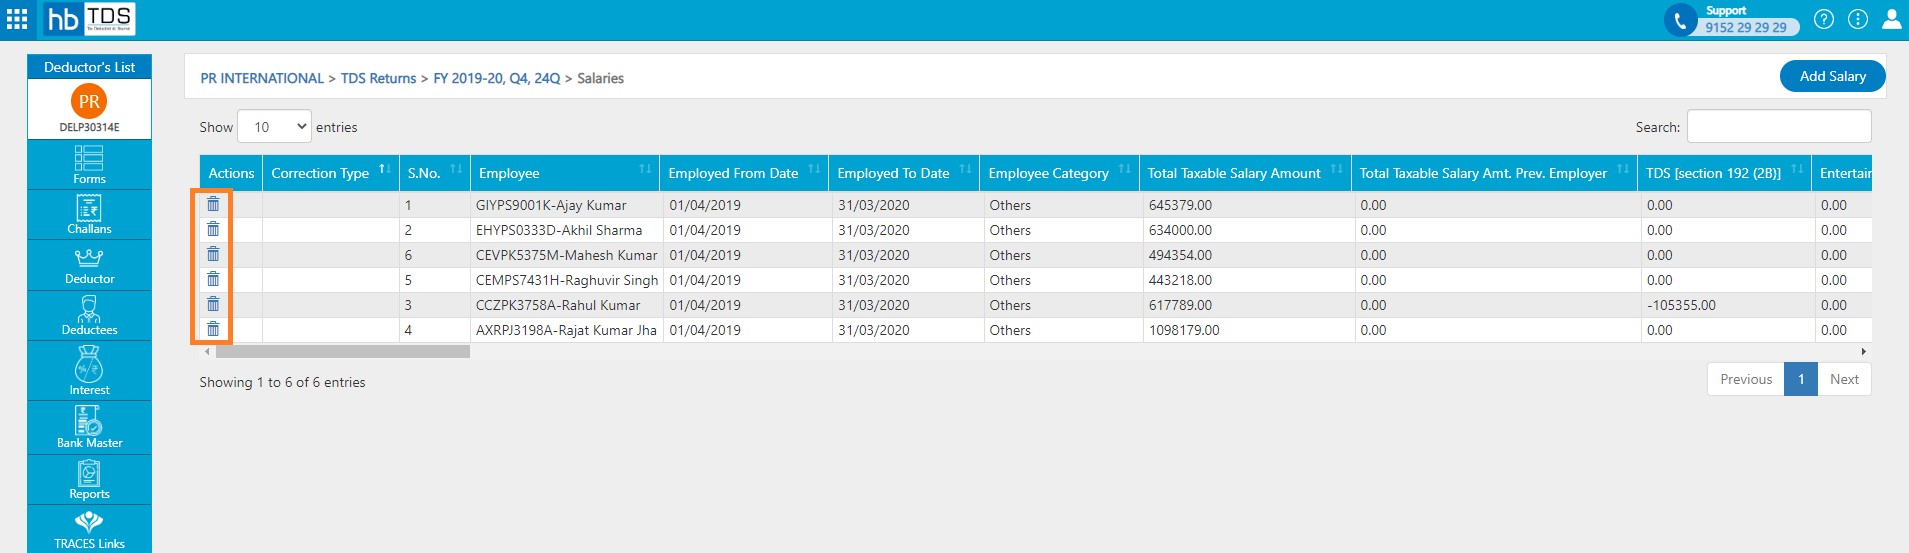
A message will appear as "Salary details deleted successfully"
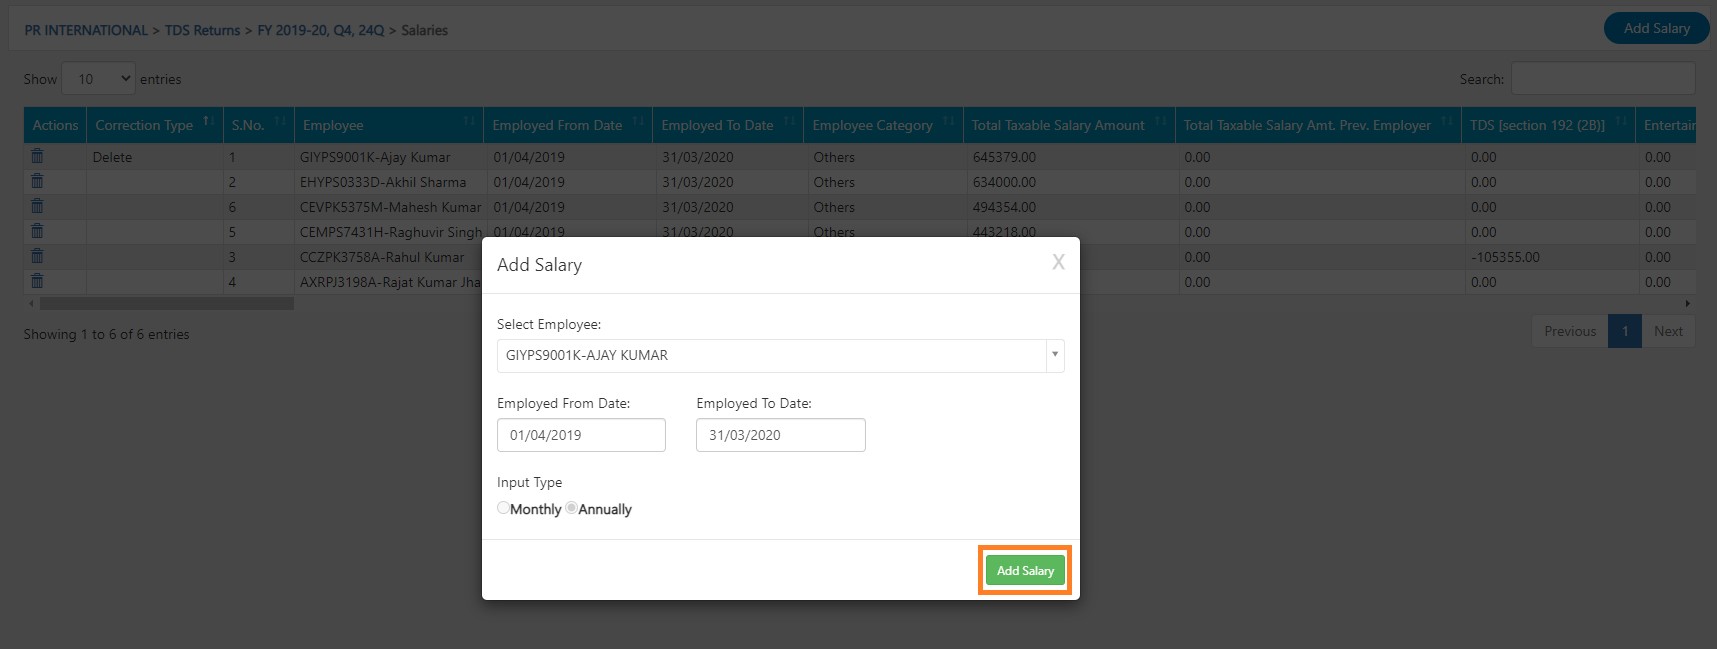
Click on "Add Salary" to add salary.
After select employee name and employment date, click on "Add Salary"
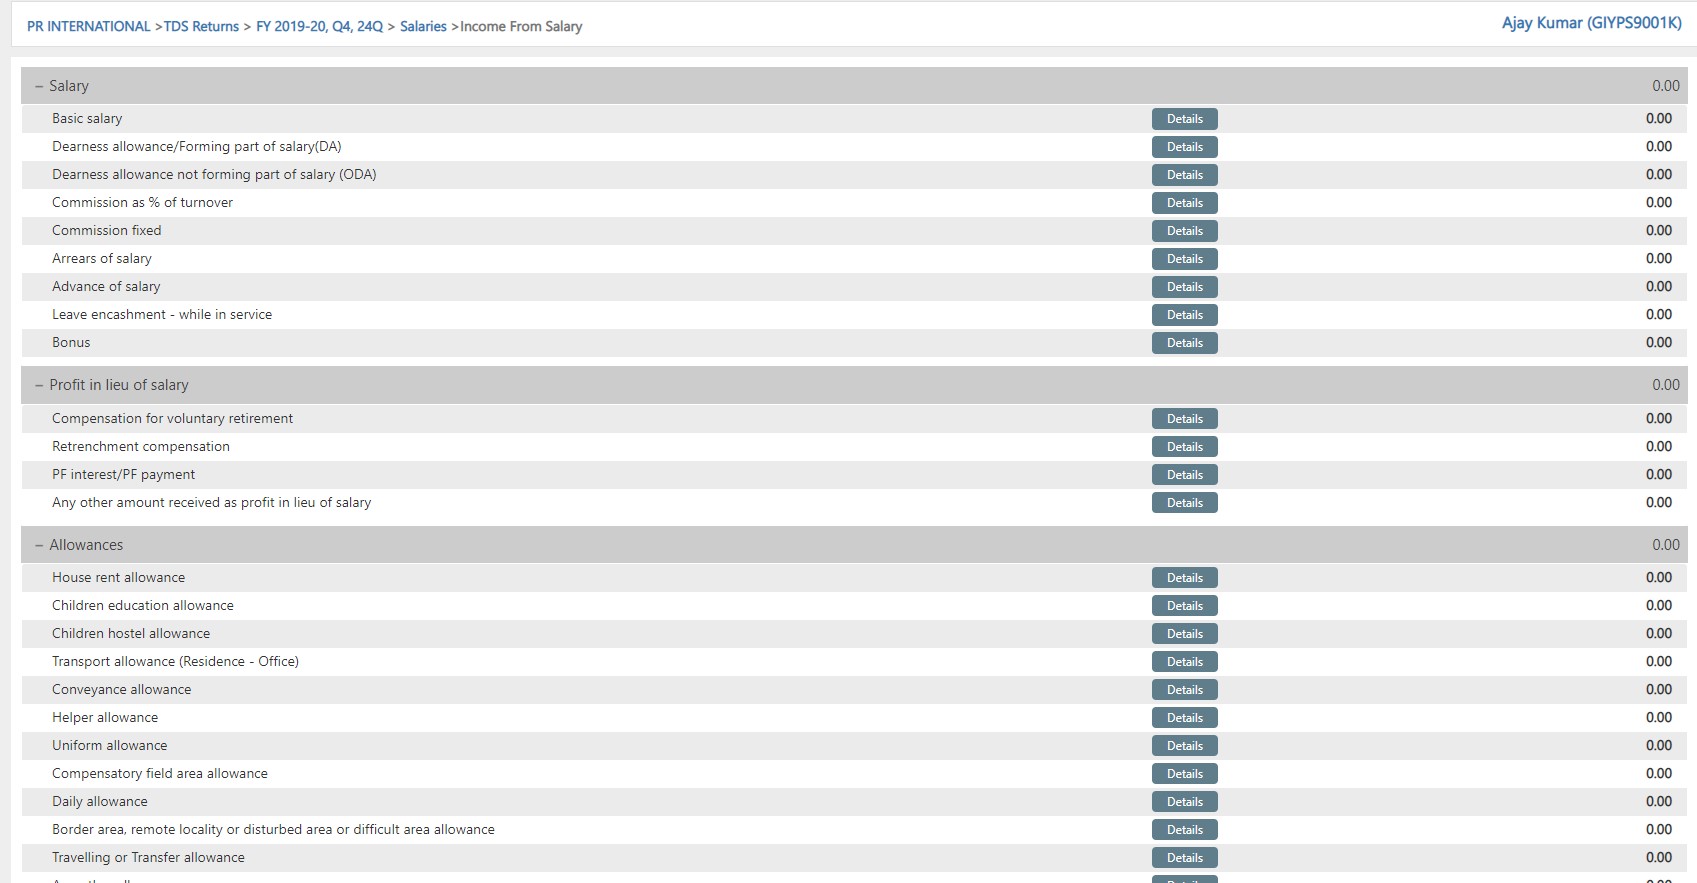
You are required to fill following fields in Income from Salary page:-
- Salary
- Profit in lieu of salary
- Allowances
- Perks
- Retirement benefits
- Salary details from previous employer
- Deduction u/s 16
- Superanuation Trust Details
- Other Income
- Deduction Under Chapter VI A
- Tax Relief
- Tax deducted
The Correction Status will appear on the Salaries List page.

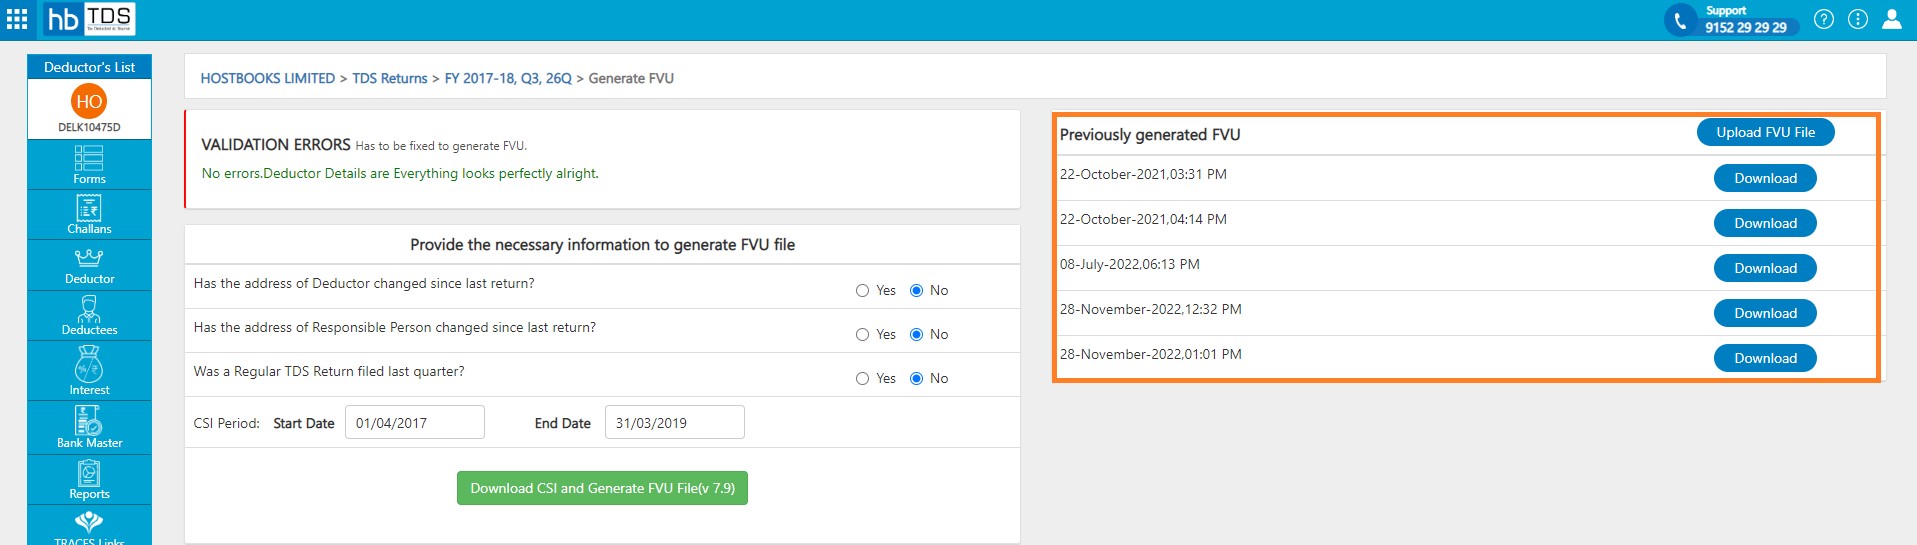
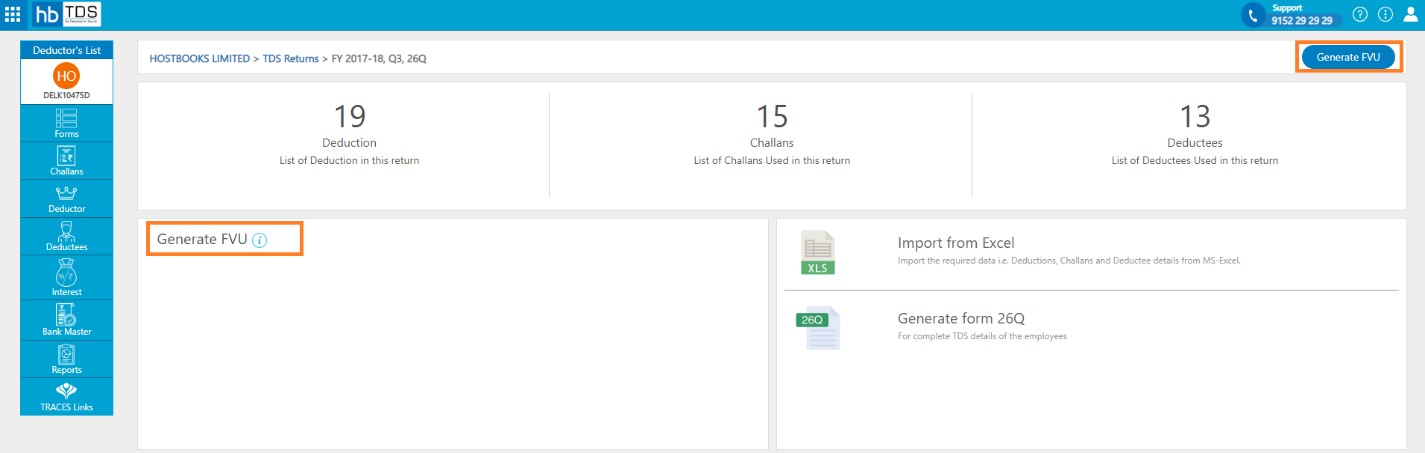
How to Generate FVU?
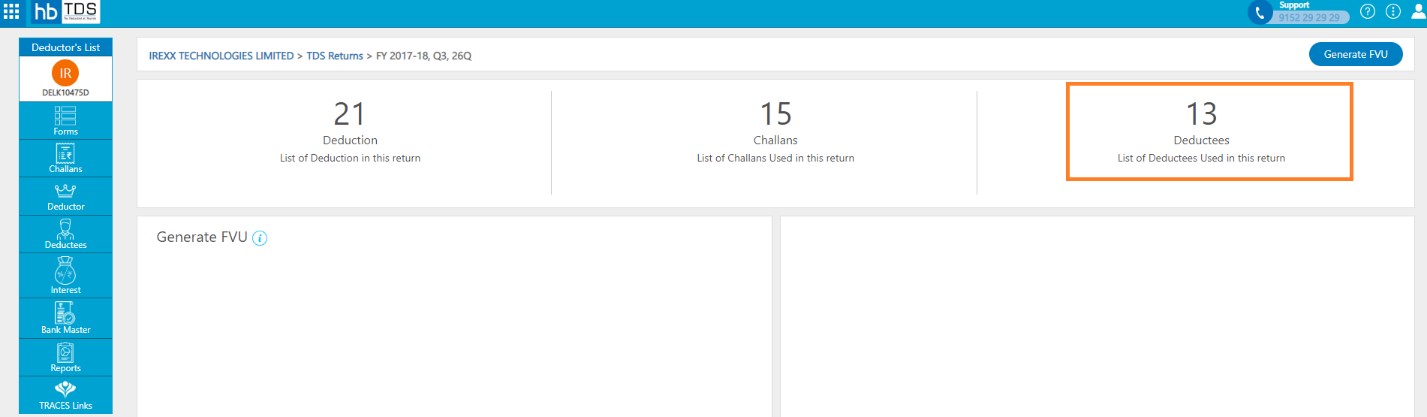
TDS Return page:- Click on "Generate FVU".
Click on "Download CSI and Generate FVU File".
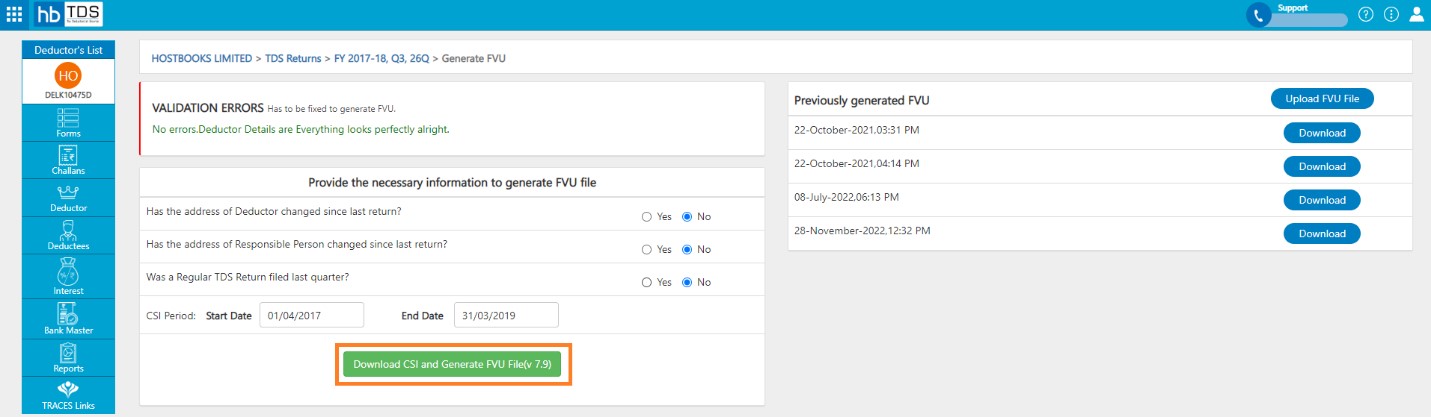
After clicking on “Download CSI and Generate FVU File, a message will appear as “Successfully generated FVU file”.
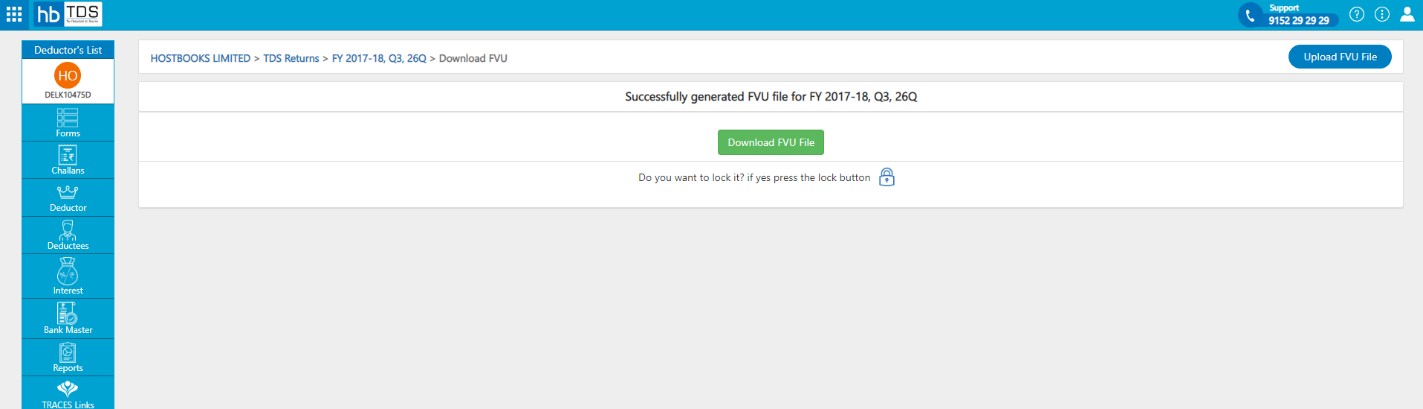
You can also view previous generated FVU on "Previously generated FVU" section.