How to Create Bill of supply?
 Save as PDF
How to Create Bill of supply?
You can create Bill one by one by clicking “Bill of supply” from Bill listing page.

After clicking on “Bill of supply” - New Bill of supply form will be opened.
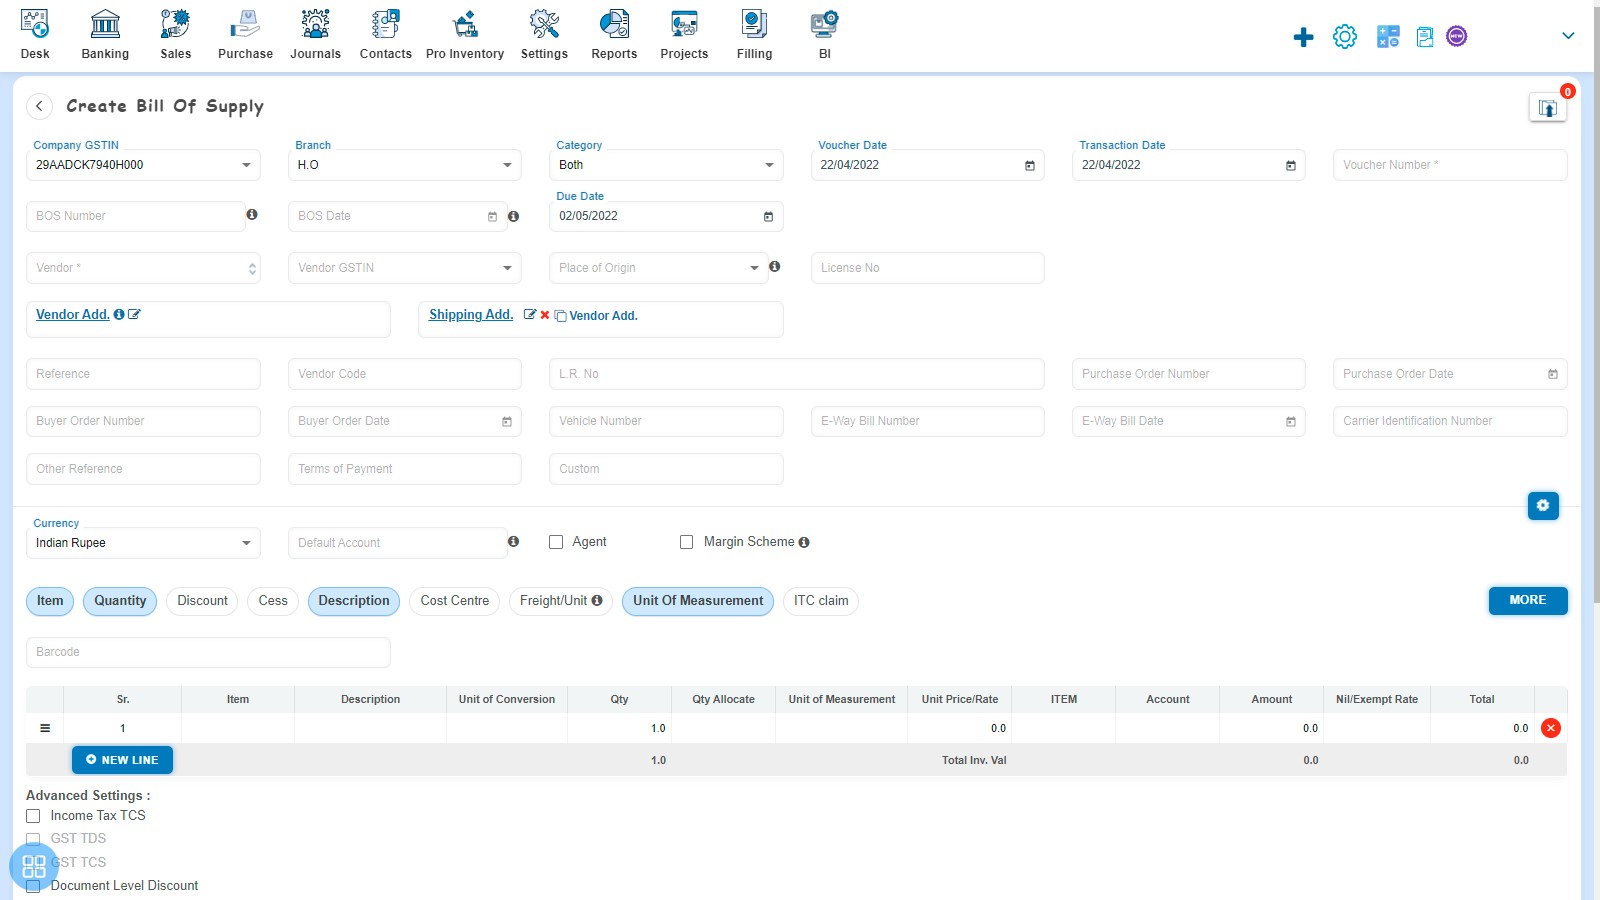
What Mandatory fields are required?
For creating the “Bill of supply” you are required to fill some mandatory fields such as:-
- Voucher Number
- Vendor
- Place of Origin
- Vendor Address
- Unit Price
- Account
- NIL/Exempt Rate
How to set Auto-fields?
You can set some auto-fill functionalities for creating the Bill of supply. Such Auto-Fields are:-
- Voucher date: By default current date will be the Voucher Date. You can also change the same.
- Transaction date: By default current date will be the Transaction Date. You can also change the same.
- Due Date: By default due date is also given by the software. However, you can change the same.
- Branch (Auto): You are required to Add Branch in Organization Settings. Those added Branch list will appear at the time of creation of Bill of supply.
For adding Branch - Navigate to Settings → Organization Settings → Location → + Branch.
- Category (Auto): You are required to Add Category in Organization Settings. Those added Category list will appear at the time of creation of Bill of supply.
For adding Category - Navigate to Settings → Organization Settings → Location → + Category.
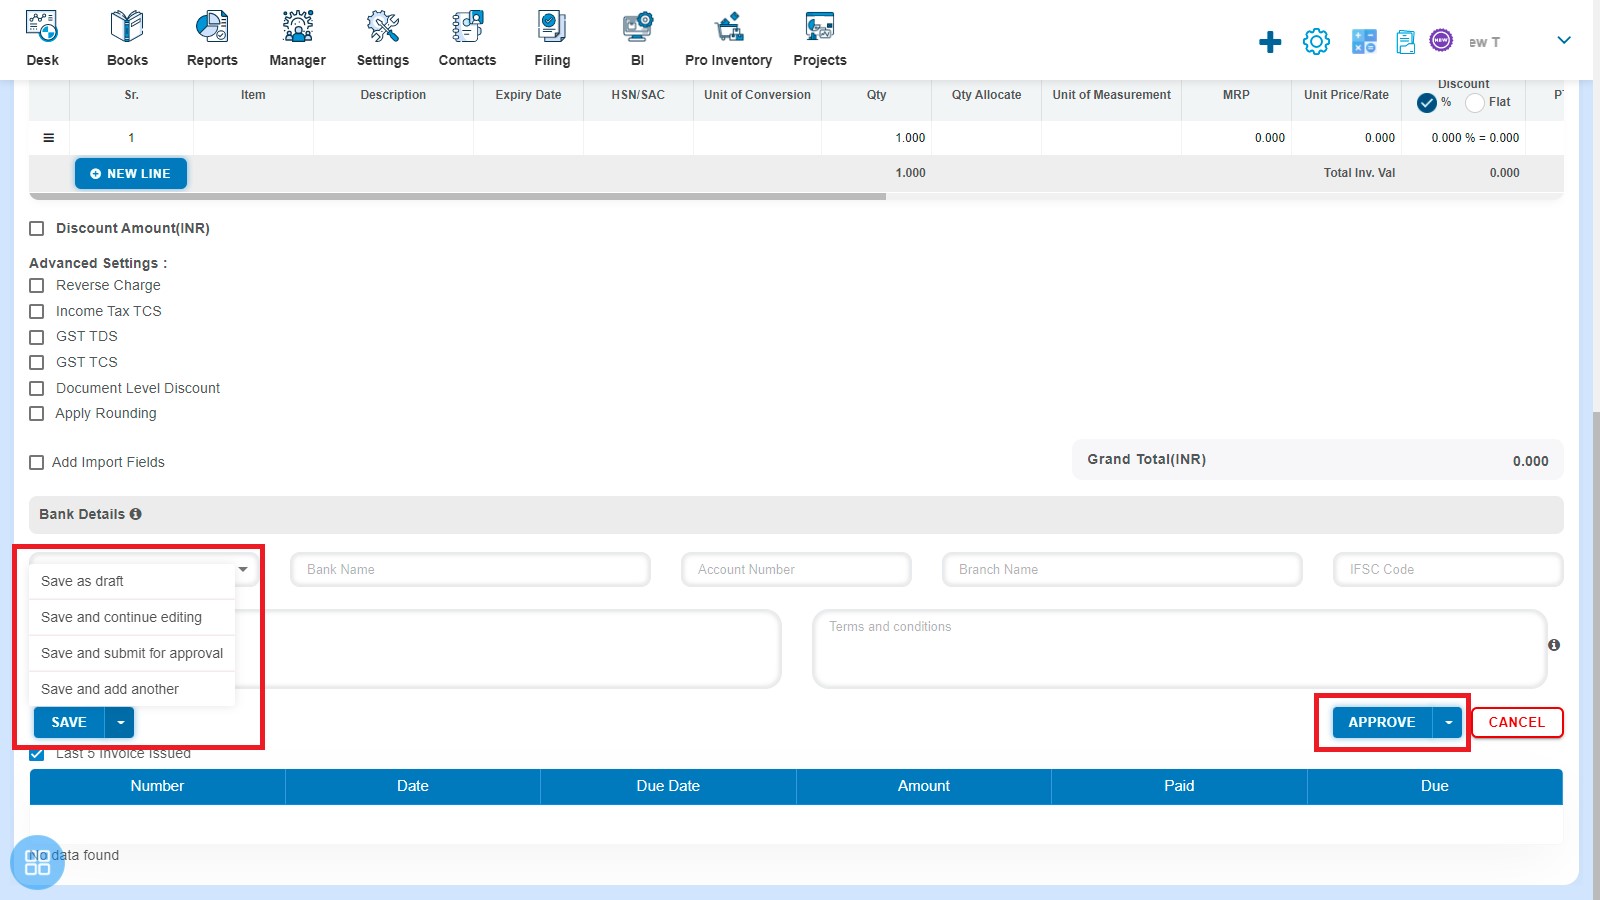
How to Save Bill of supply?
You can save the Invoice into following three types:
- Save as Draft
- Save as Submit for Approval
- Save as Approve
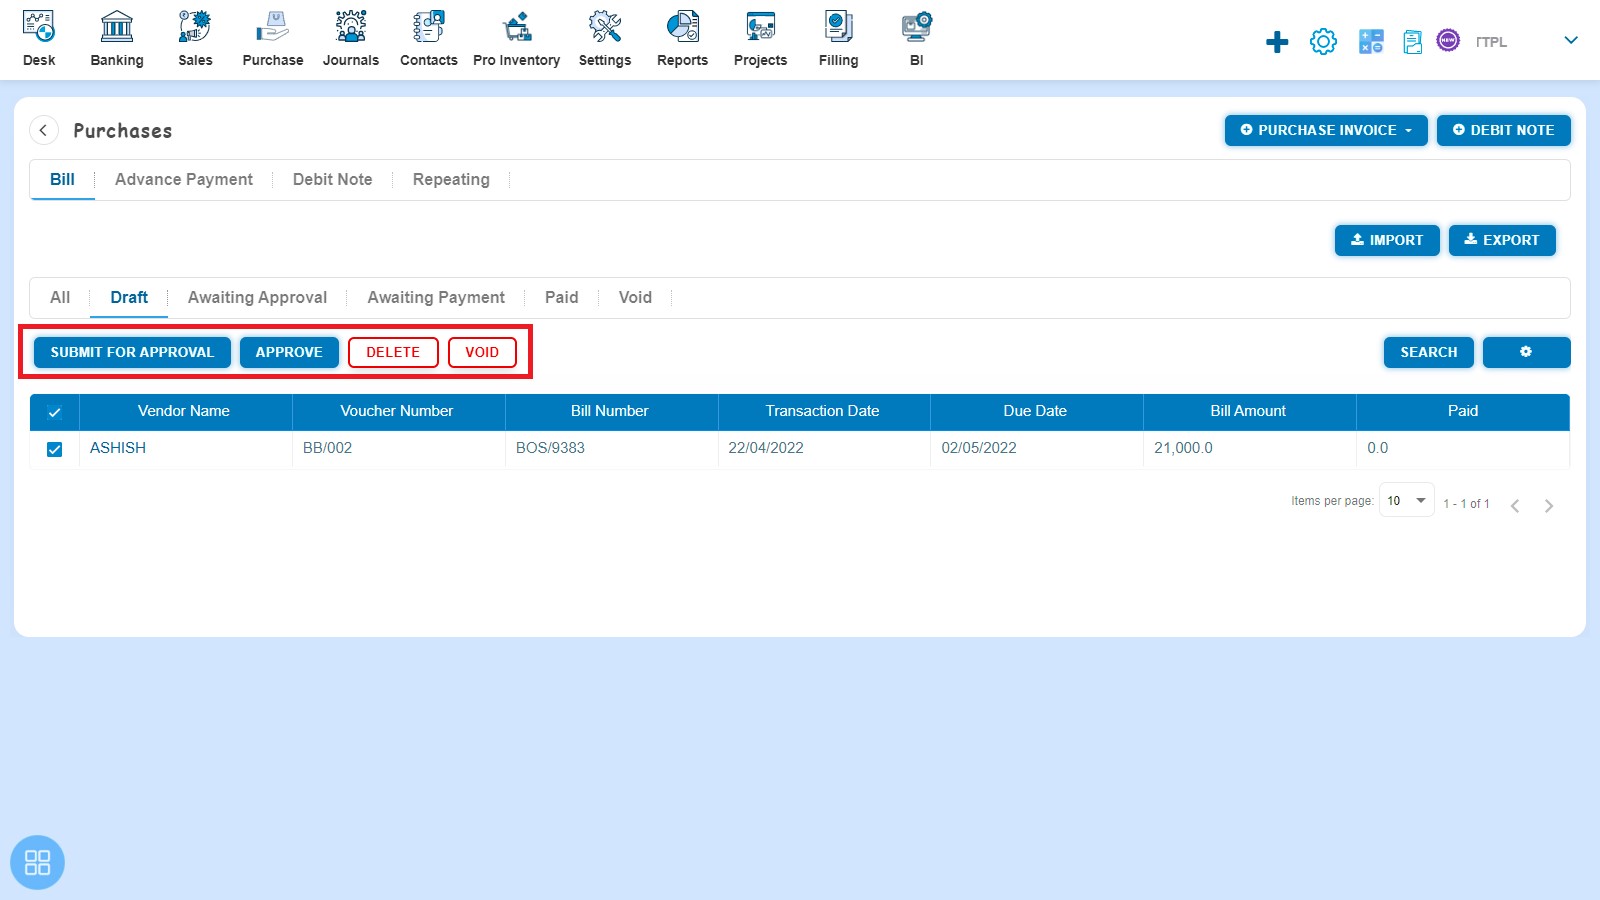
How to change the status of Purchase Invoice from Listing?
- Navigate to Draft listing from All Purchase listing and select the Bill of supply which you want to move in “Submit for Approval”, “Approve”, “Void” or “Delete”.
- Navigate to Awaiting Approval listing from All Purchase listing and select the Bill of supply which you want to move in “Approve”, “Void” or “Delete”.
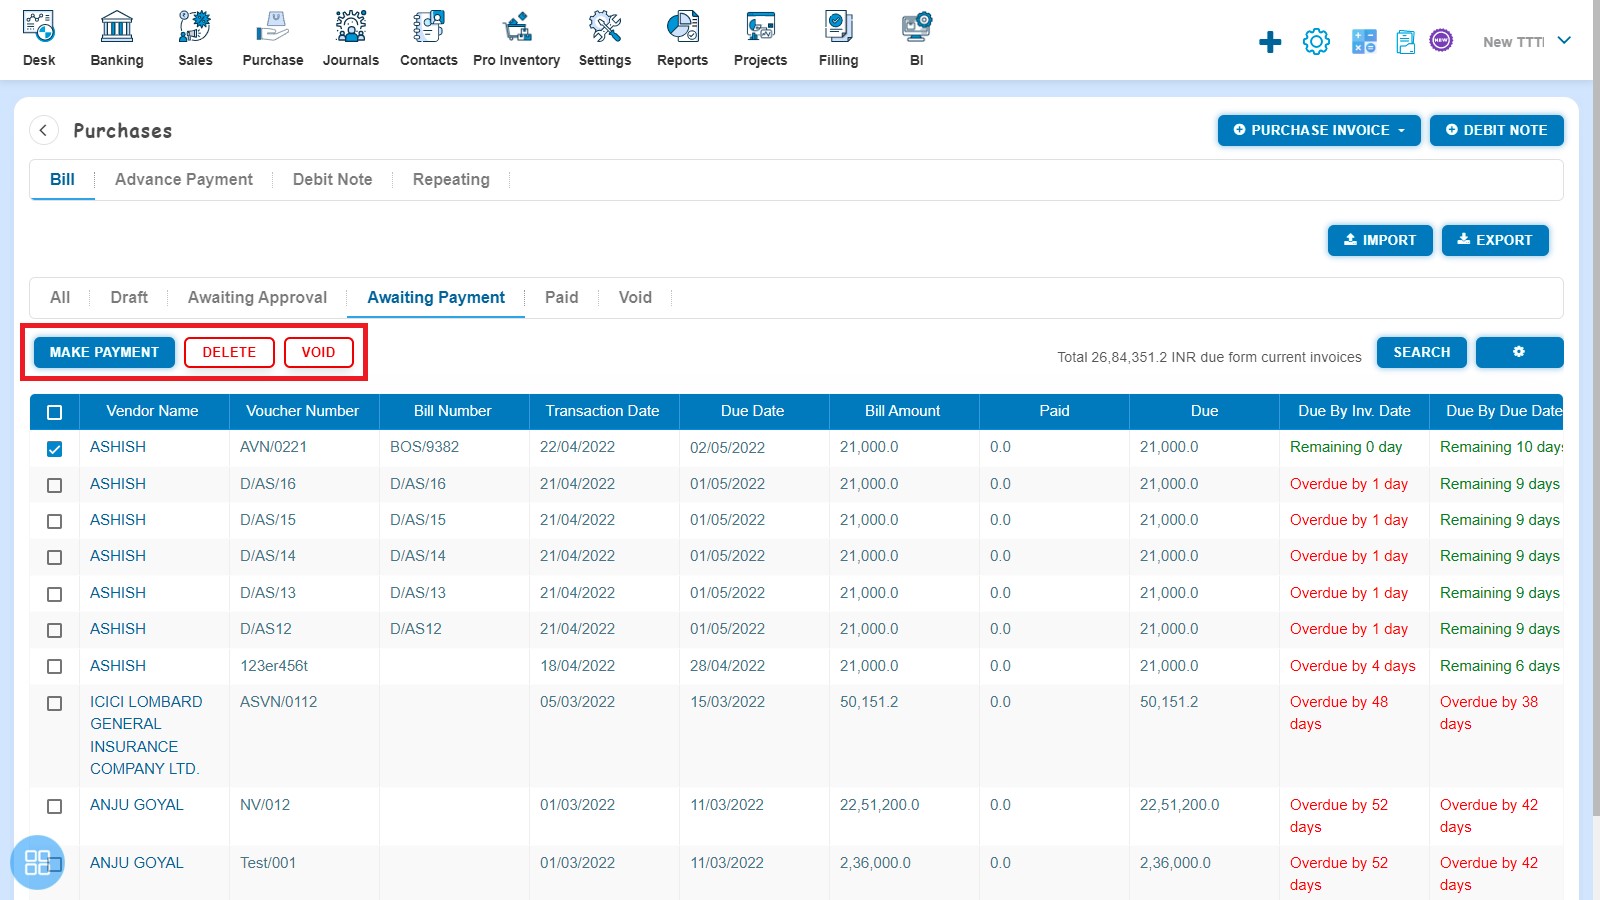
- Navigate to Awaiting Payment listing from All Purchase listing and select the Bill of supply which you want to move in “Make Payment”, “Void” or “Delete”.
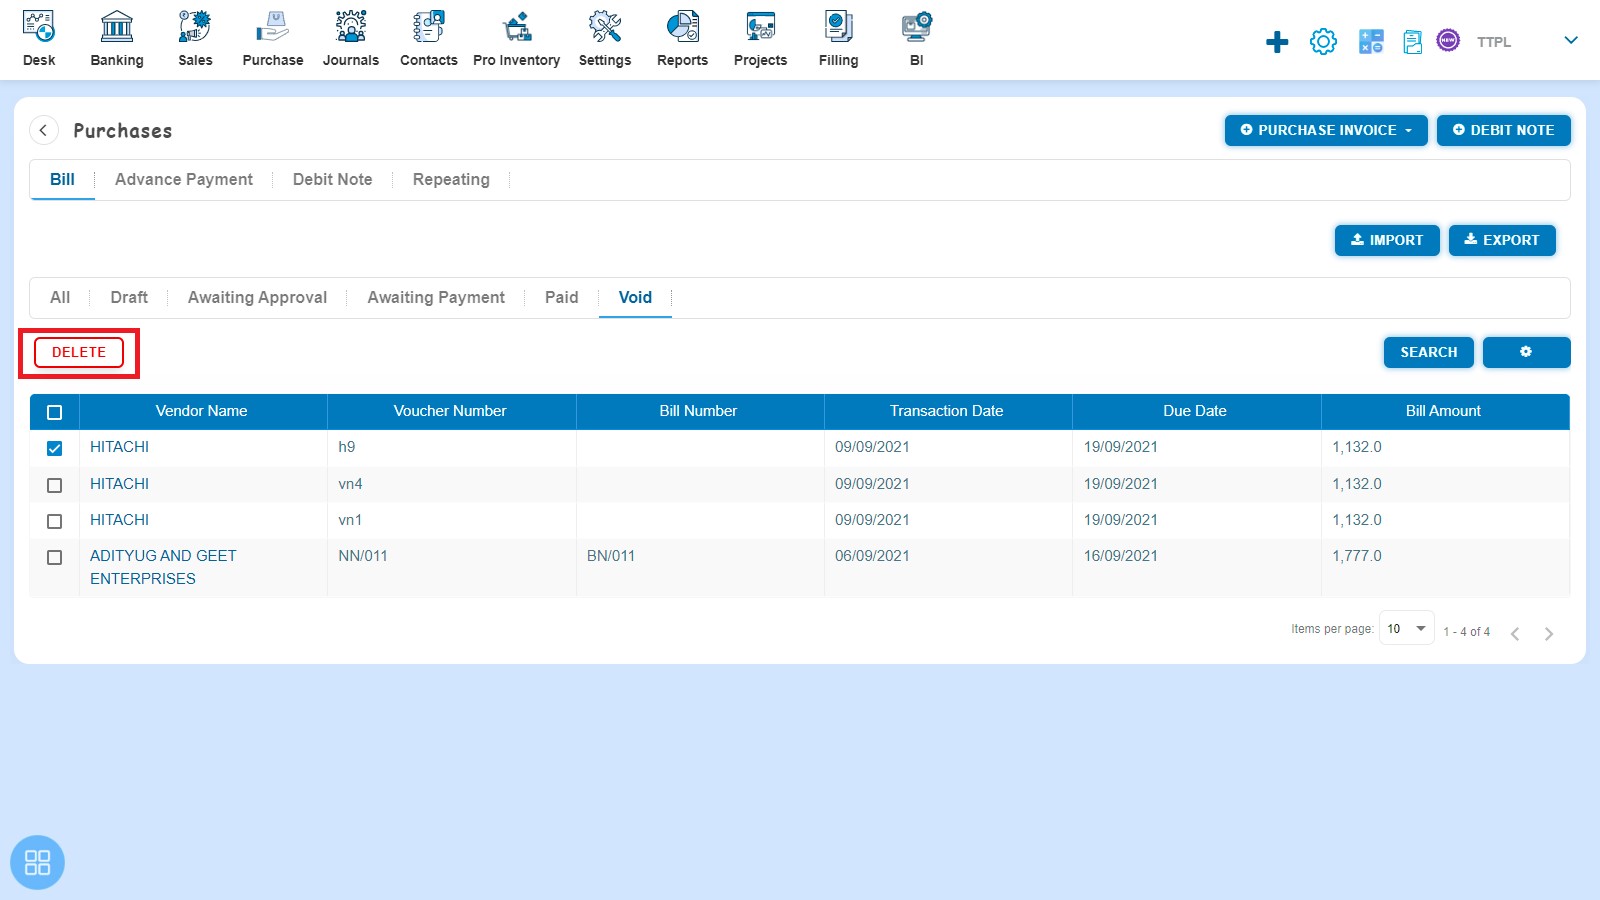
- Navigate to Void listing from All Purchase listing and select the Bill of supply which you want to “Delete”.

How to make payment of Bill of supply?
There are three ways to make payment.
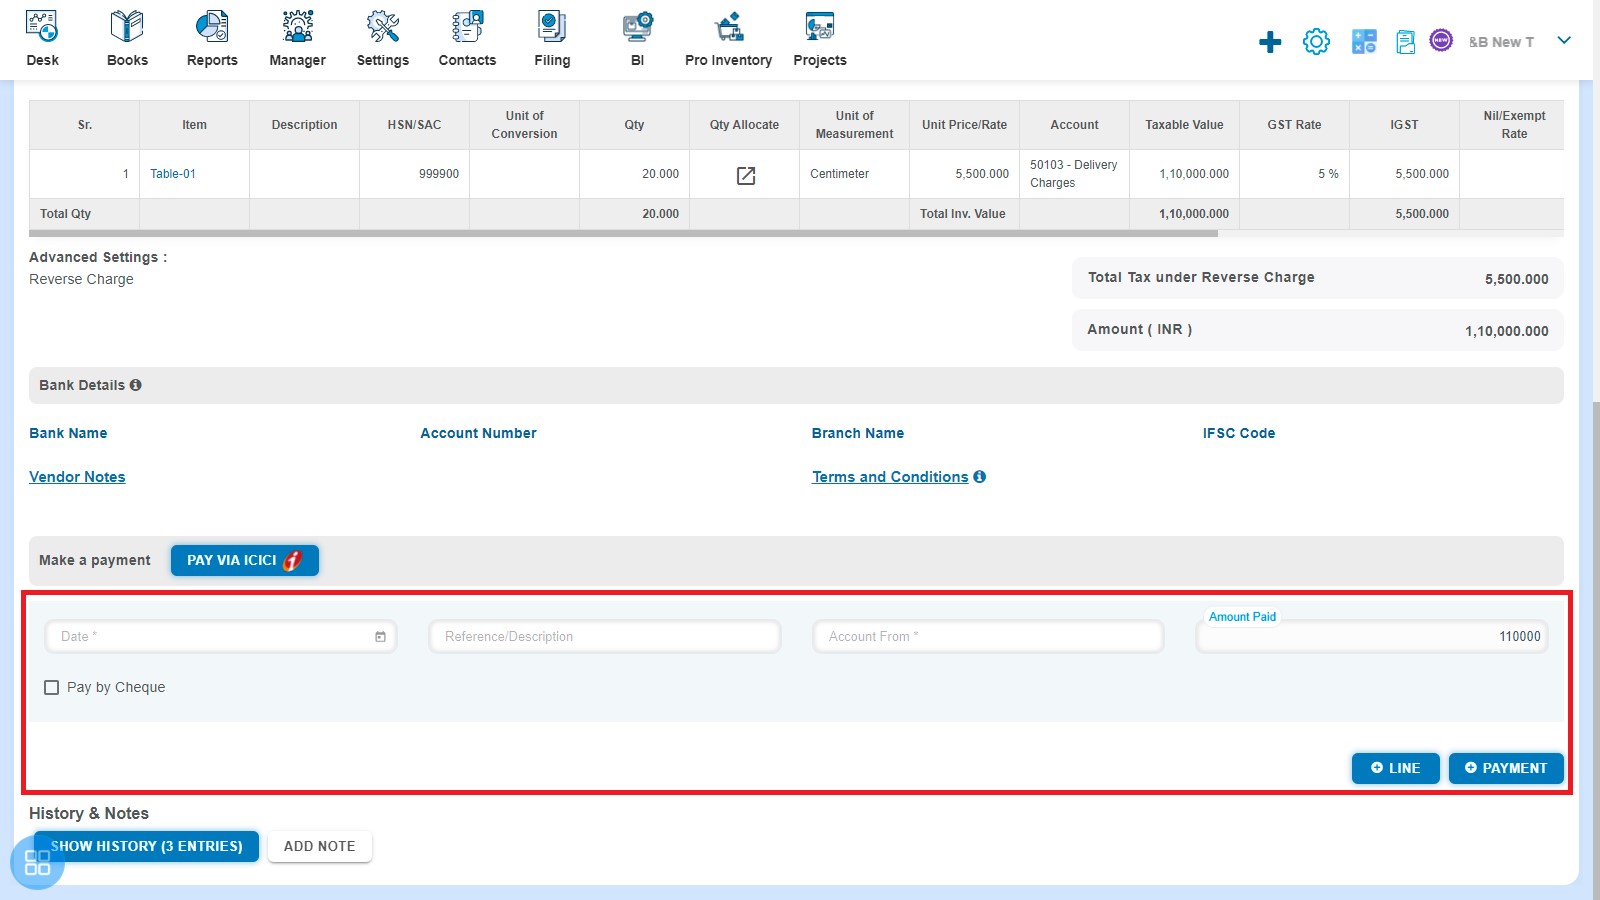
- Open the Bill of supply for which status is Awaiting Payment in View Mode. Enter following fields and click on + Payment:
- Amount Paid
- Date Paid
- Paid From
- Reference/Description
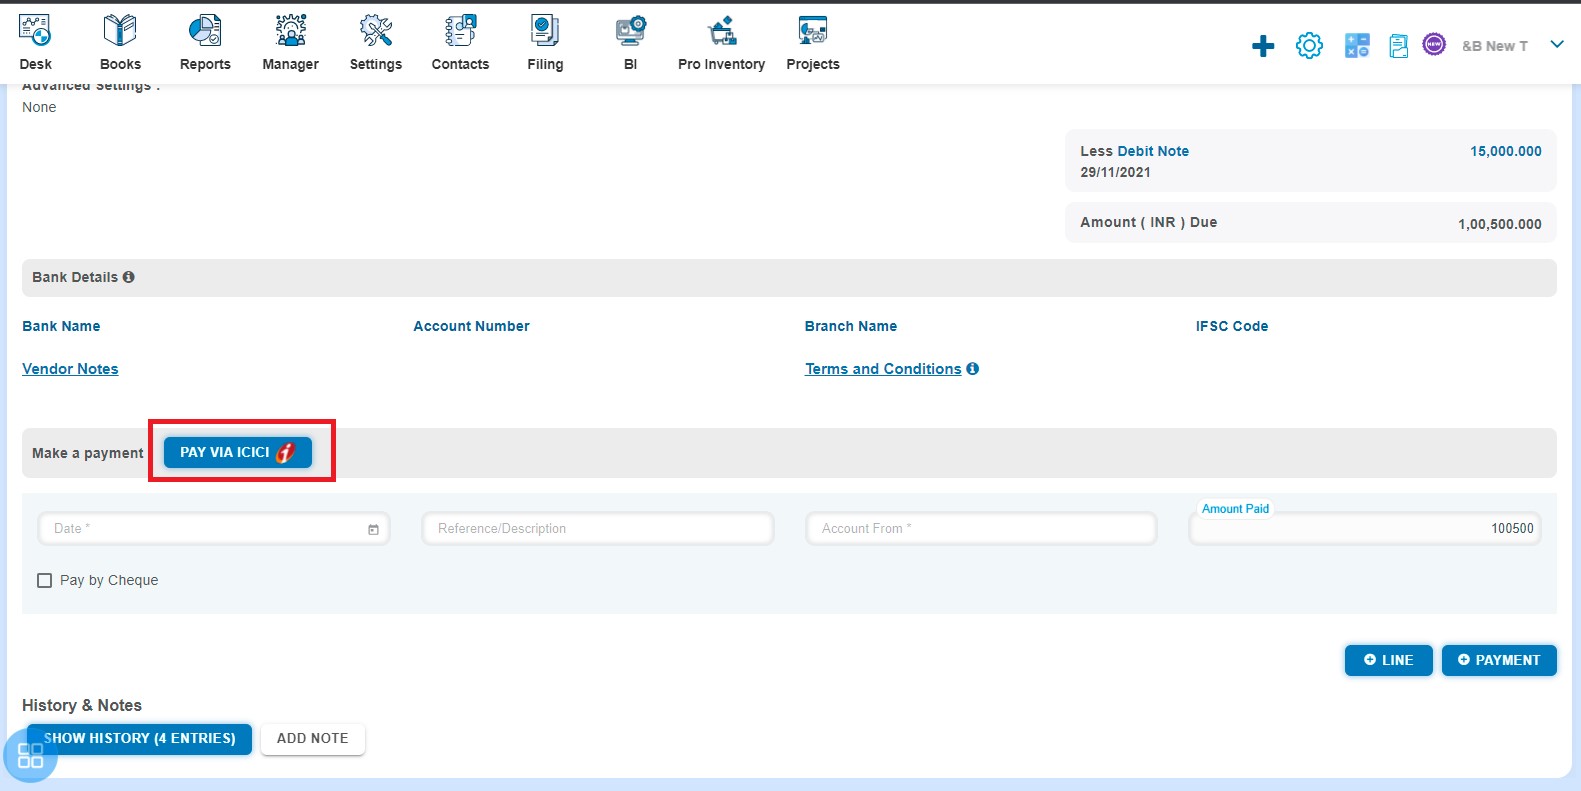
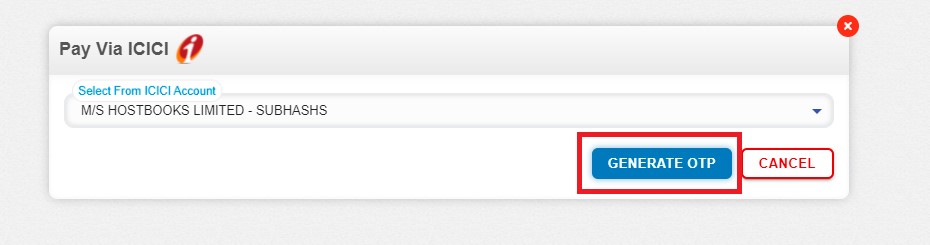
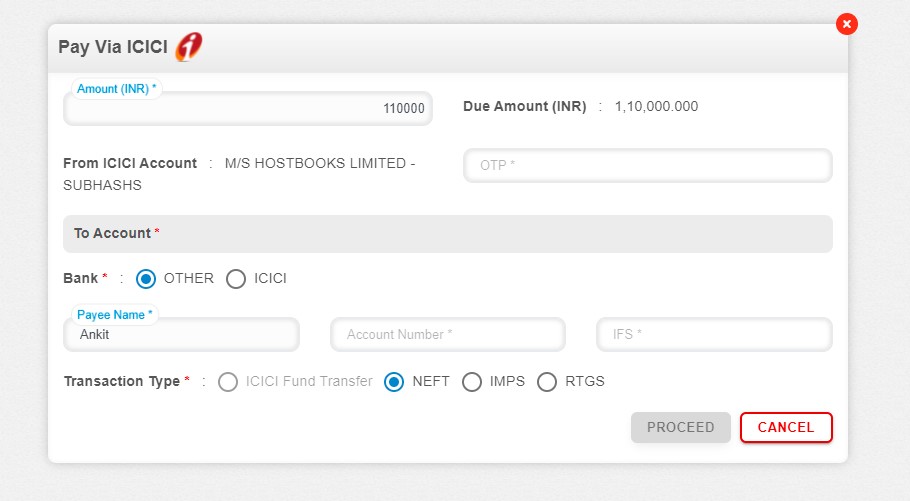
- In the Purchase listing page, open the Bill of supply for which status is Awaiting Payment in View Mode. Click on Pay VIA ICICI
- Navigate to Awaiting Payment listing page from All Purchase listing and select the single or multiple Bill of supply for which are you want to “Make Payment”
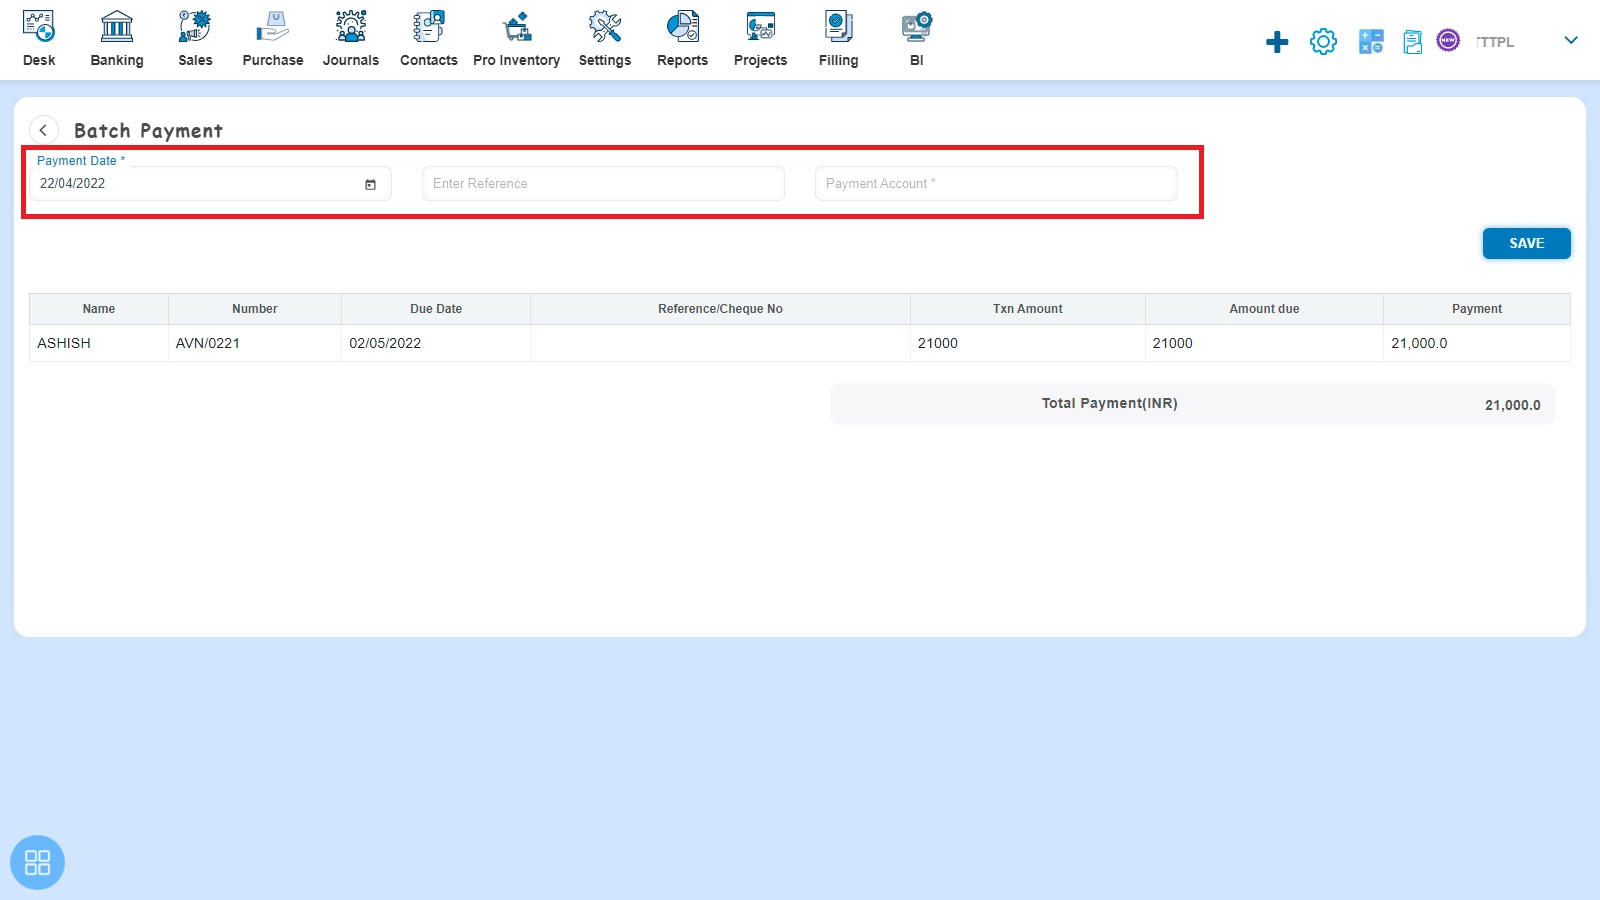
- Payment Date
- Reference
- Payment Account
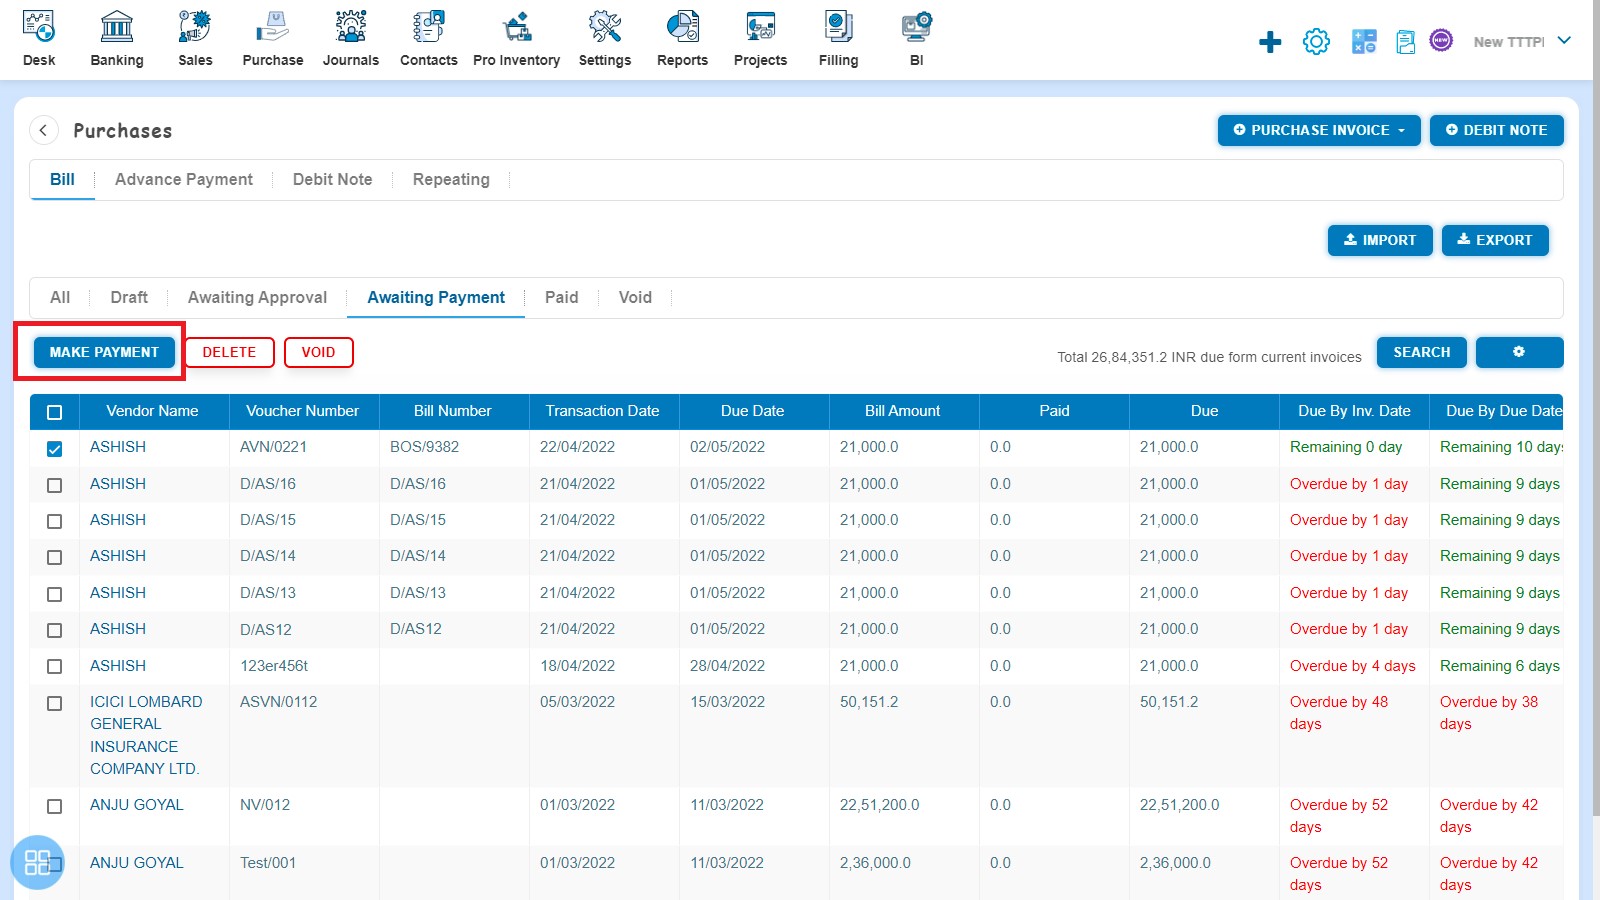
Click on Make Payment then it will redirect to Batch Payment. Enter following fields and click on Save.
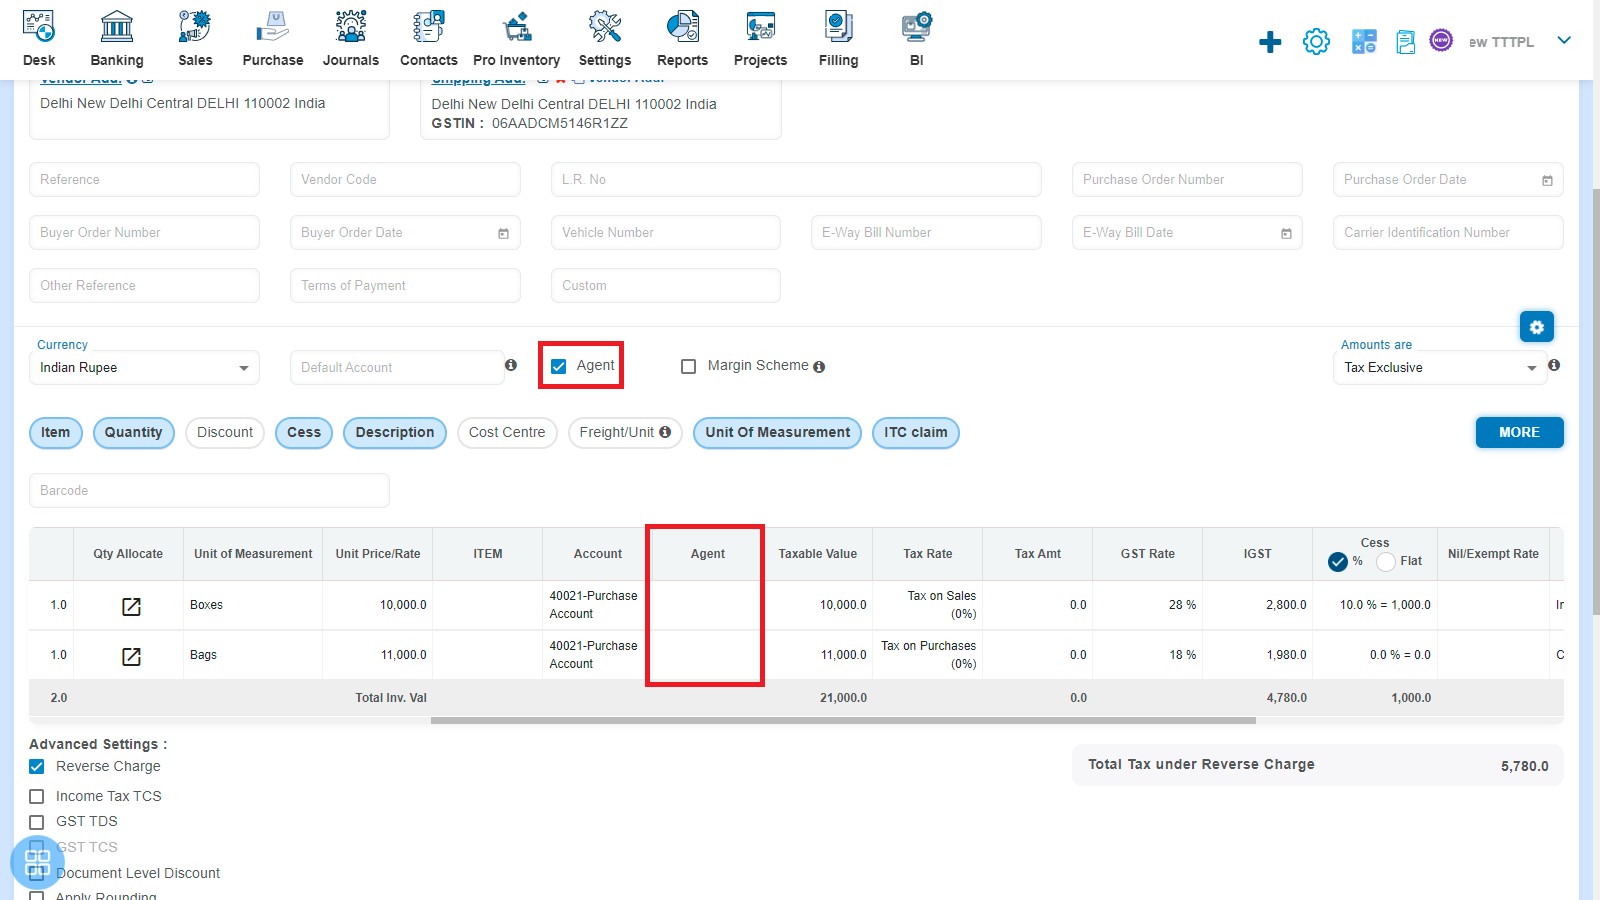
How to add Agent?
Create a Purchase Invoice and select the Agent check box then Agent column is enabled in Item table. You can select the Agent from drop-down list.
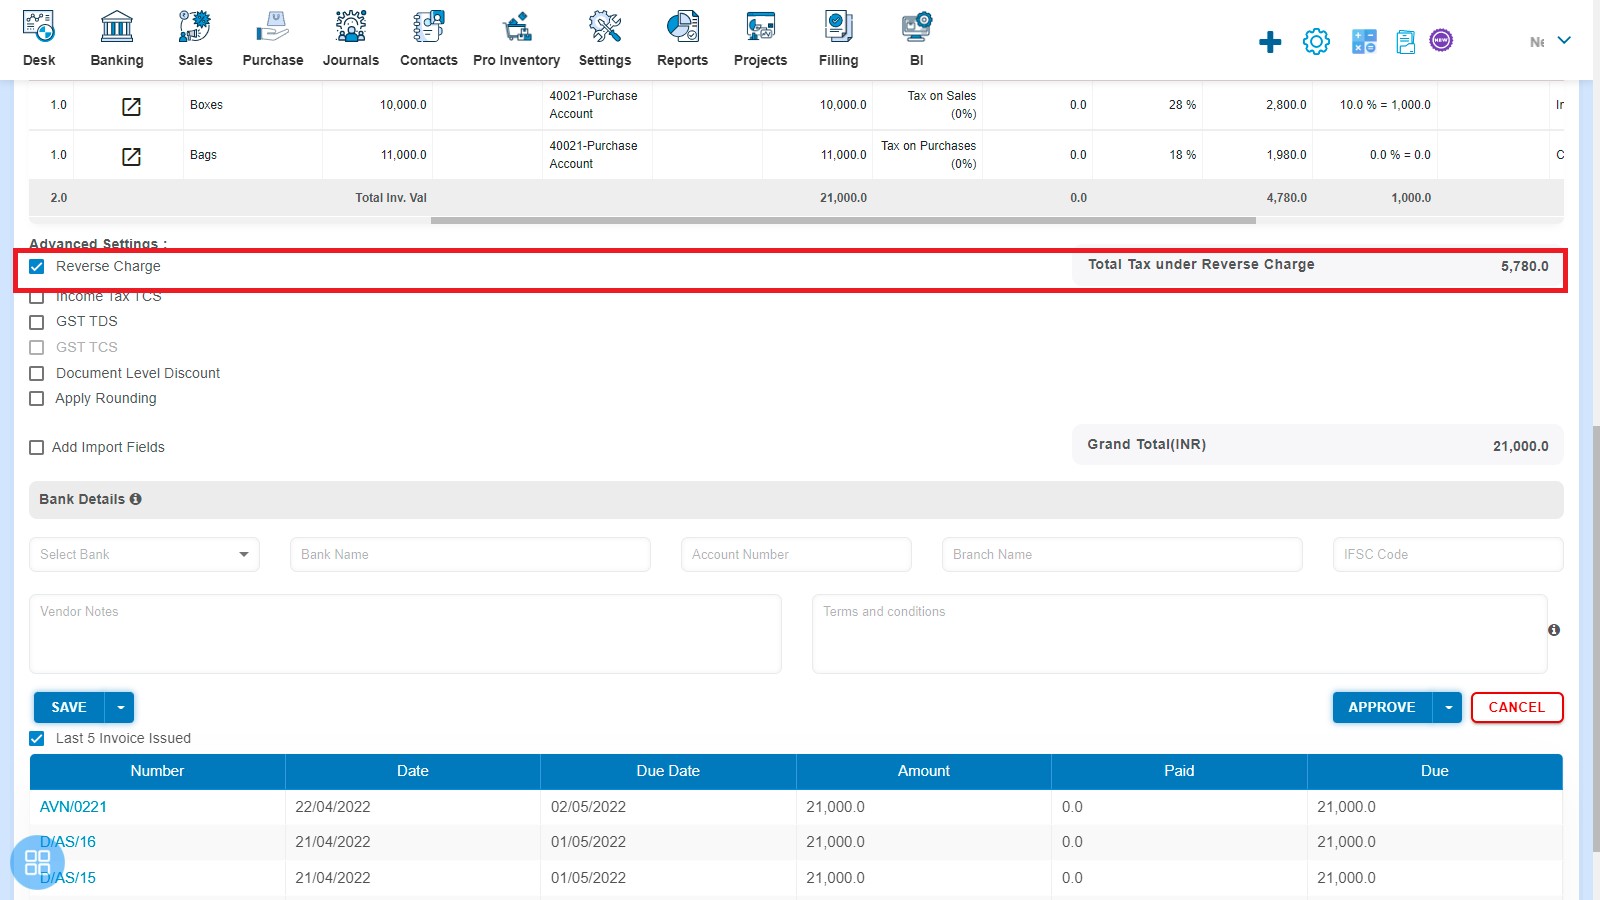
How to manage Advanced Settings?
There are 6 types of Advanced settings, out of which 2 i.e. Reverse charge and Document Level Discount will auto appear while creating invoice and rest of 4 i.e. Income Tax TCS, GST TDS, GST TCS, Rounding off will appear after checking the same in Custom Configuration.
- Create a Purchase Invoice and click on Reverse Charge then it is auto calculate the reverse charge amount
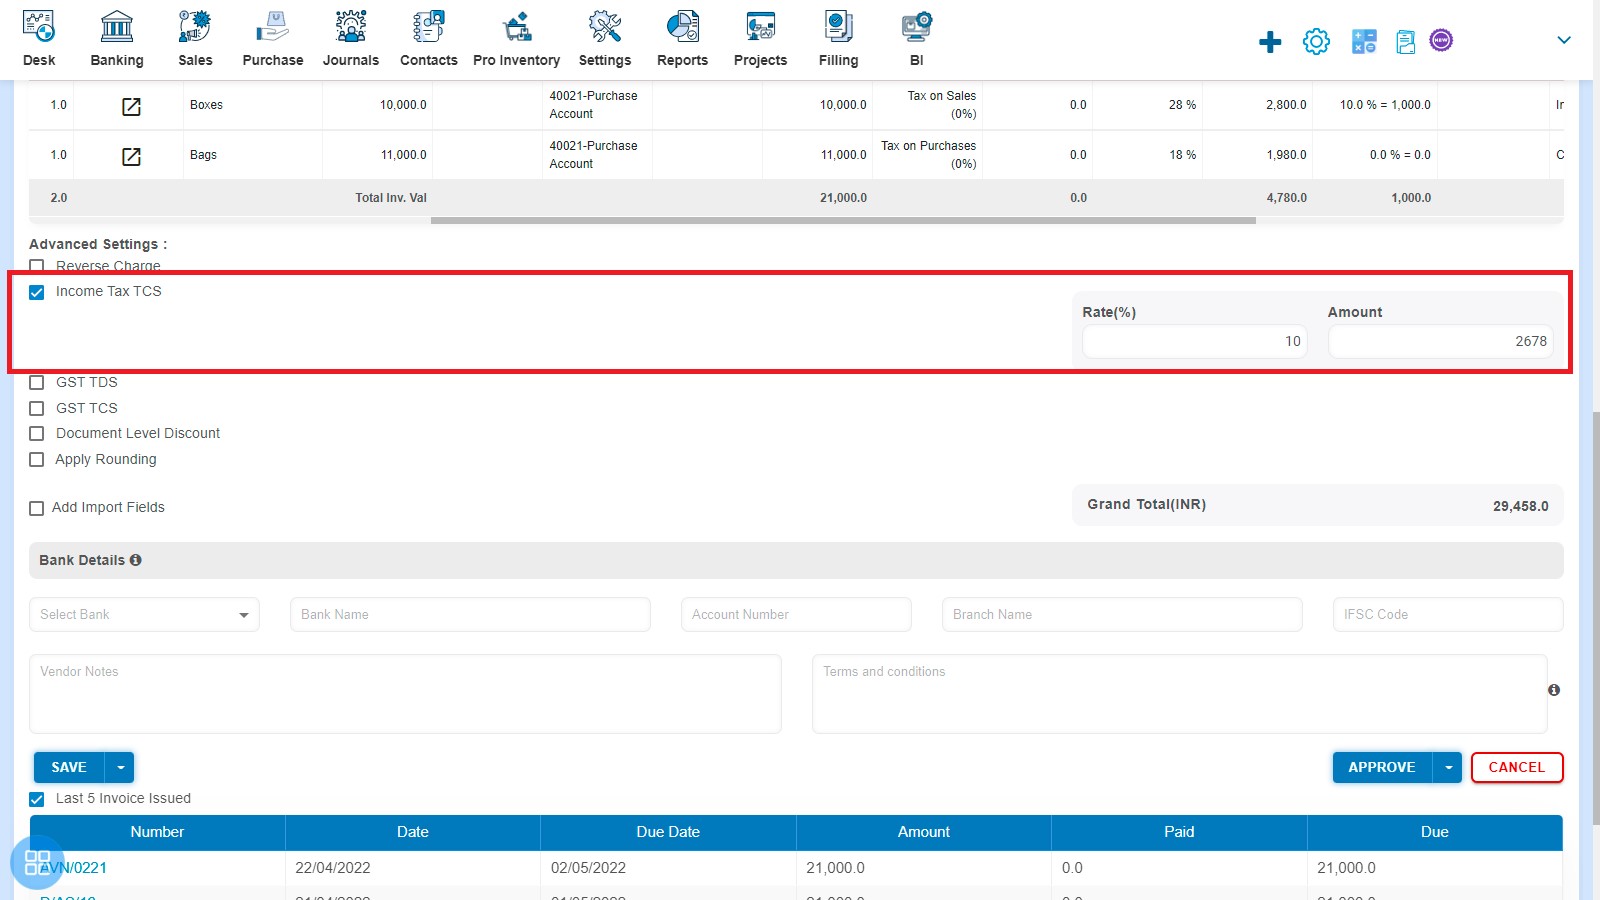
- Create a Purchase Invoice and click on Income Tax TCS then Rate & Amount input fields are enabled. You can enter the Income Tax rate and it will calculate the amount automatically.
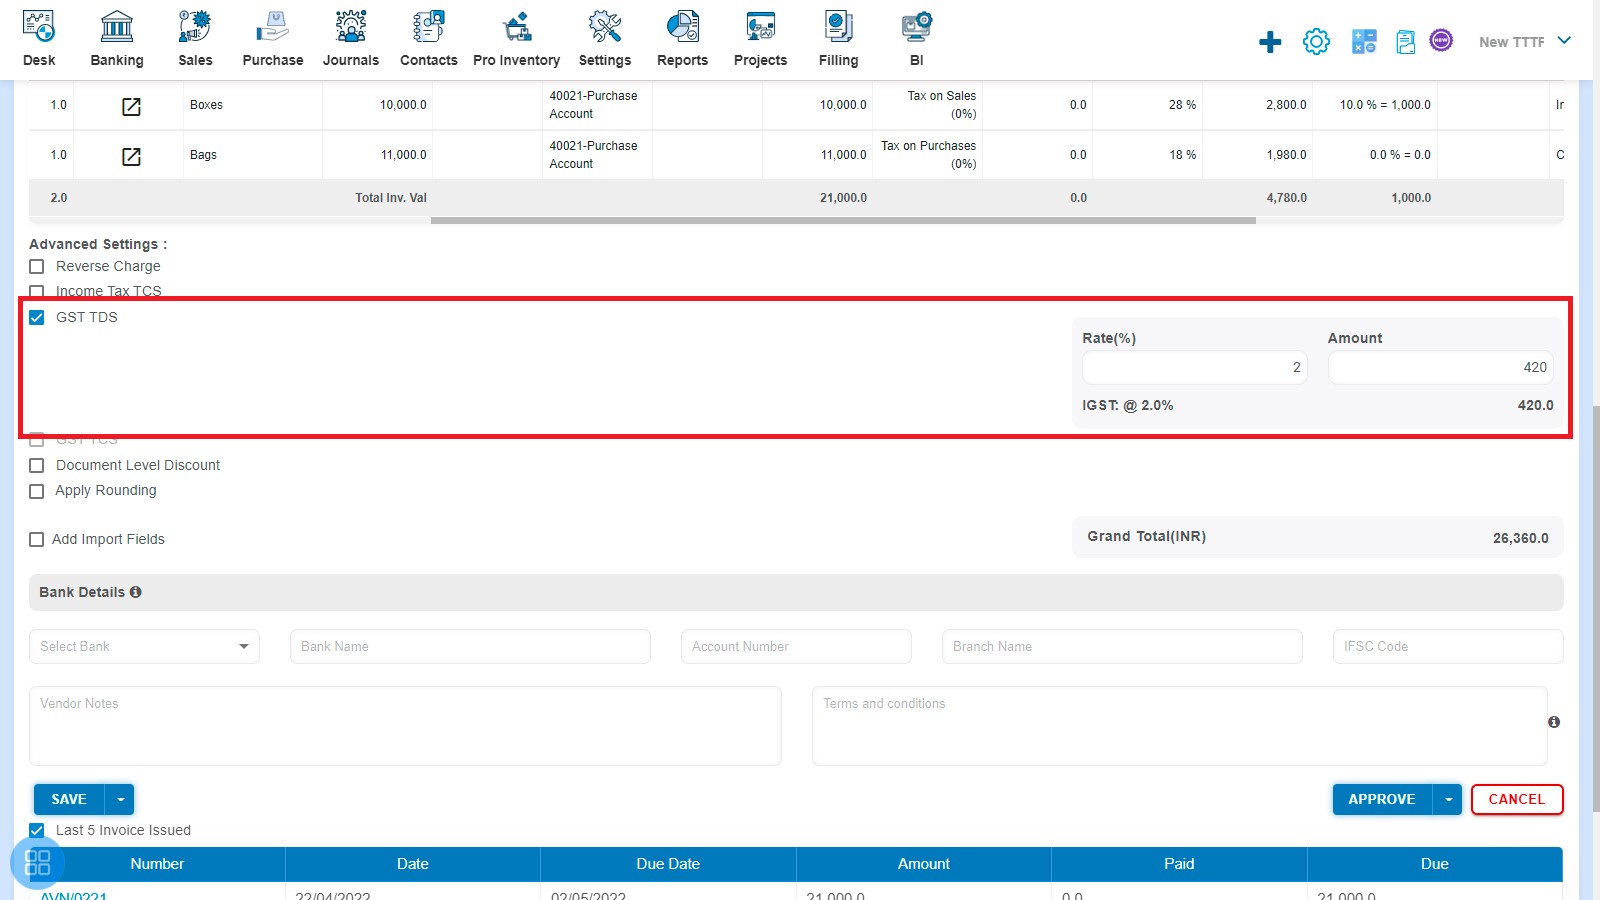
- Create a Purchase Invoice and click on GST TDS then Rate & Amount input fields are enabled. You can enter the GST Rate and it will calculate the amount automatically.
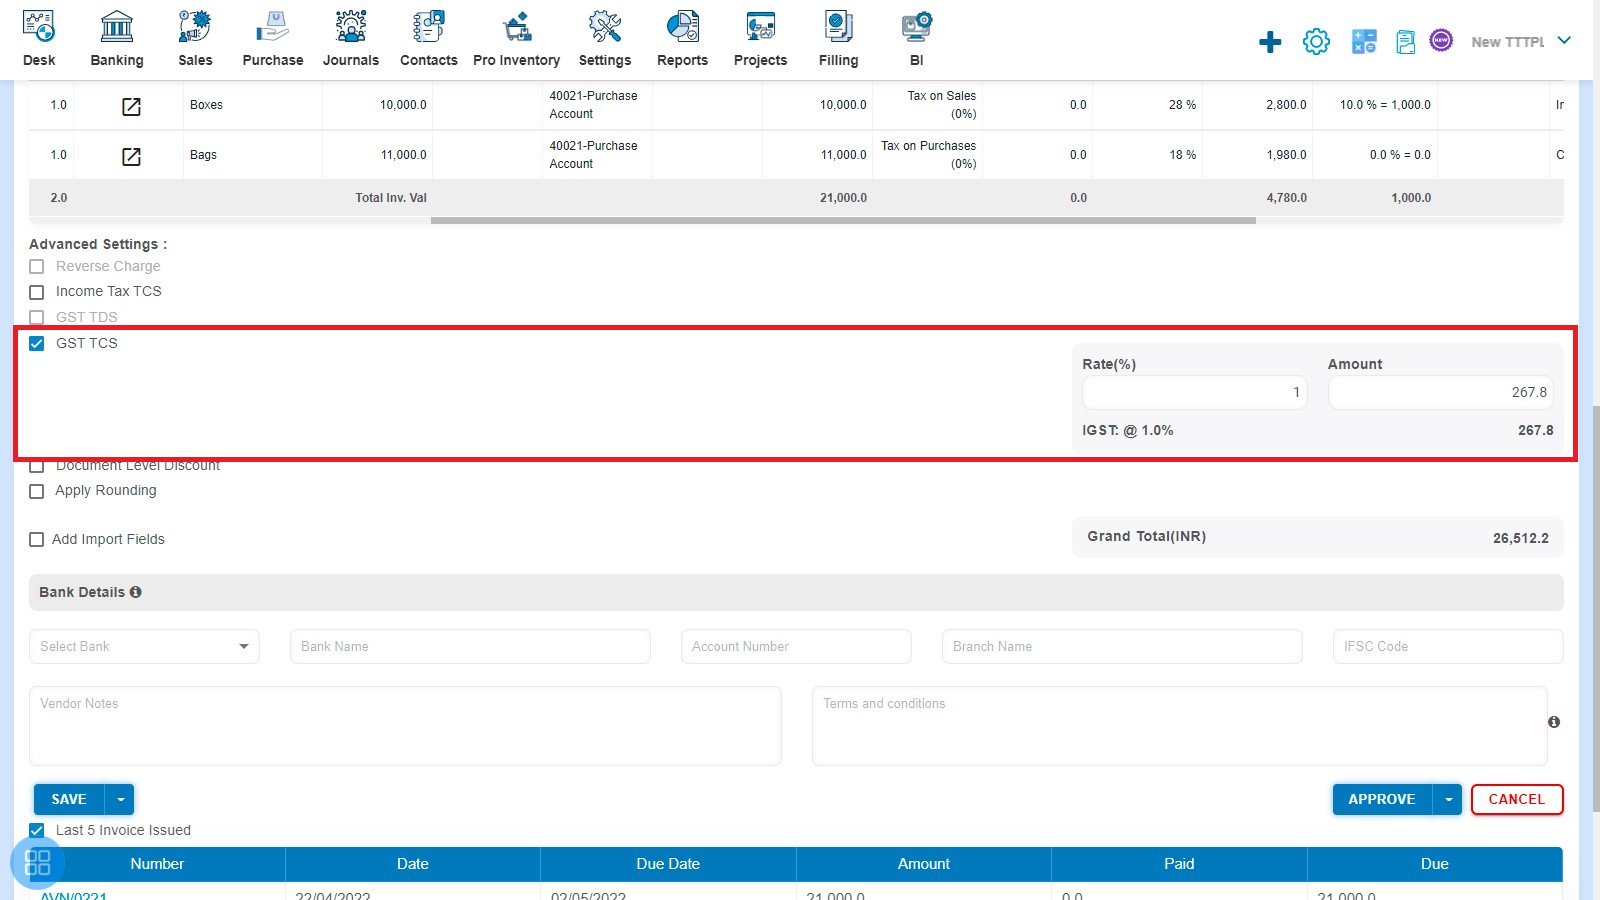
- Create a Purchase Invoice and click on GST TCS then Rate & Amount input fields are enabled. You can enter the GST TCS and it will calculate the amount automatically.
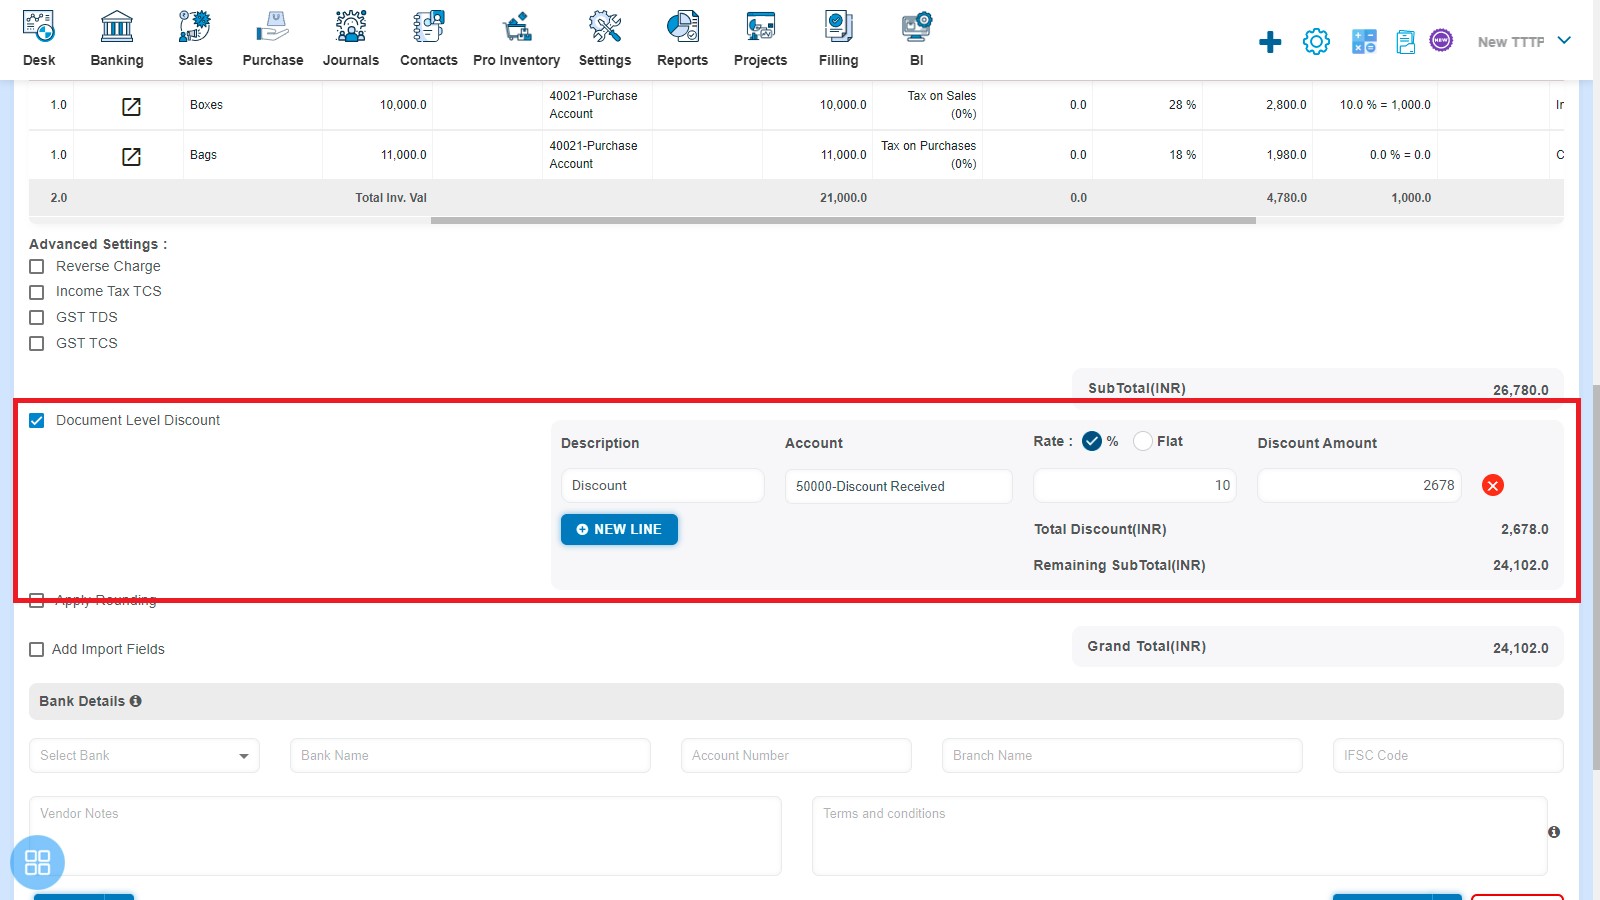
- Create a Purchase Invoice and click on Document Level Discount then Description, Account, Rate & Discount Amount input fields are enabled.
- Create a Purchase Invoice and click on Rounding off and it will calculate the rounding off amount automatically.

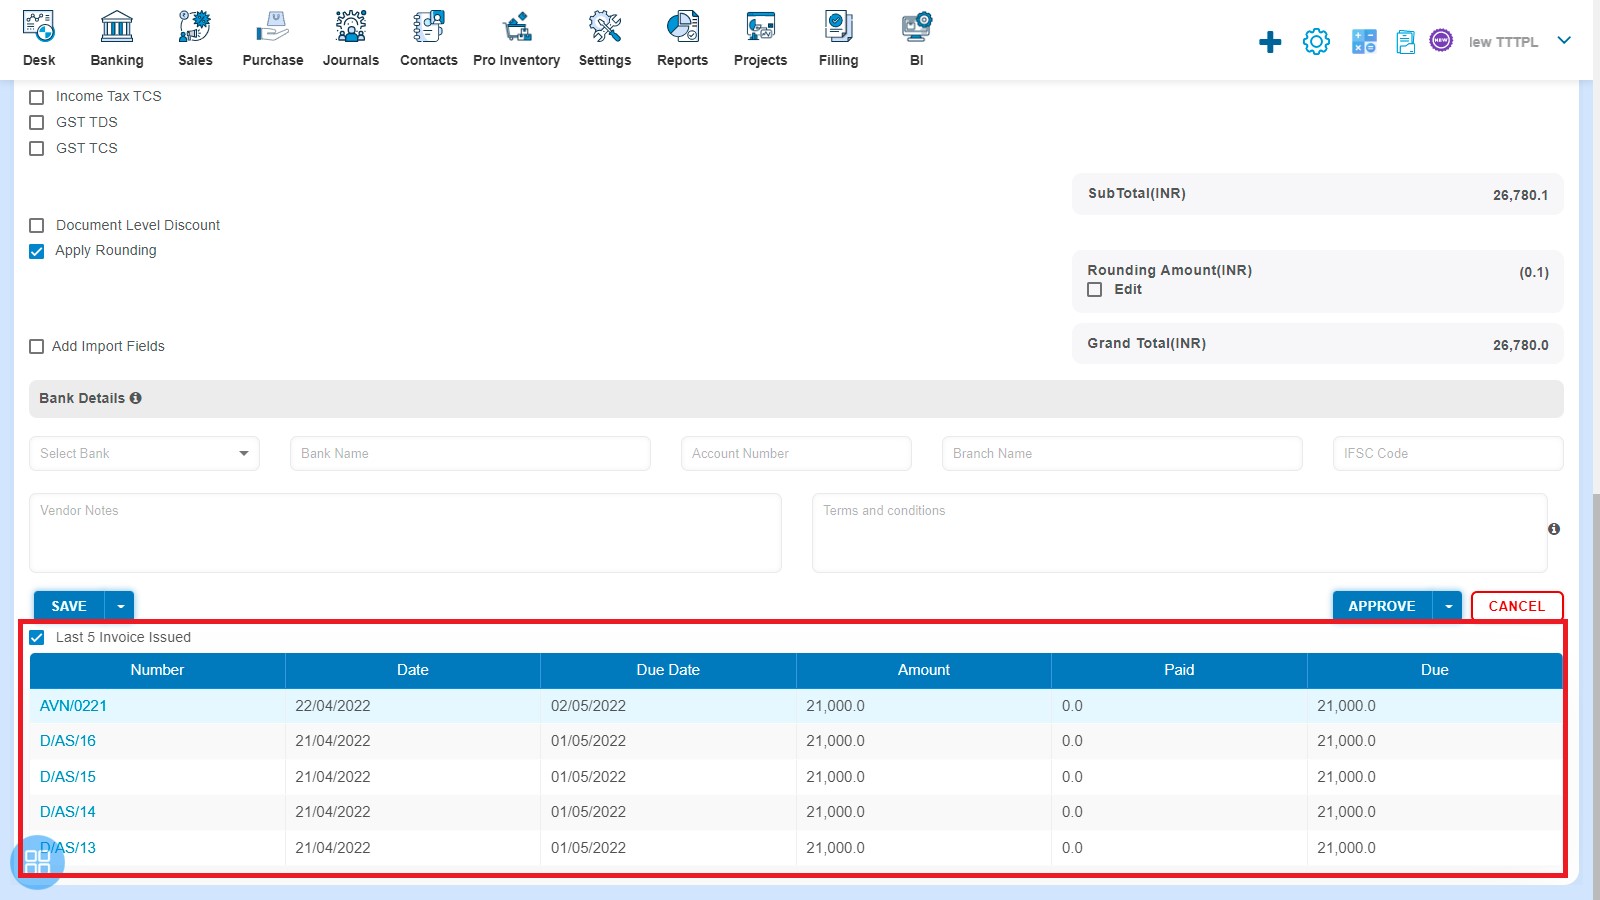
How to view Last 5 Bill of supply issued?
Last 5 Bill of supply issued will appear after checking the same in Customization Settings. After creating the Bill of supply you would be able to see the last 5 Invoice issued.