Dashboard
After login
After login, you will be redirected to the Dashboard. The following menus are:-
- Switch to User
- Dashboard
- My Account
- User Management
- Settings
- Software issue
- GST Penalty Calculator
- Logout
How can I switch user?
Click Switch to User.
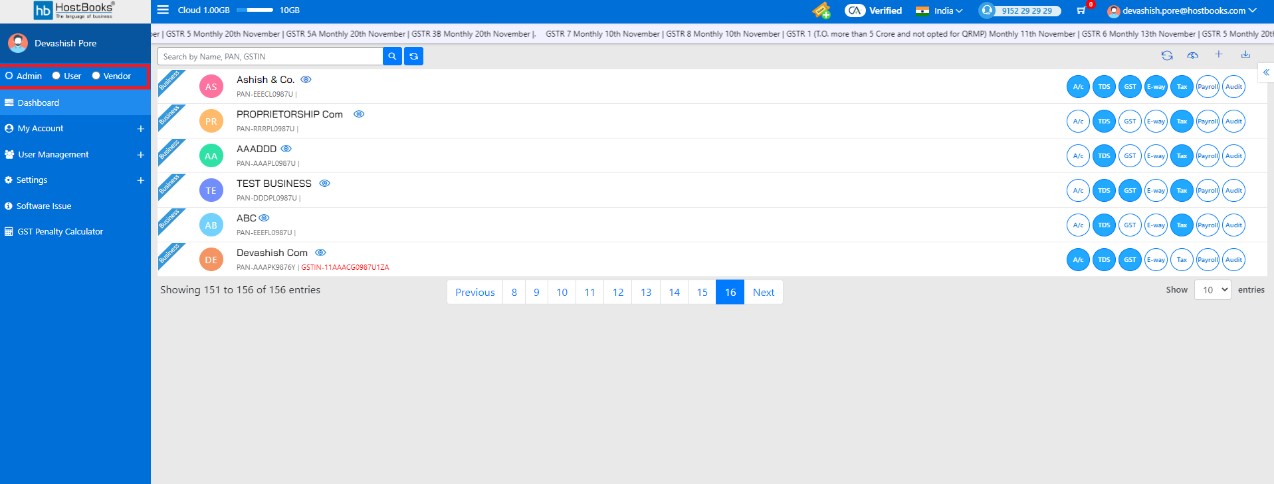
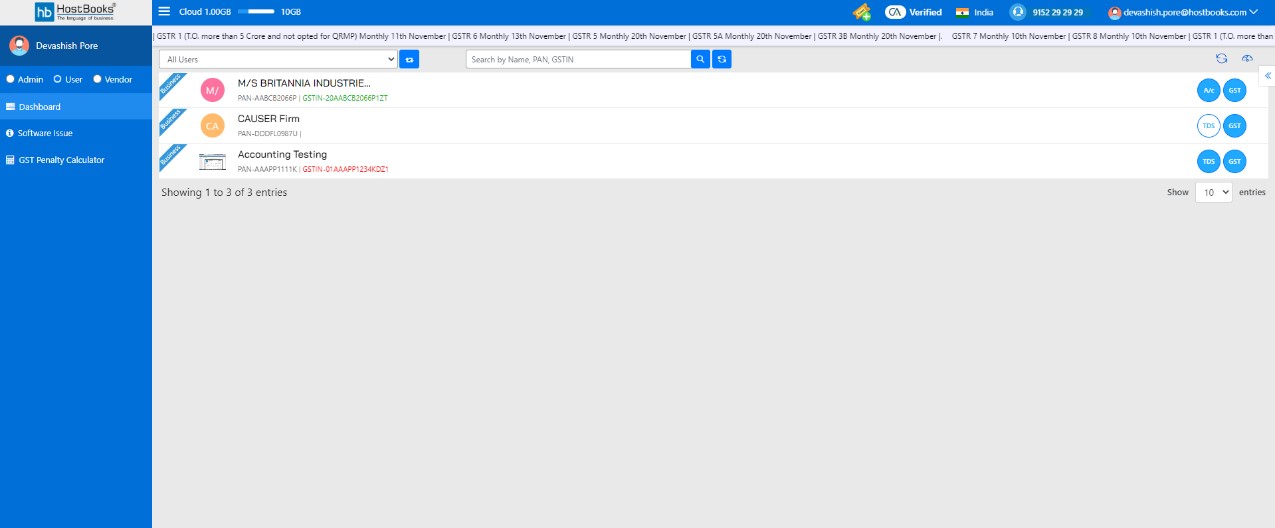
All shared Business will be available after clicking on Switch to User. You can see those businesses and can also start working.
How can I access My Account?
Click on My Account. The following option are visible:
- My Subscription
- HostBooks Plans
- Billing History
- My HostBooks Cloud
- Inactive Business List

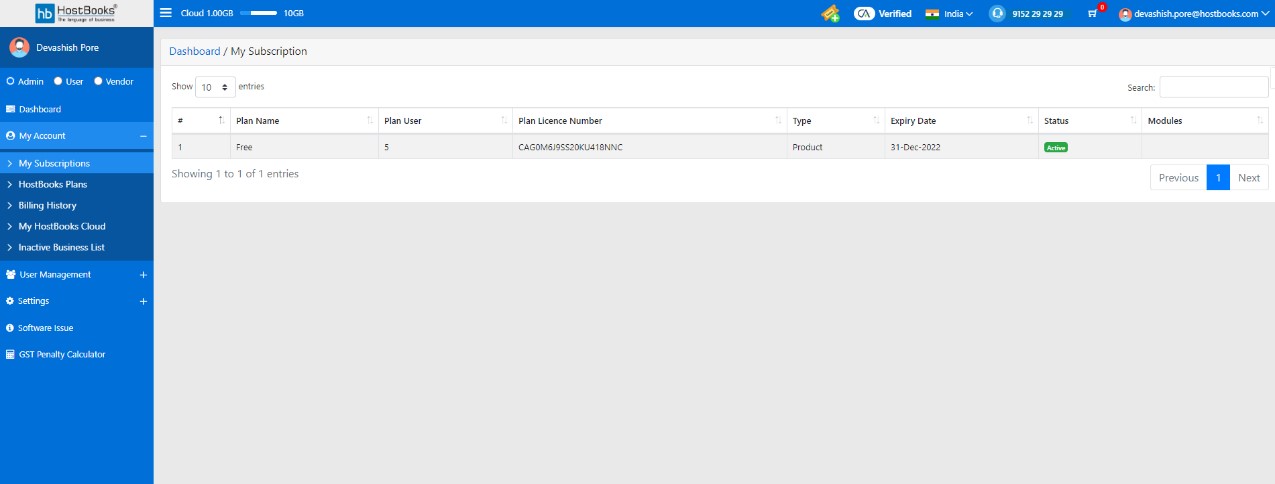
- Click on My Subscription. List of all subscriptions which you have purchased will available here.
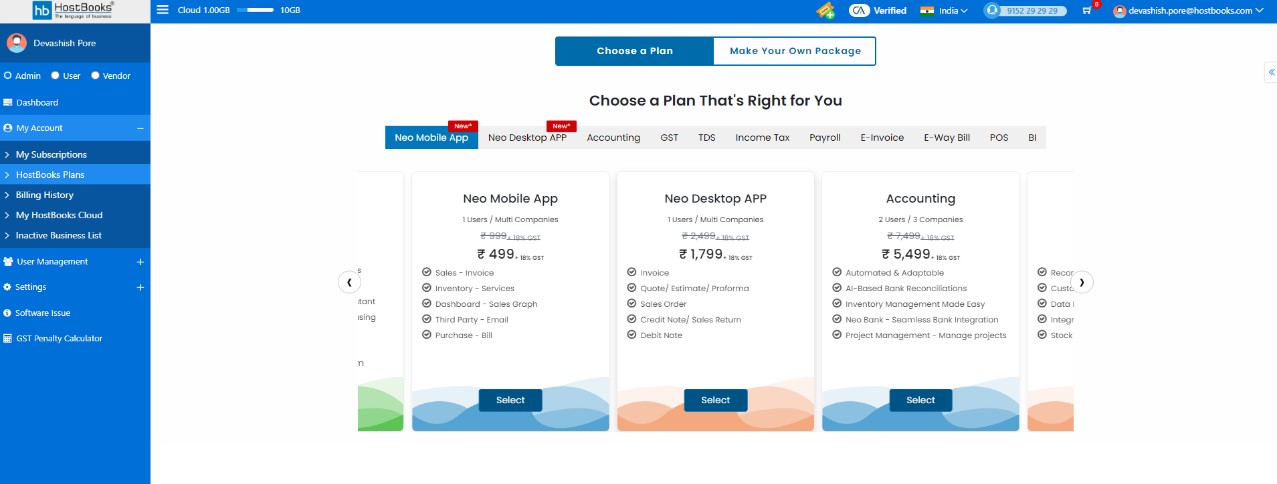
- On click on HostBooks Plans you can see plans and price.
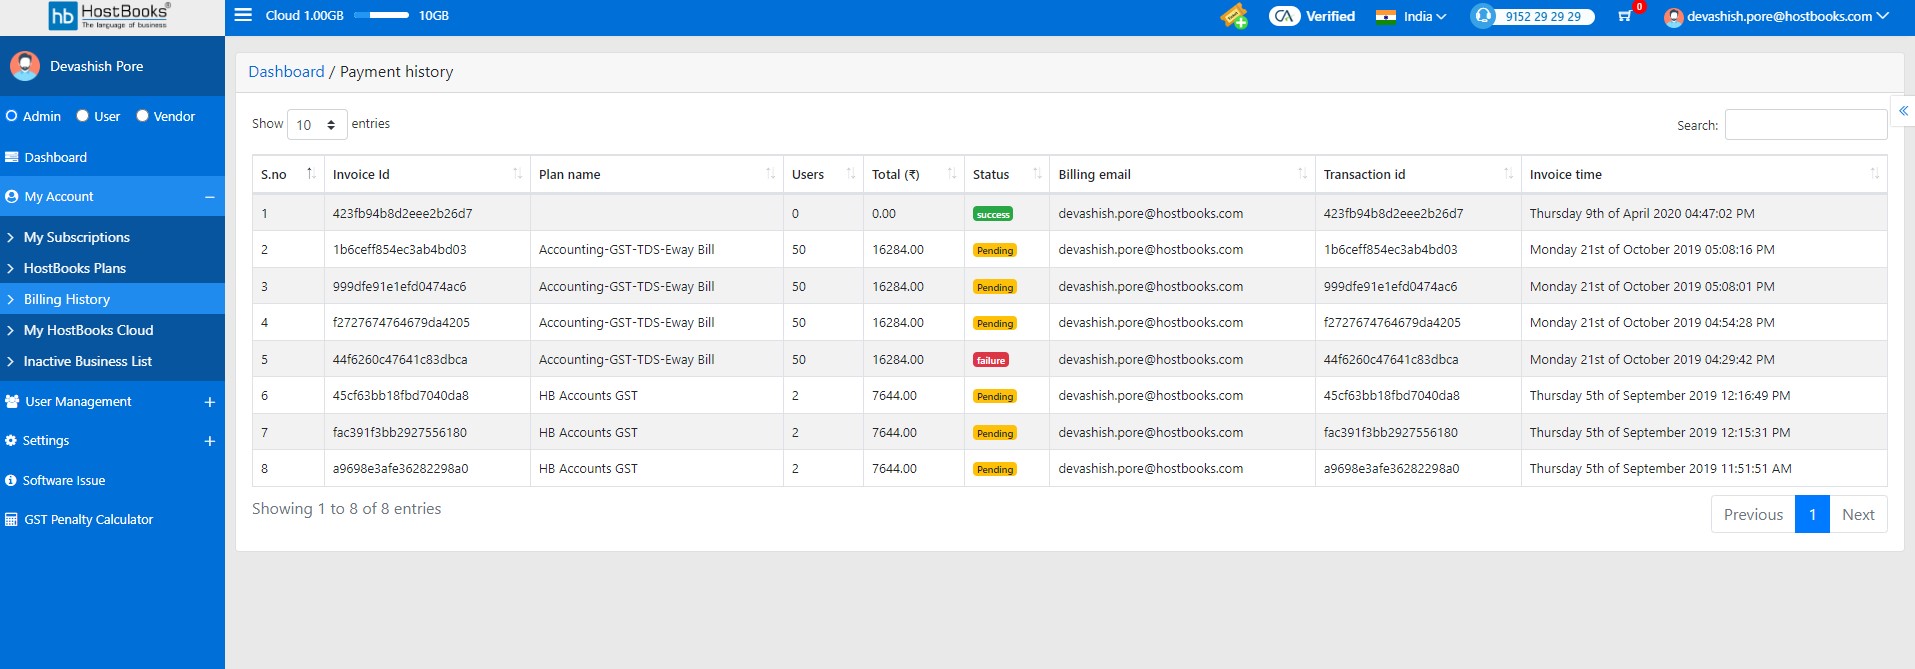
- After clicking on Billing History, all Billing history list will appear
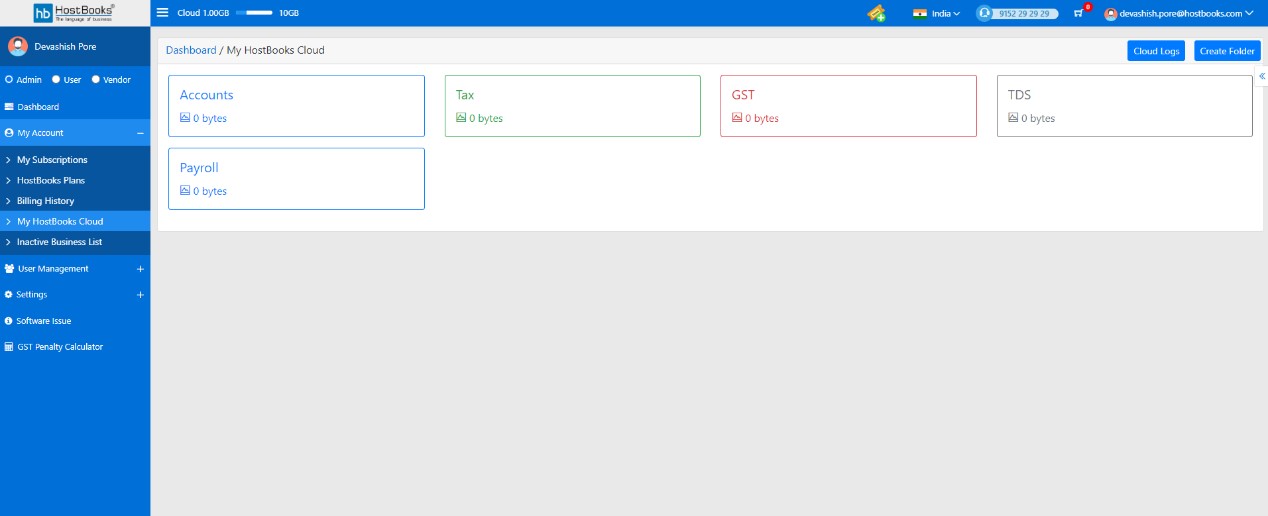
- 4. Click on My HostBooks cloud. You have 10 GB storage space in cloud. You can upload your documents and can also create folder through "Create Folder" option.
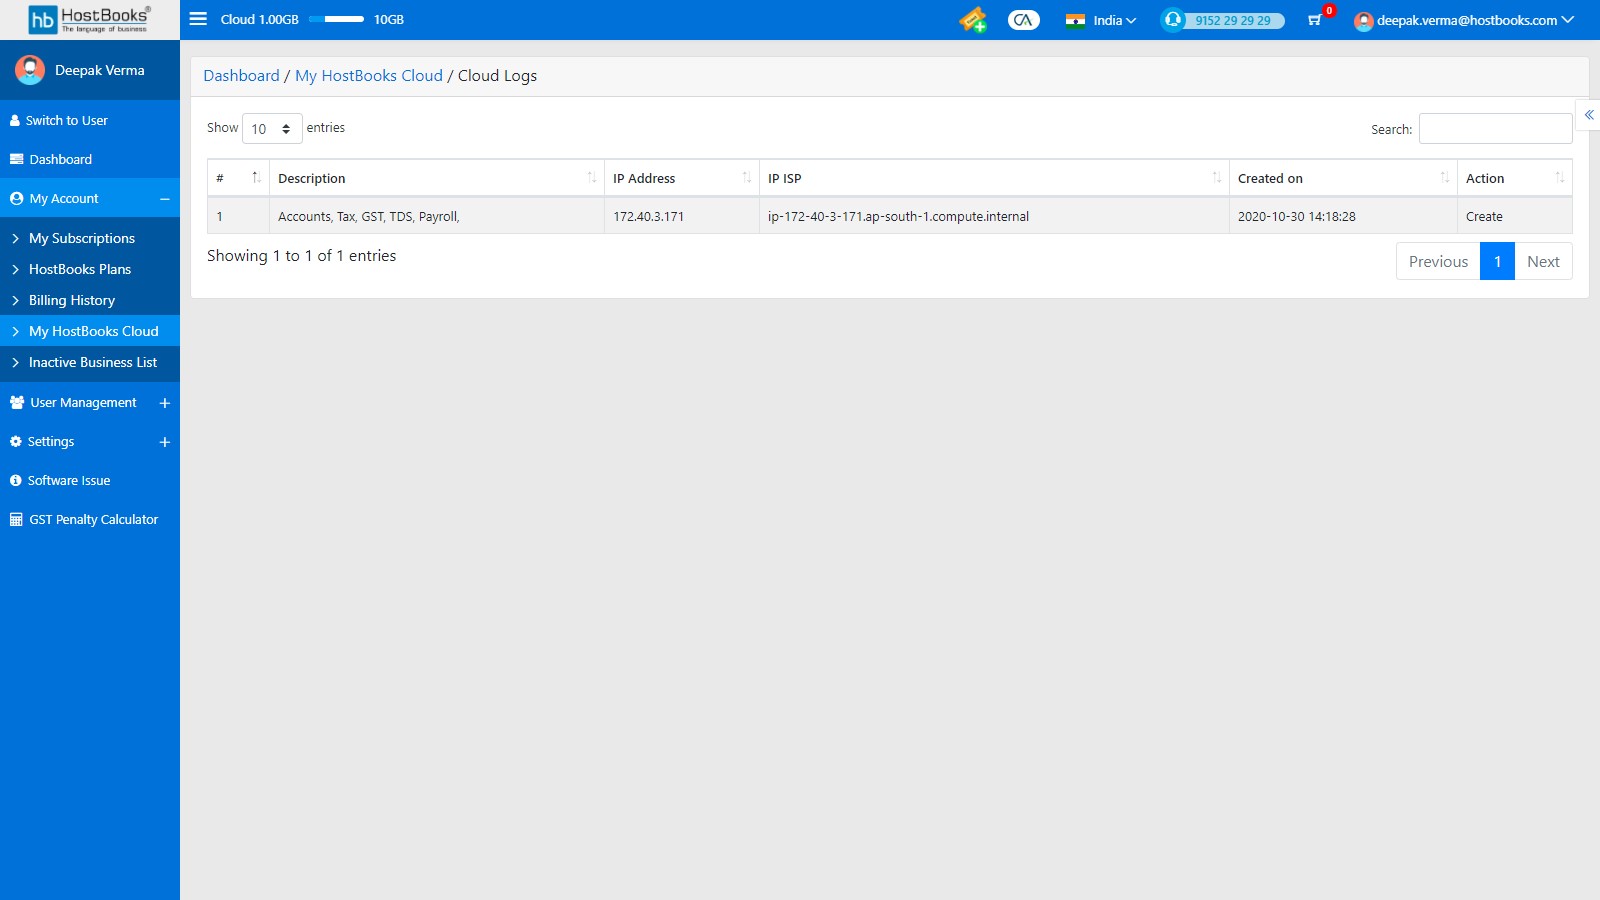
After clicking on Cloud logs, you will be able to see all the cloud logs
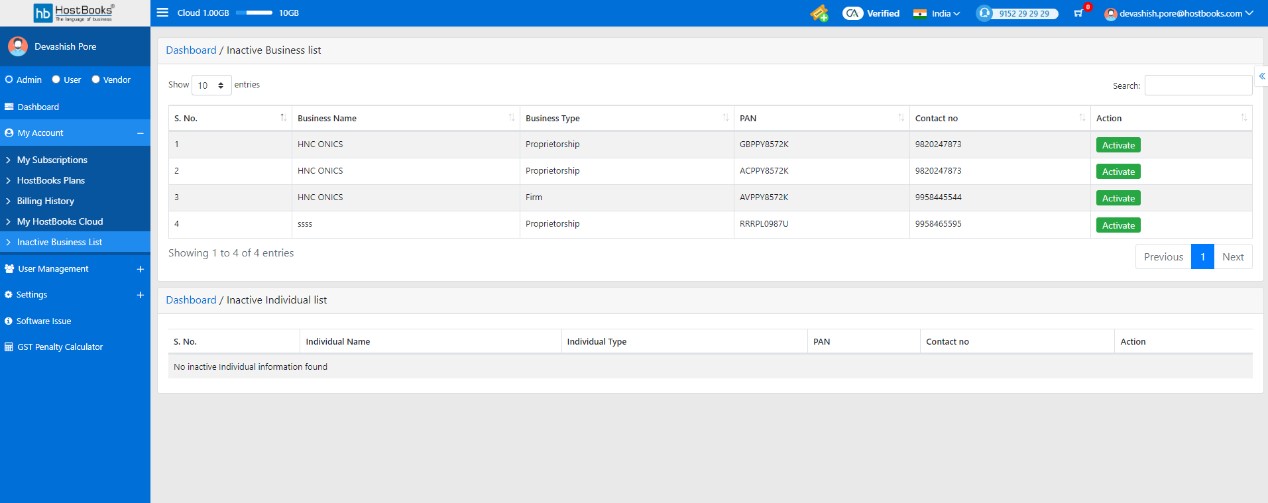
- After clicking on Inactive Business List, list of all businesses will appear which are inactive
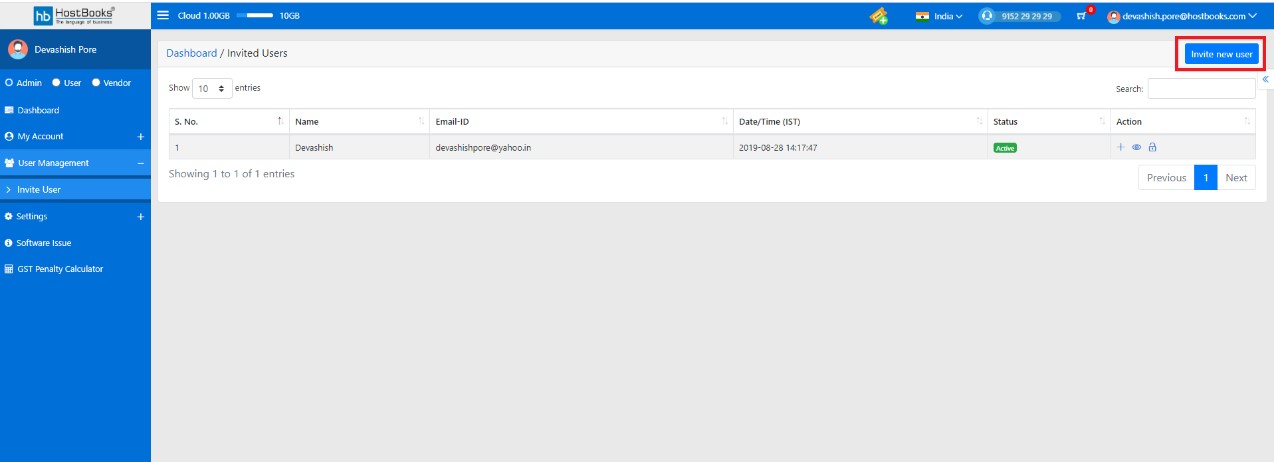
How can I manage Users?
Click on User Management
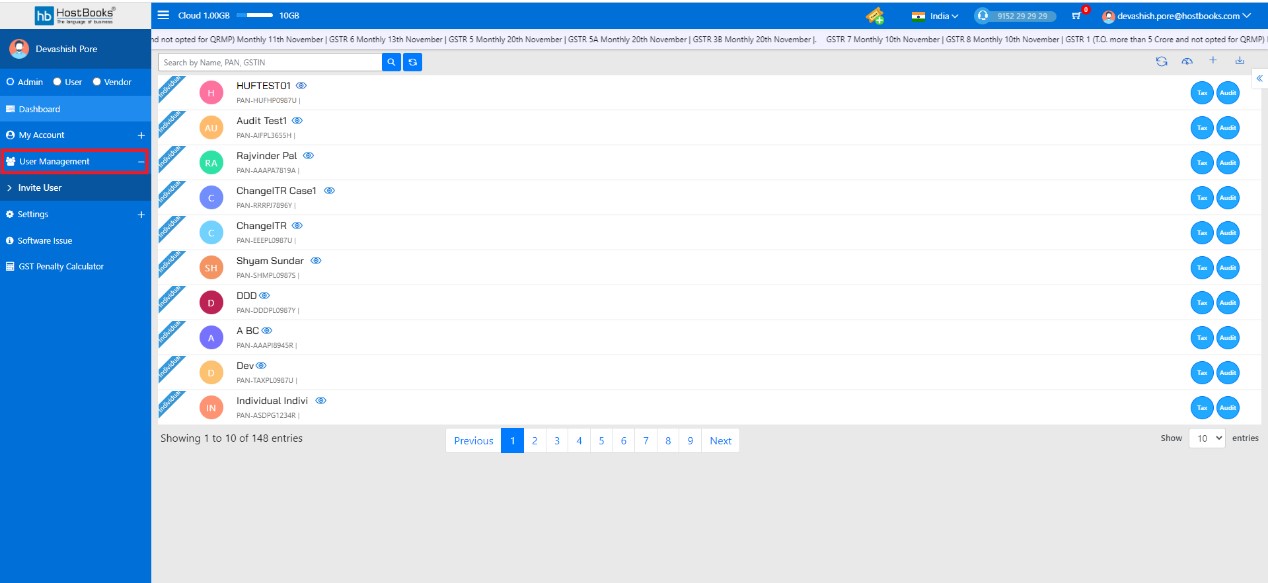
After clicking on User Management, User list will appear. You can Invite New user to access the business which you have created. You can also add the business through click (+) icon.
You can Add New Business by selecting Business from dropdown.
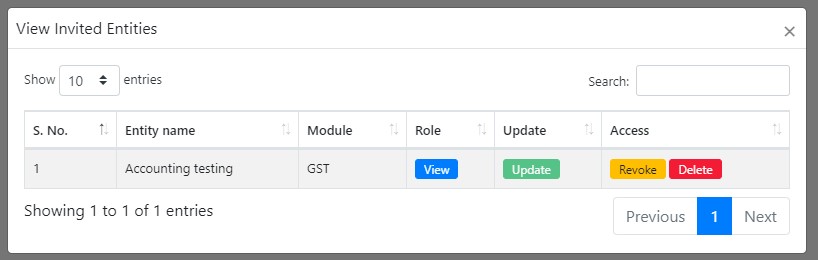
Click on Eye icon, in order to view, update or Revoke the access given to the user

After clicking on Eye icon, you can see the details of sharing business and role. You can update, revoke, delete the access of that business.
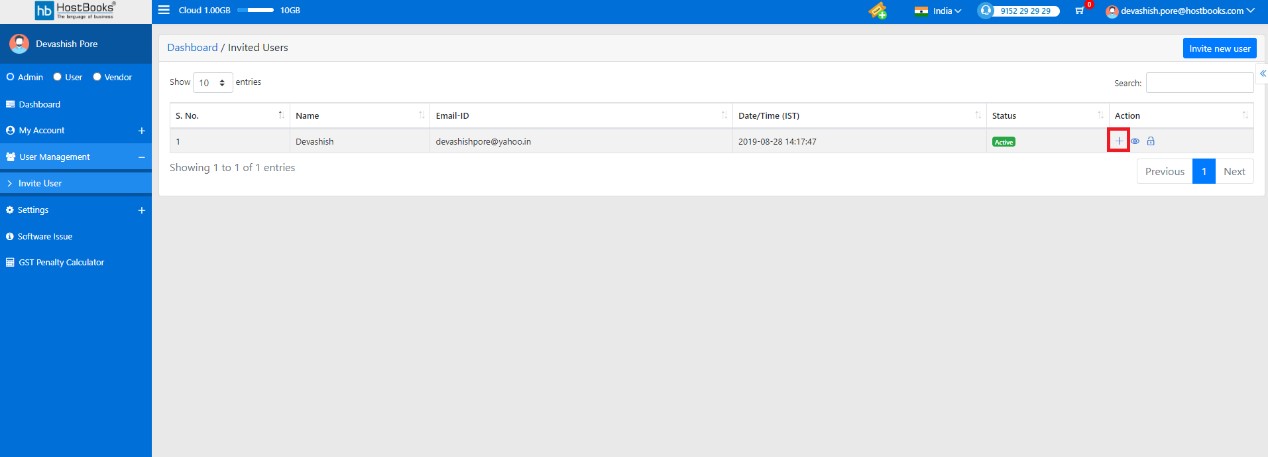
Click on Invite New User, in order to Invite New user
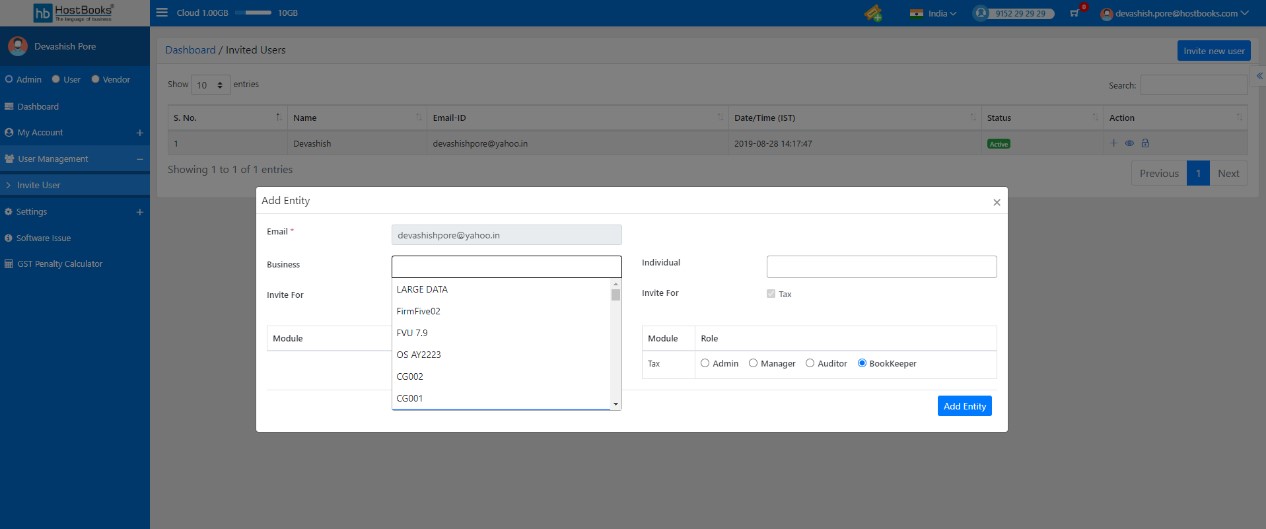
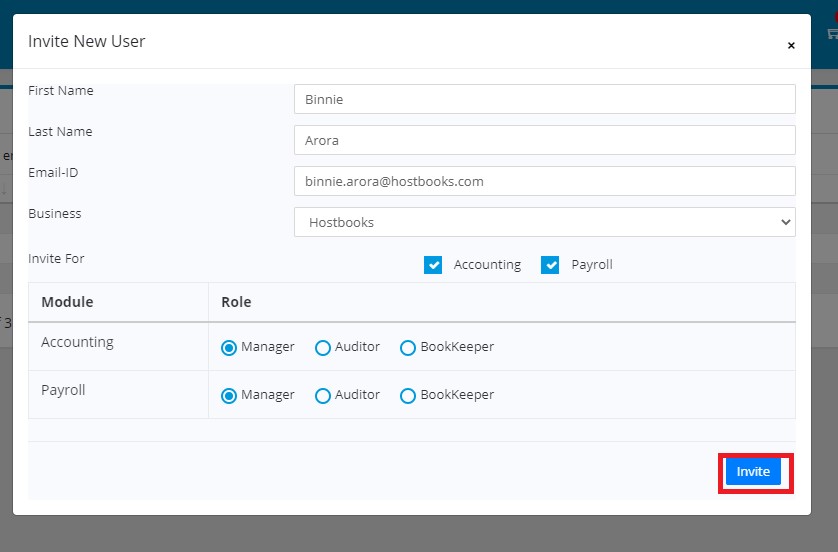
After clicking, Invite New User form will be opened. You are required to fill the following details:
- First Name
- Last Name
- Email-ID
- Business
- Invite For
- Set the Role
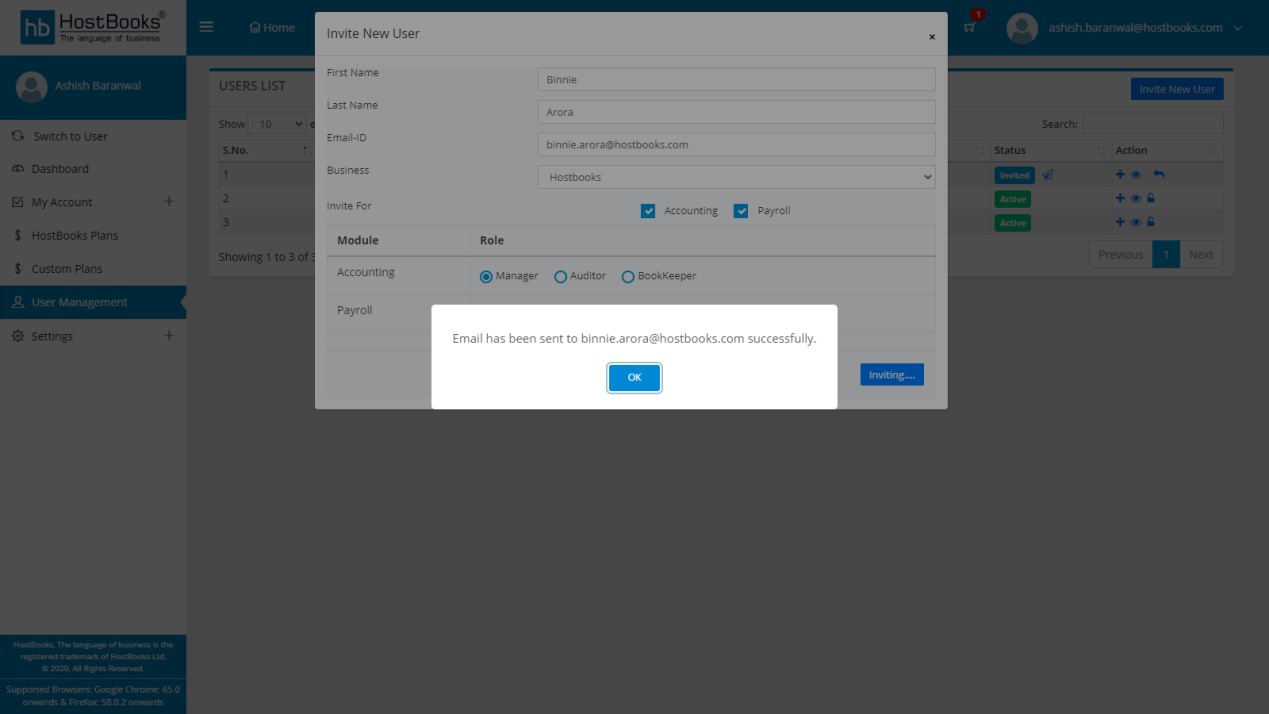
After filling the necessary information, Click on Invite
A message will appear as "Email has been sent successfully"
How can I manage the Settings?
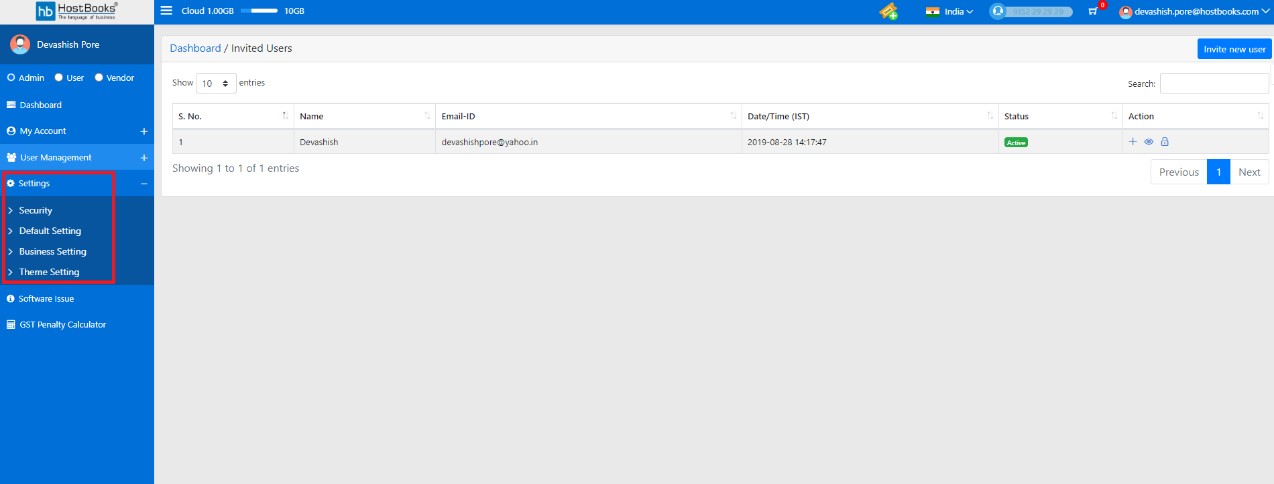
There are three types of settings:-
- Security
- Default setting
- Theme setting
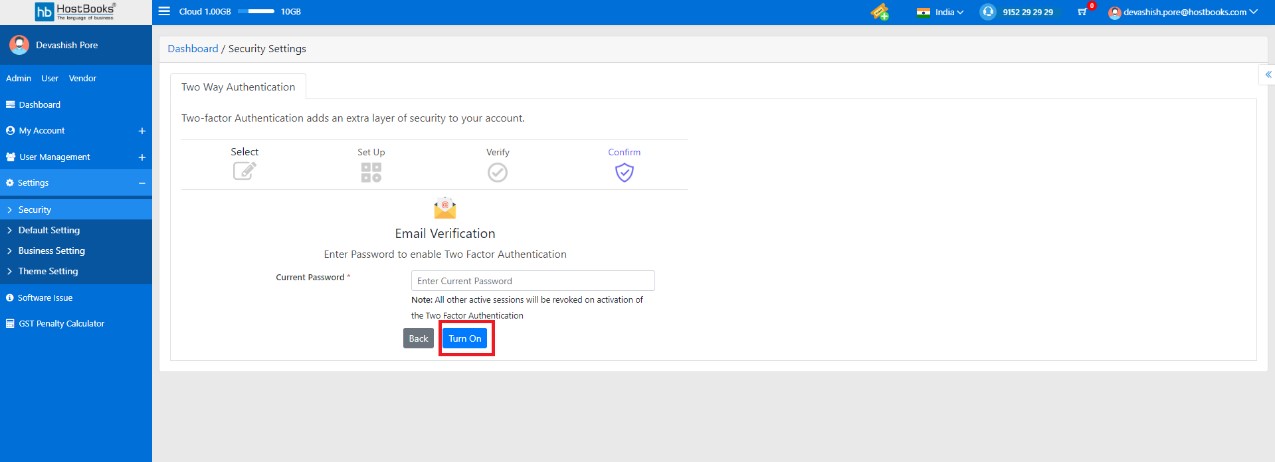
Click on Security. It will navigate to user two ways authentication page
Click on Next.
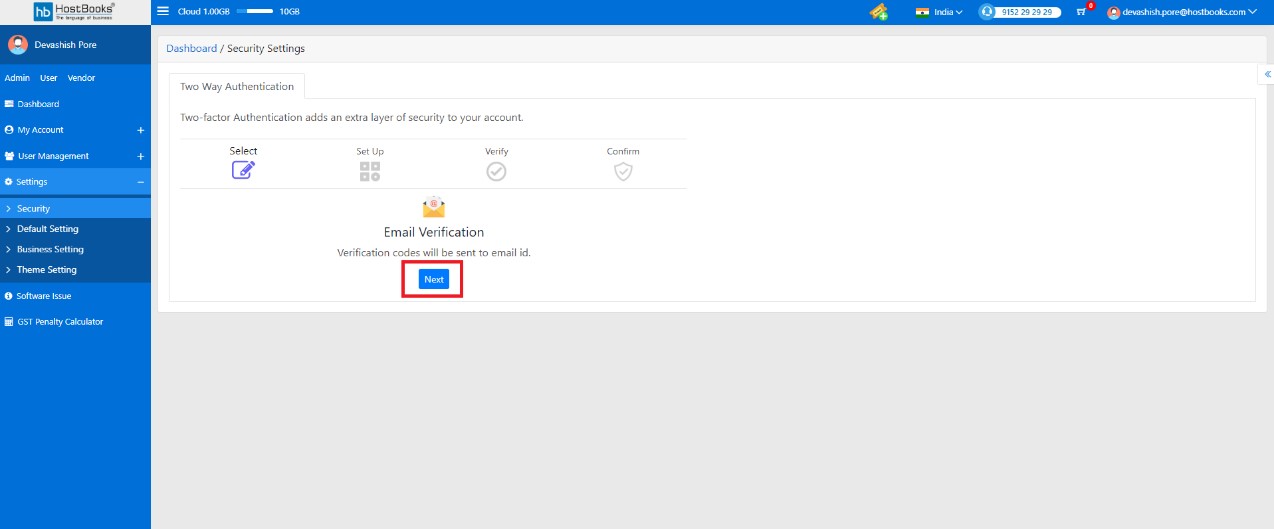
It will redirect to set up page. By default, email id will appear, click on Next
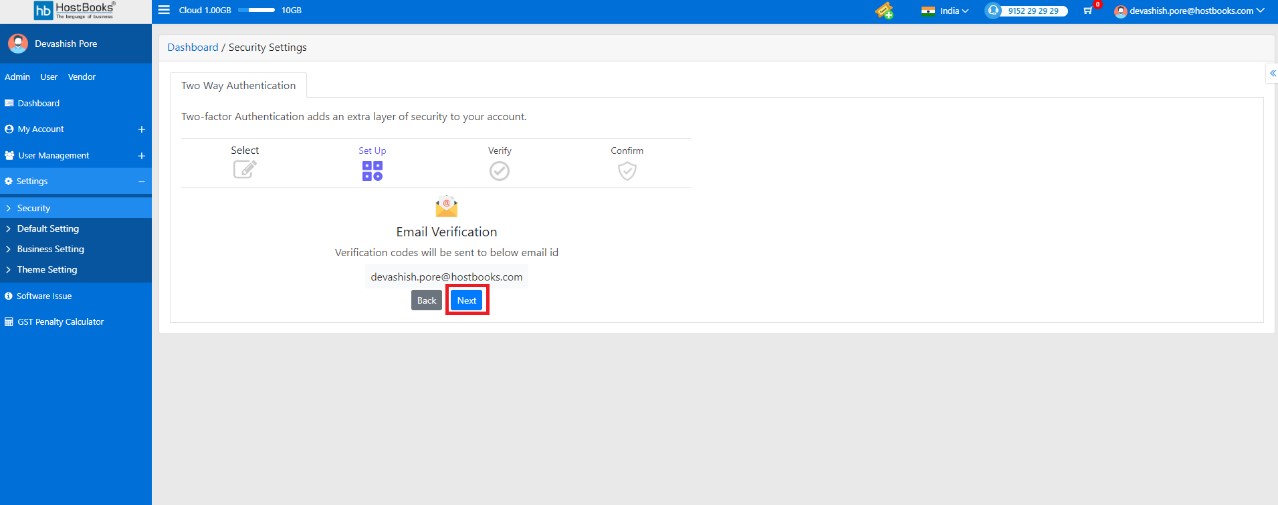
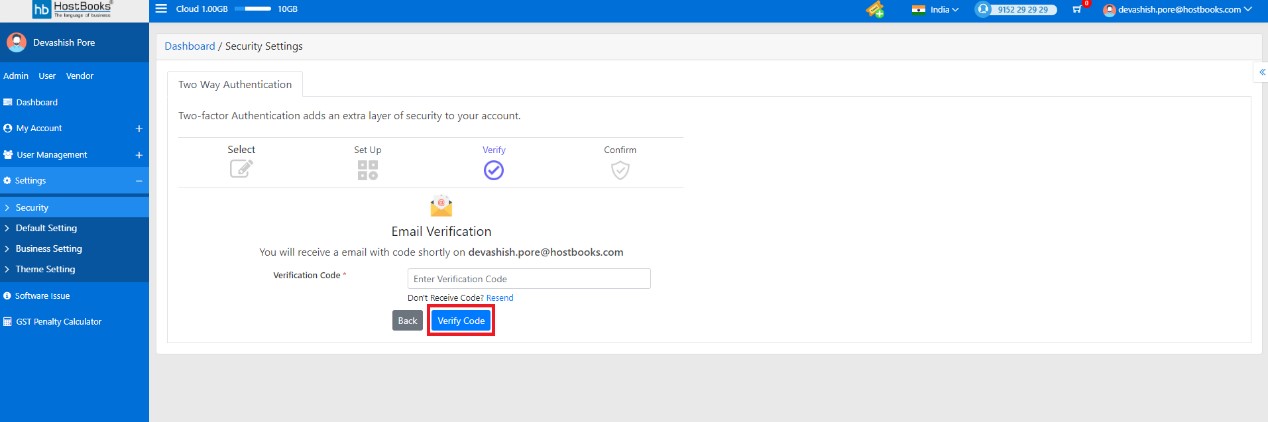
It will redirect to Verify page. A verification code will be sent to your email id. Enter the verification code and Click on Verify Code.
It will redirect to Confirm page. Enter the confirm password and click on Turn on.
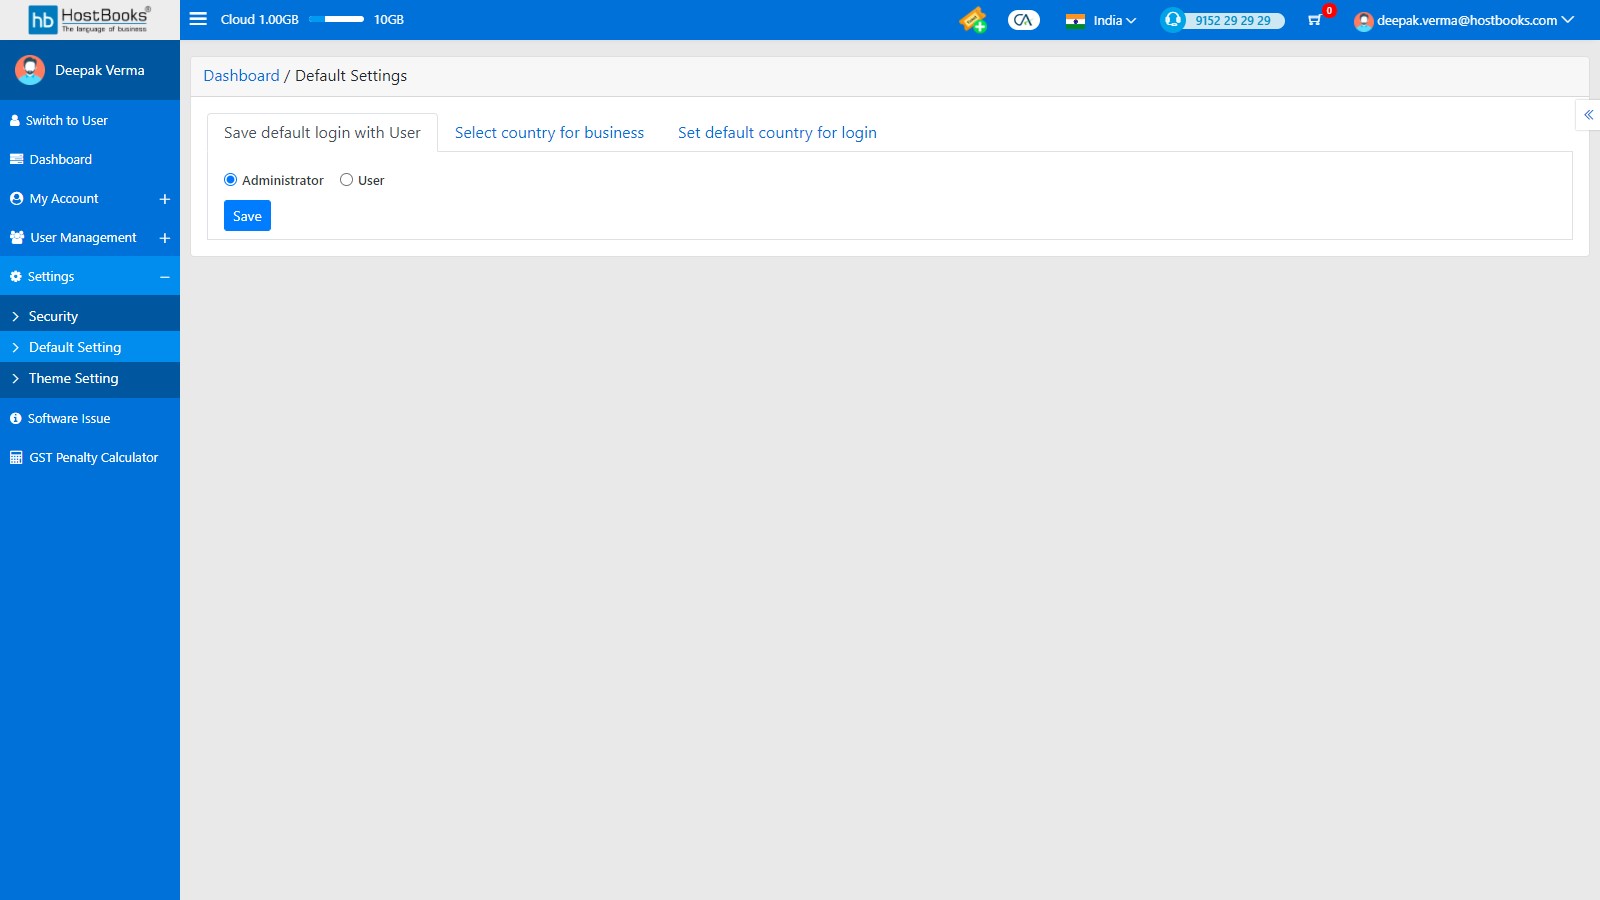
Click on Default Setting.
- You can save default login with "Administrator" or "User" as per your convenience
- You can select country for your business
- Set the default Country for your business.
Click on Theme setting, you can set your own theme
- Admin Theme Setting- this will set the theme for Admin
- User Theme Setting - this will set the theme for User
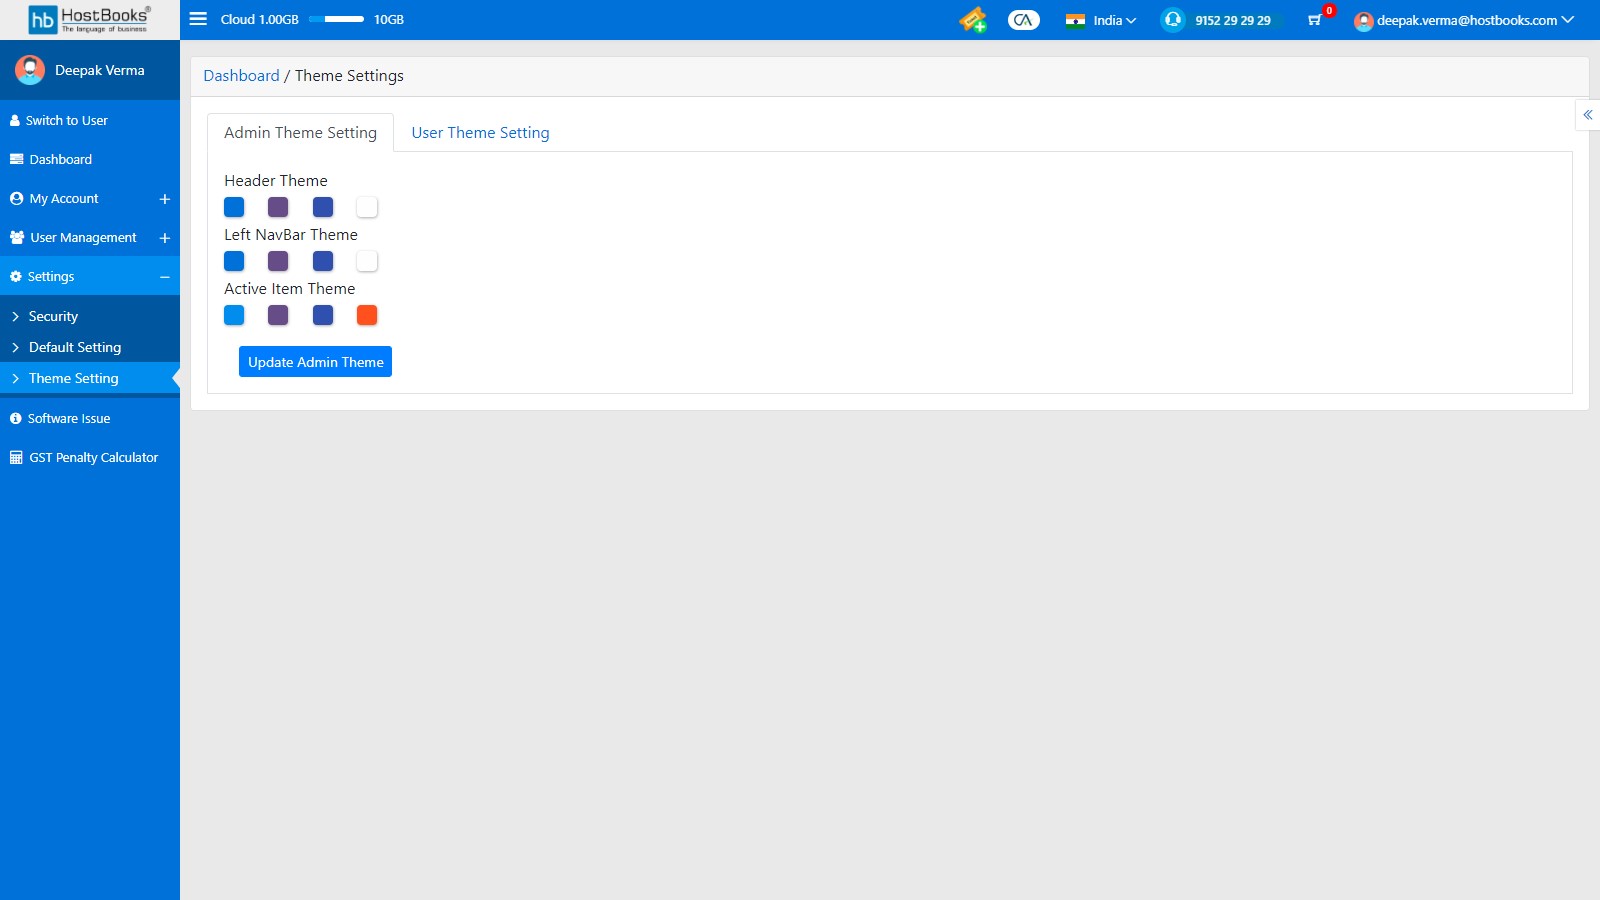
After select color click on Update Admin Theme button.
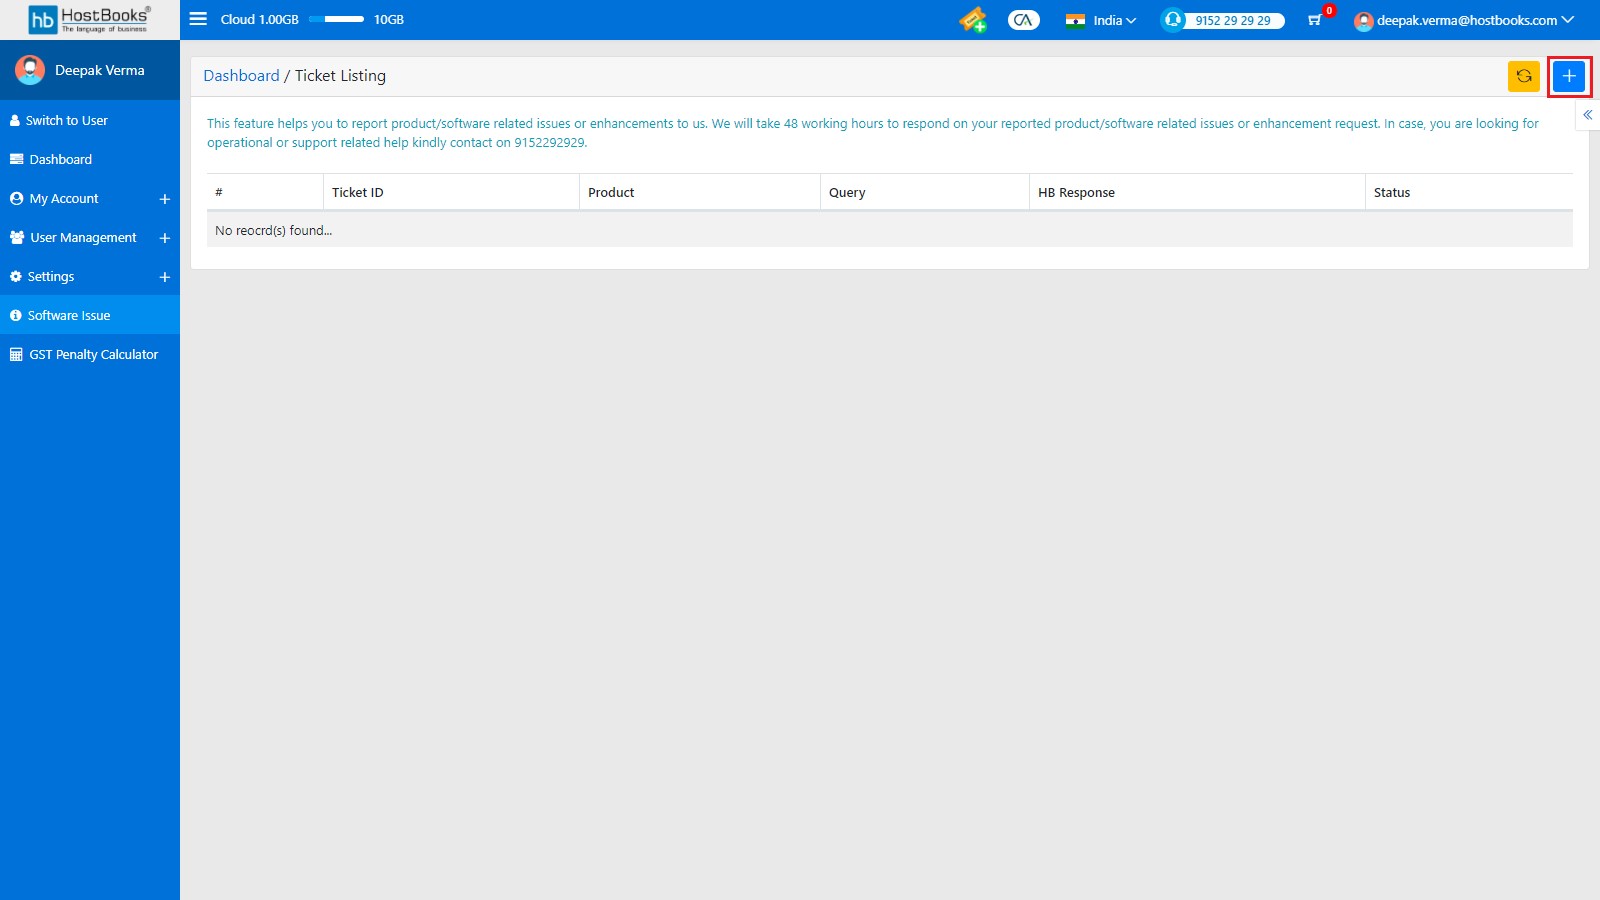
How can create Software issue?
Click on Software issue to create a ticket or issue.

Click on + button to create new issue.
You are required to fill the following details
- Bug Type
- Product
- Query
- Related URL
- Description
- Modules
- Priority
- Attachment
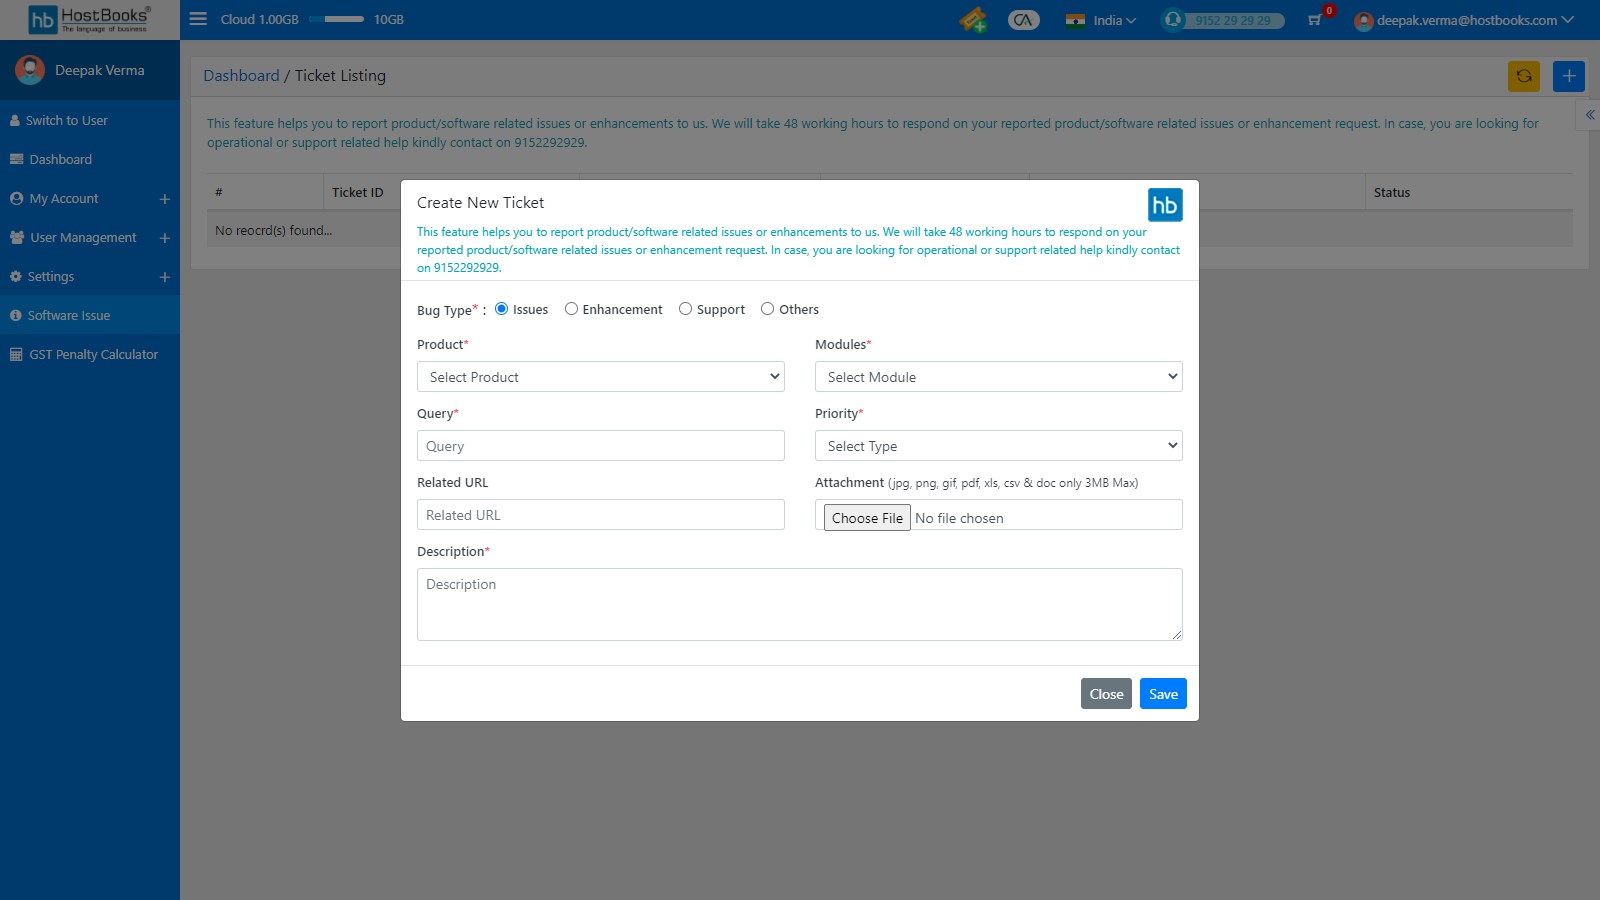
After fill the necessary information click on save button.
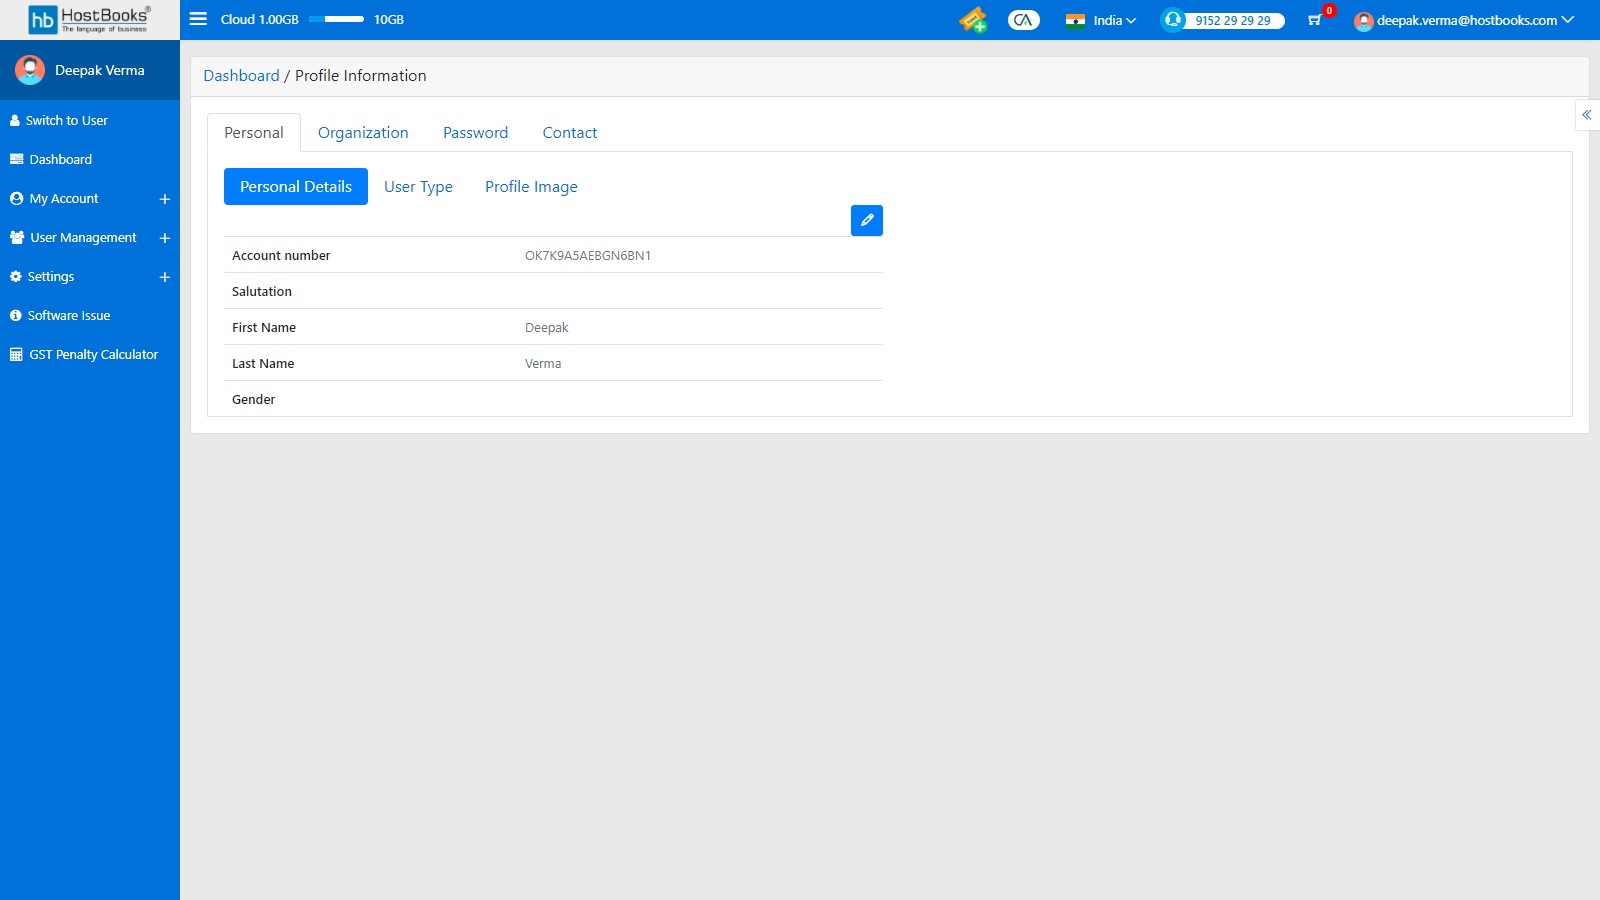
How can I update Profile?
Take the mouse on Email ID and Click on Profile.

It will redirect to the Edit profile page from where you can update the following:-
- Personal
- Organization
- Password
- Contact
- Click edit icon on Personal
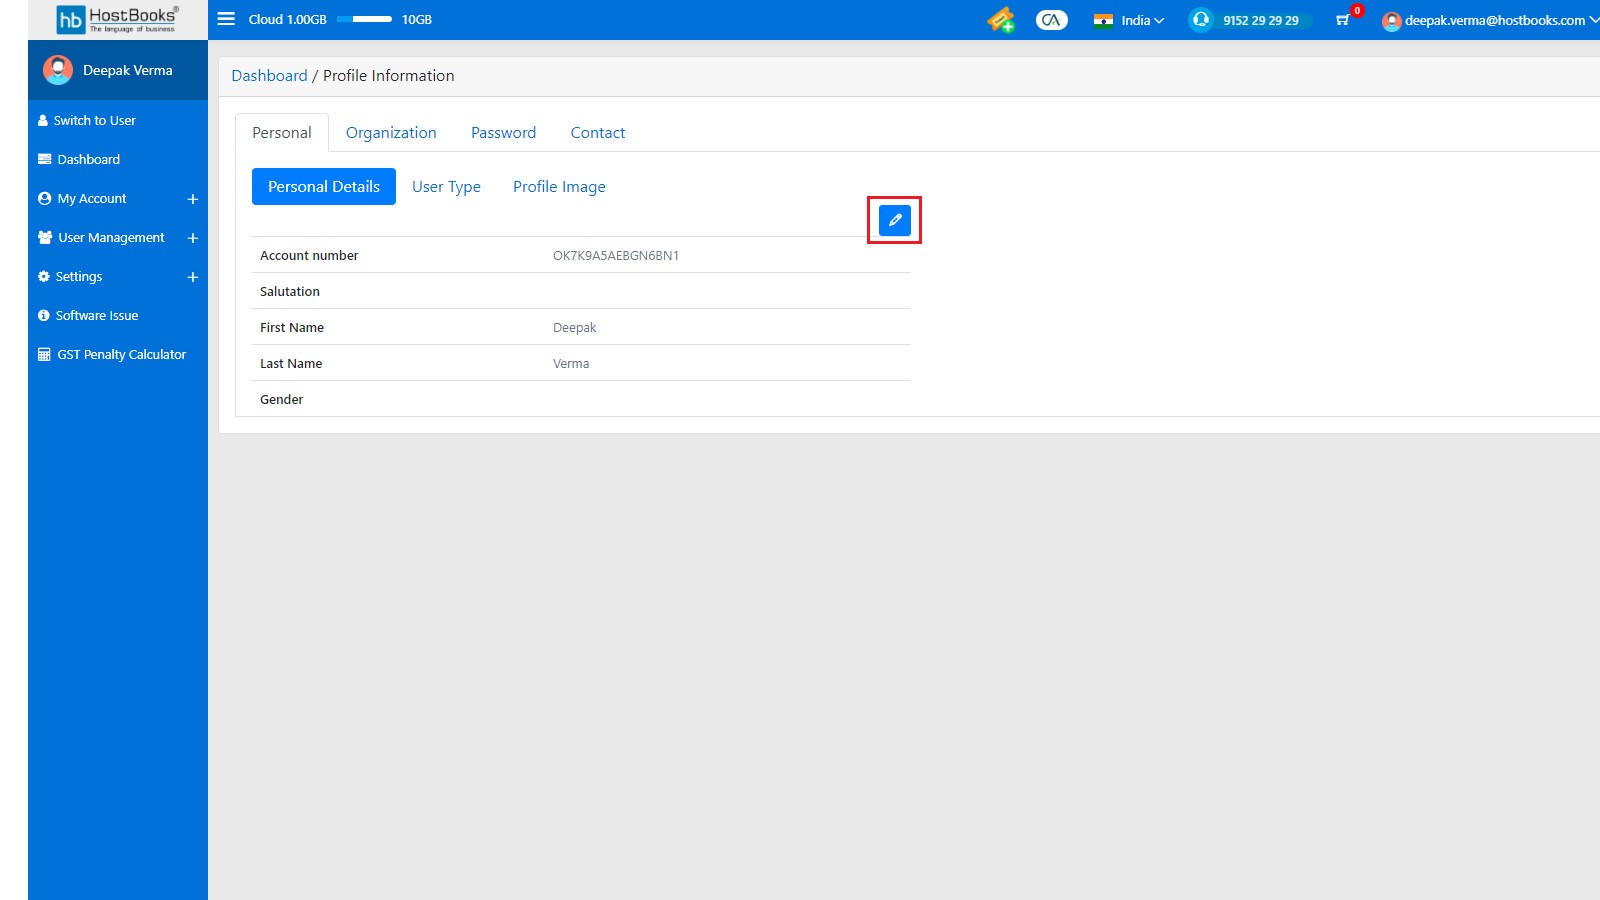
You can Edit/Update the following fields
- Salutation
- First Name
- Last Name
- Gender
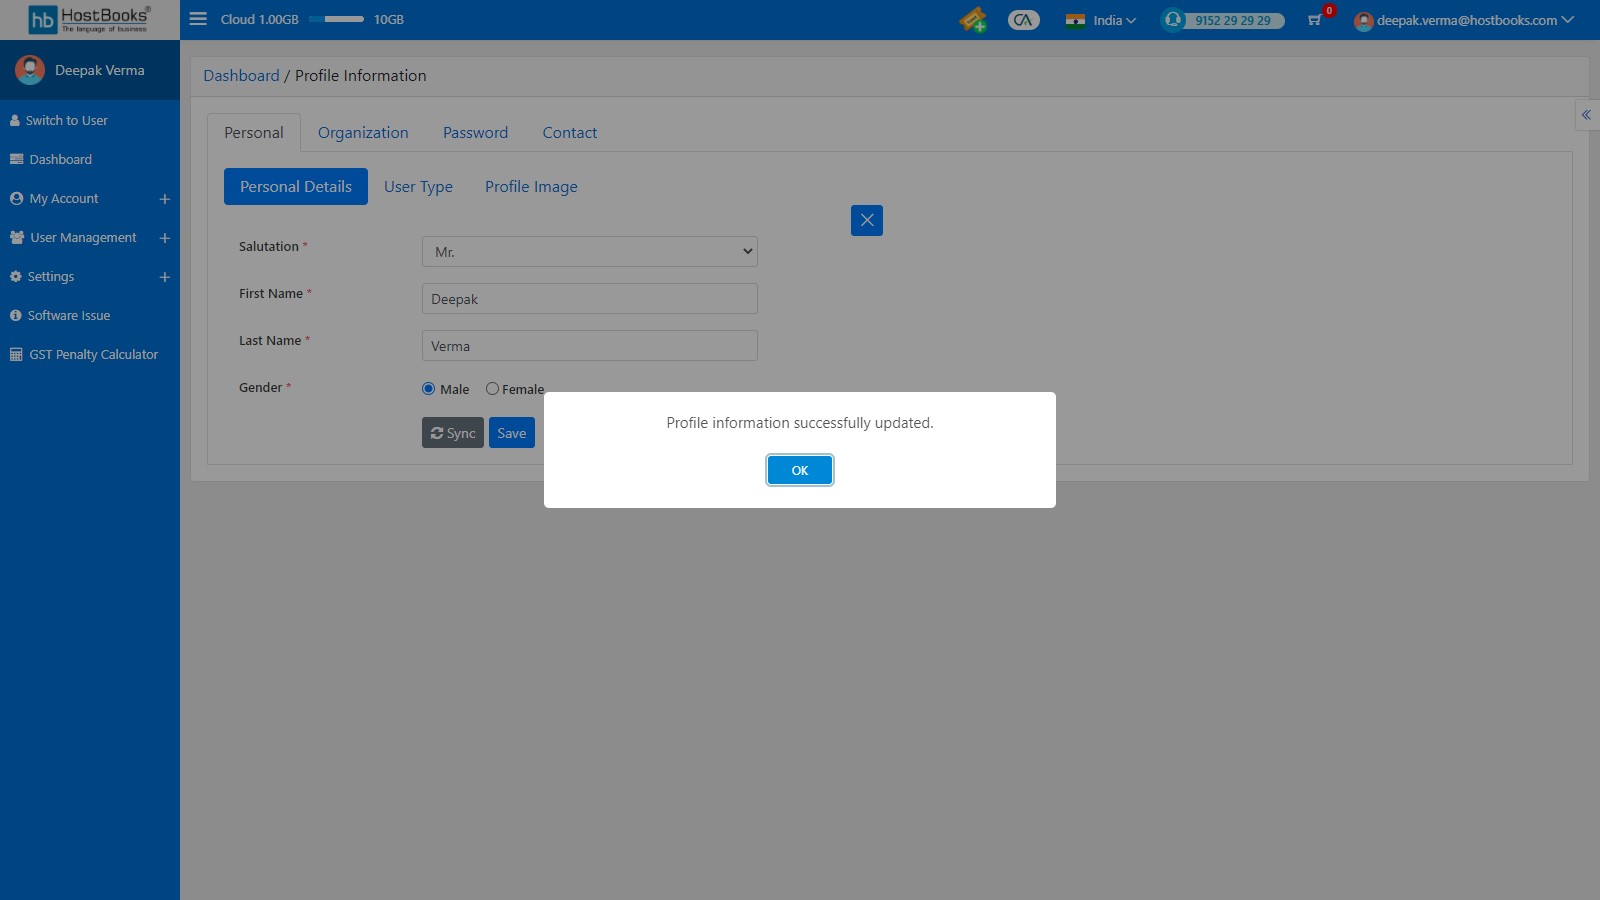
After updating Click on Save
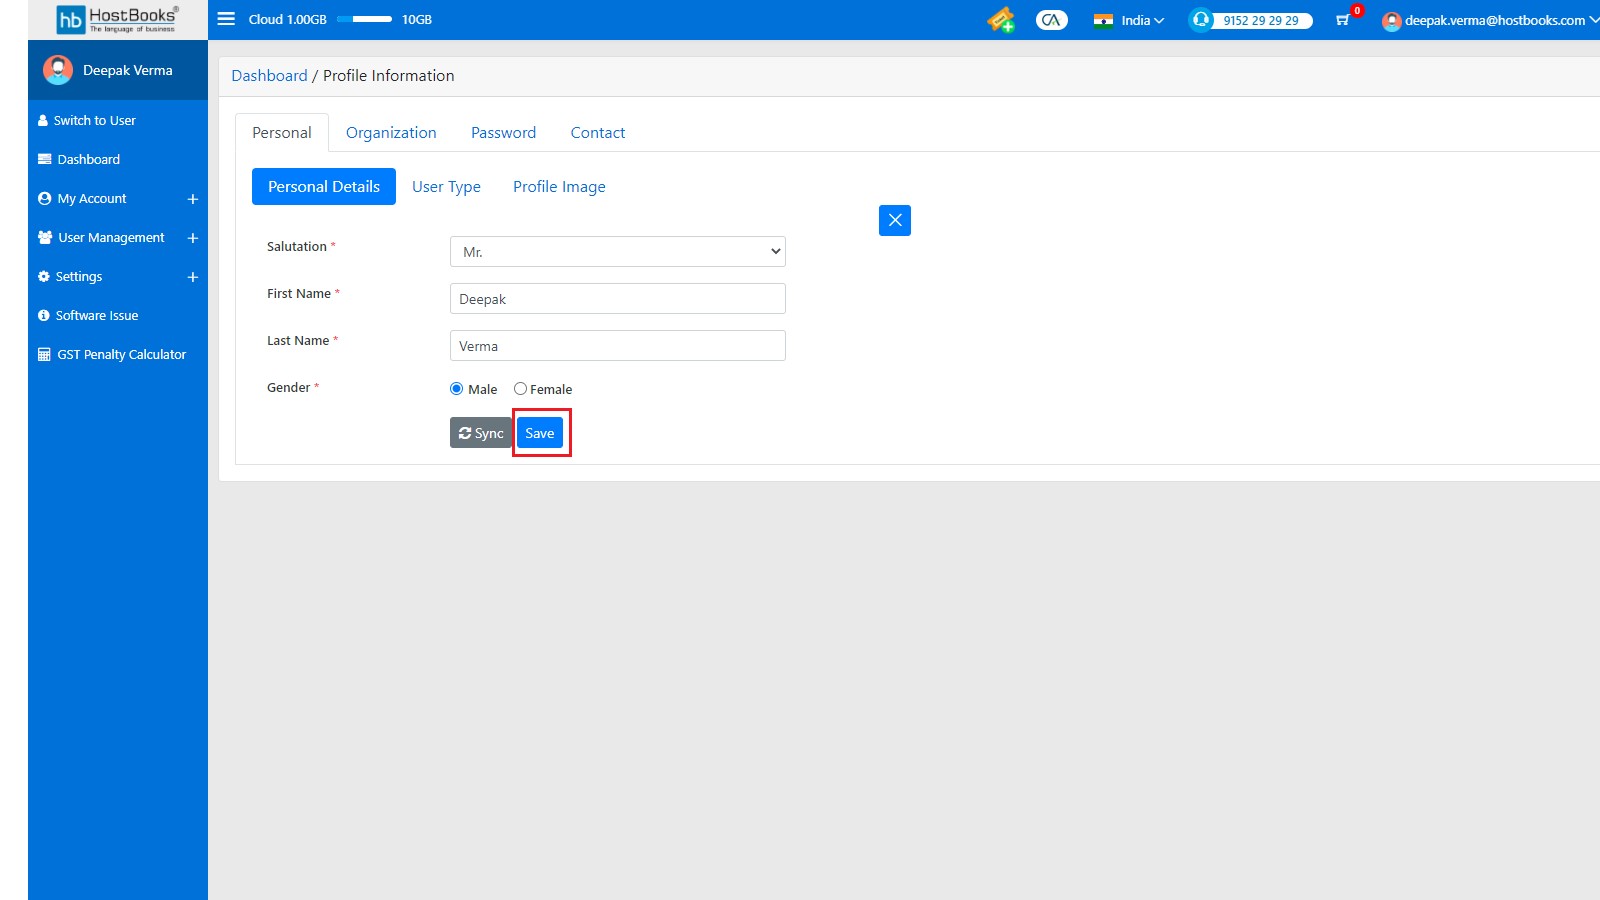
A popup message will appear as "Profile information successfully updated".
- Navigate to Organization and click on edit icon
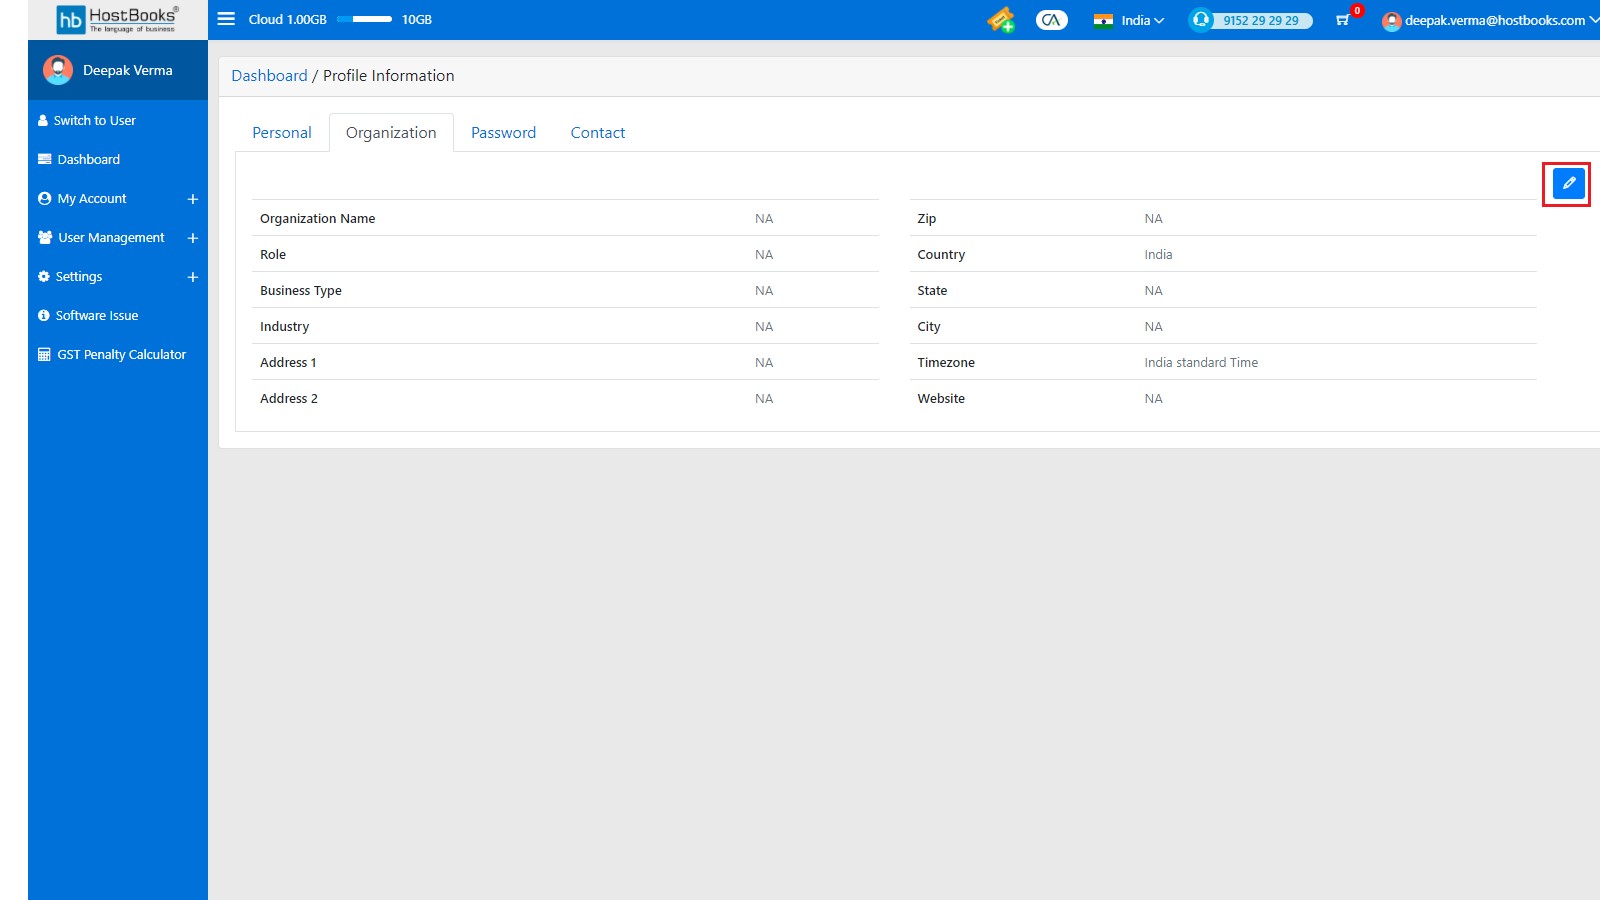
You can update the following fields
- Organization Name
- Role
- Business type
- Industry
- Address 1
- Address 2
- Zip
- Country
- State
- City
- Website
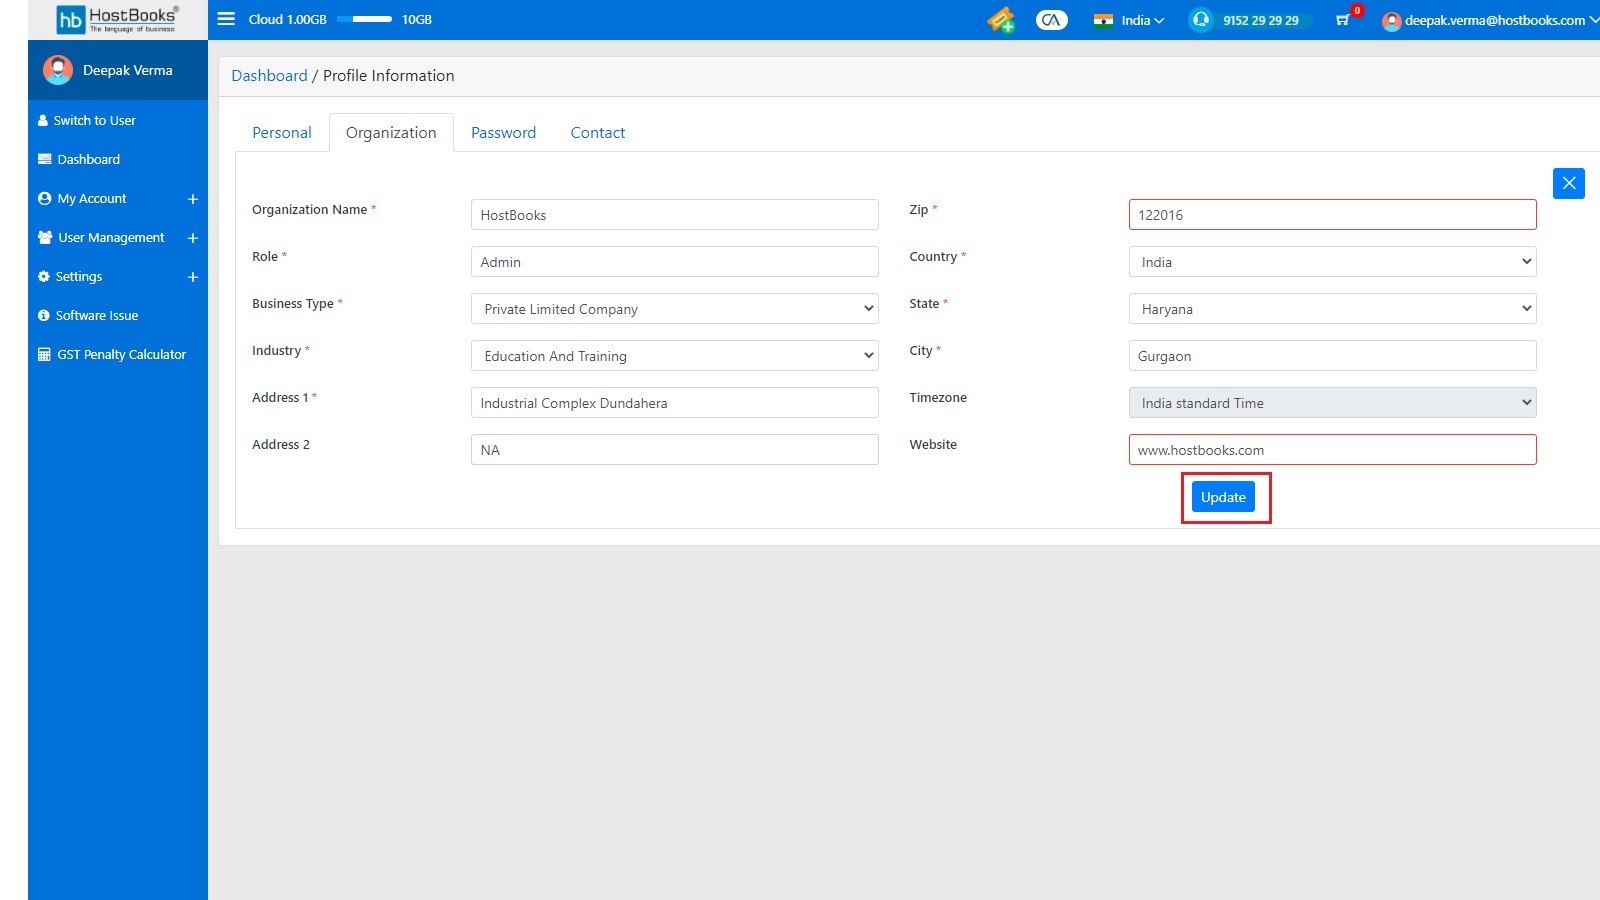
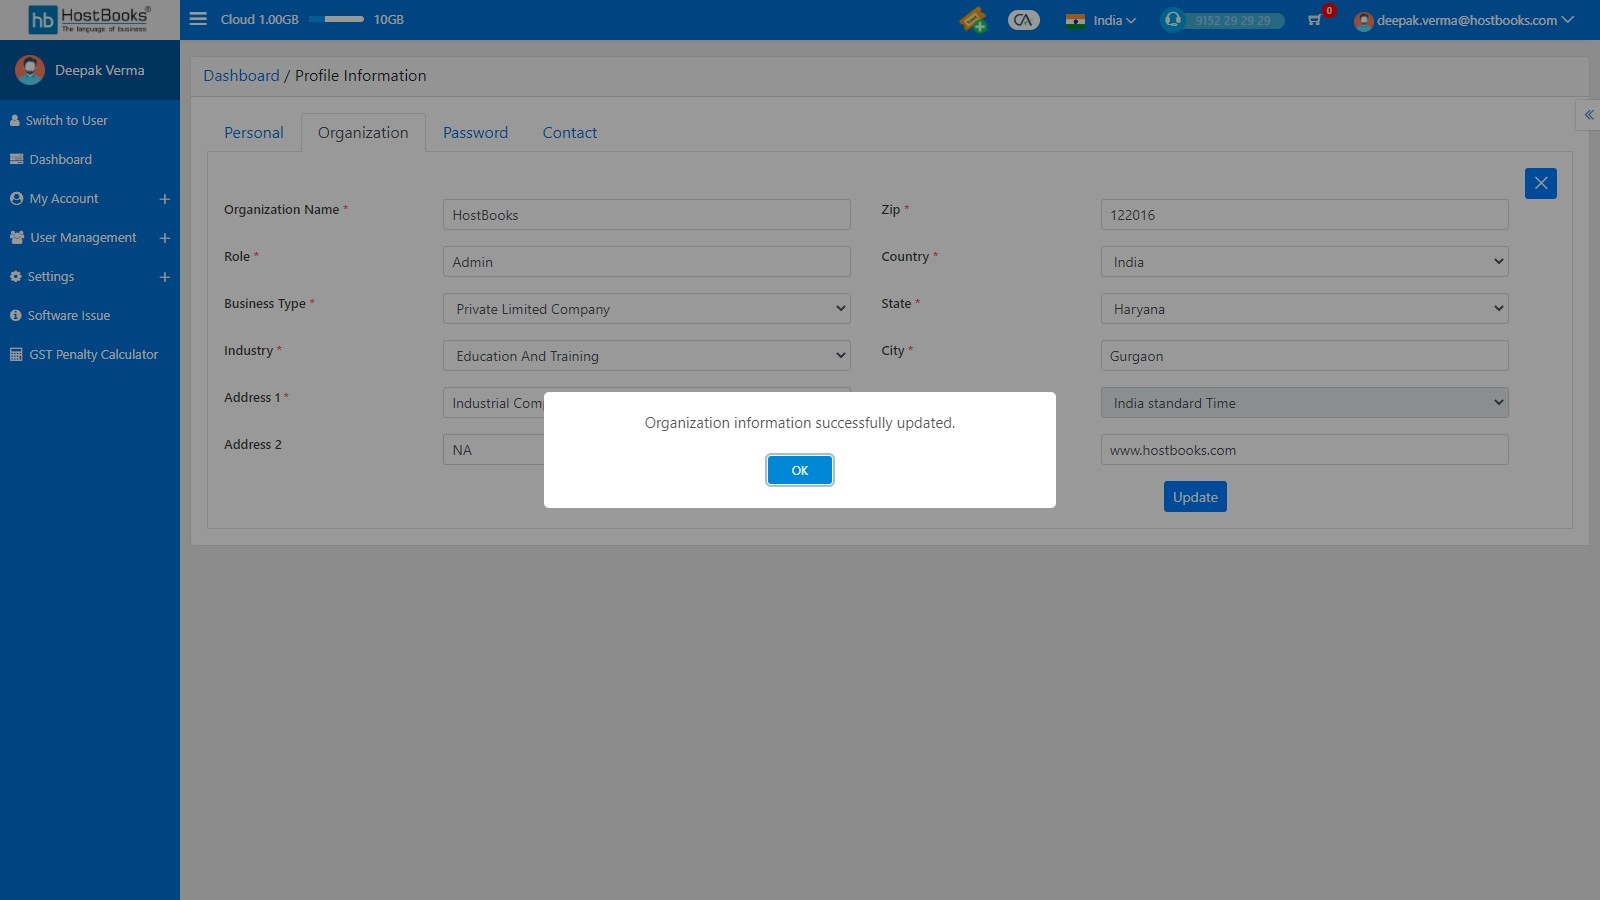
A popup message will appear as "Organization information successfully updated".
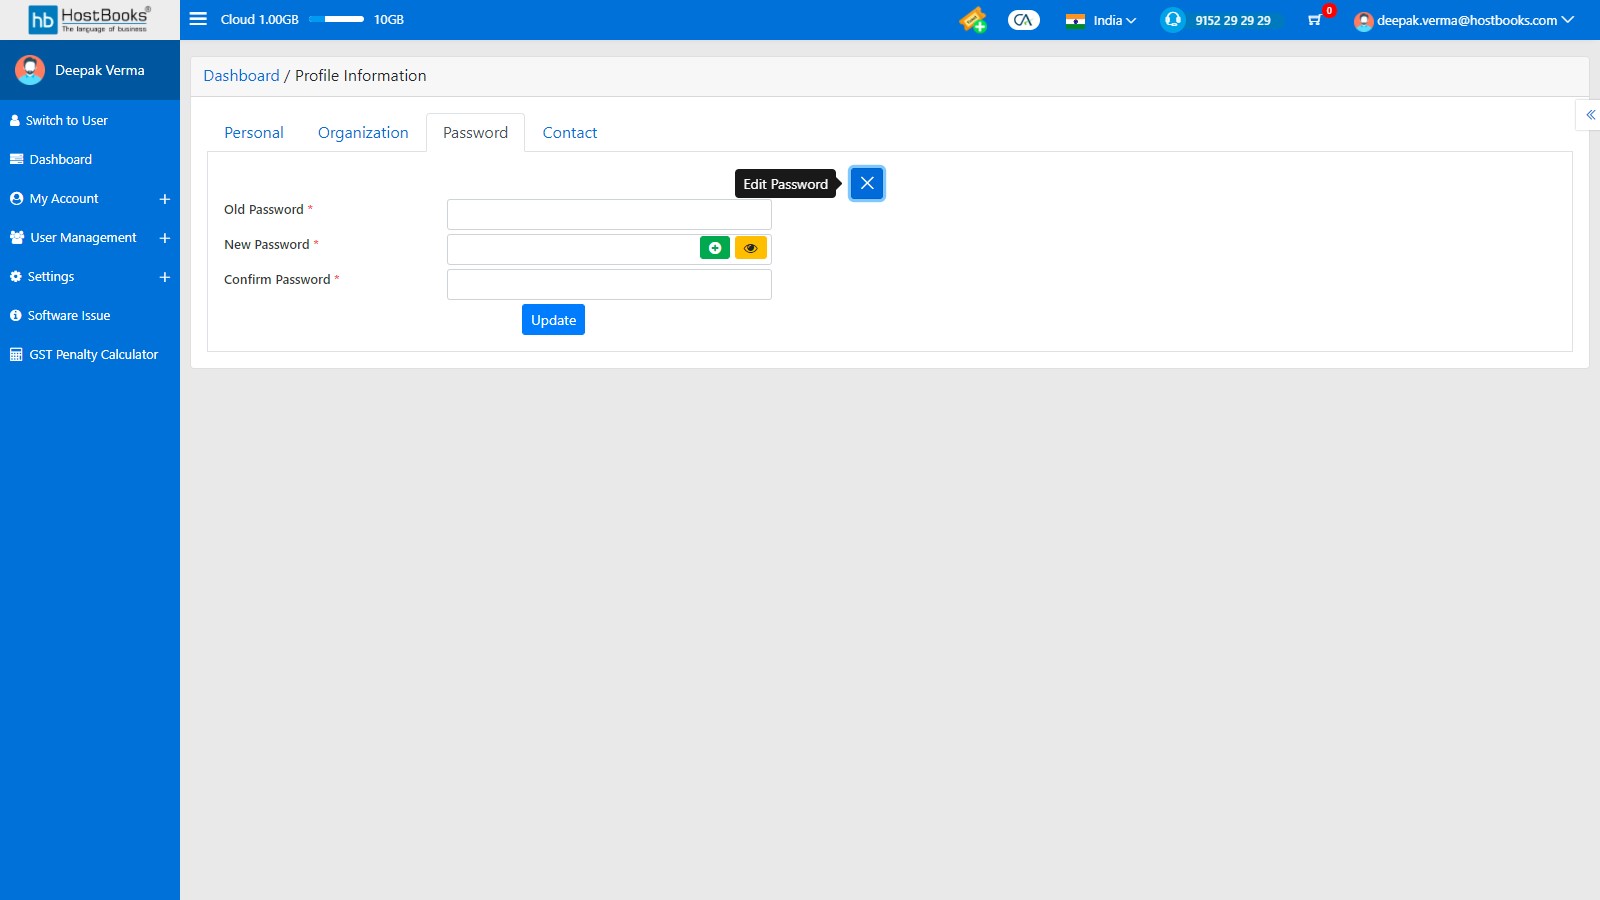
- Navigate to Password and click on edit icon
Enter the following details:
- Old Password
- New Password
- Confirm Password
Click on Update
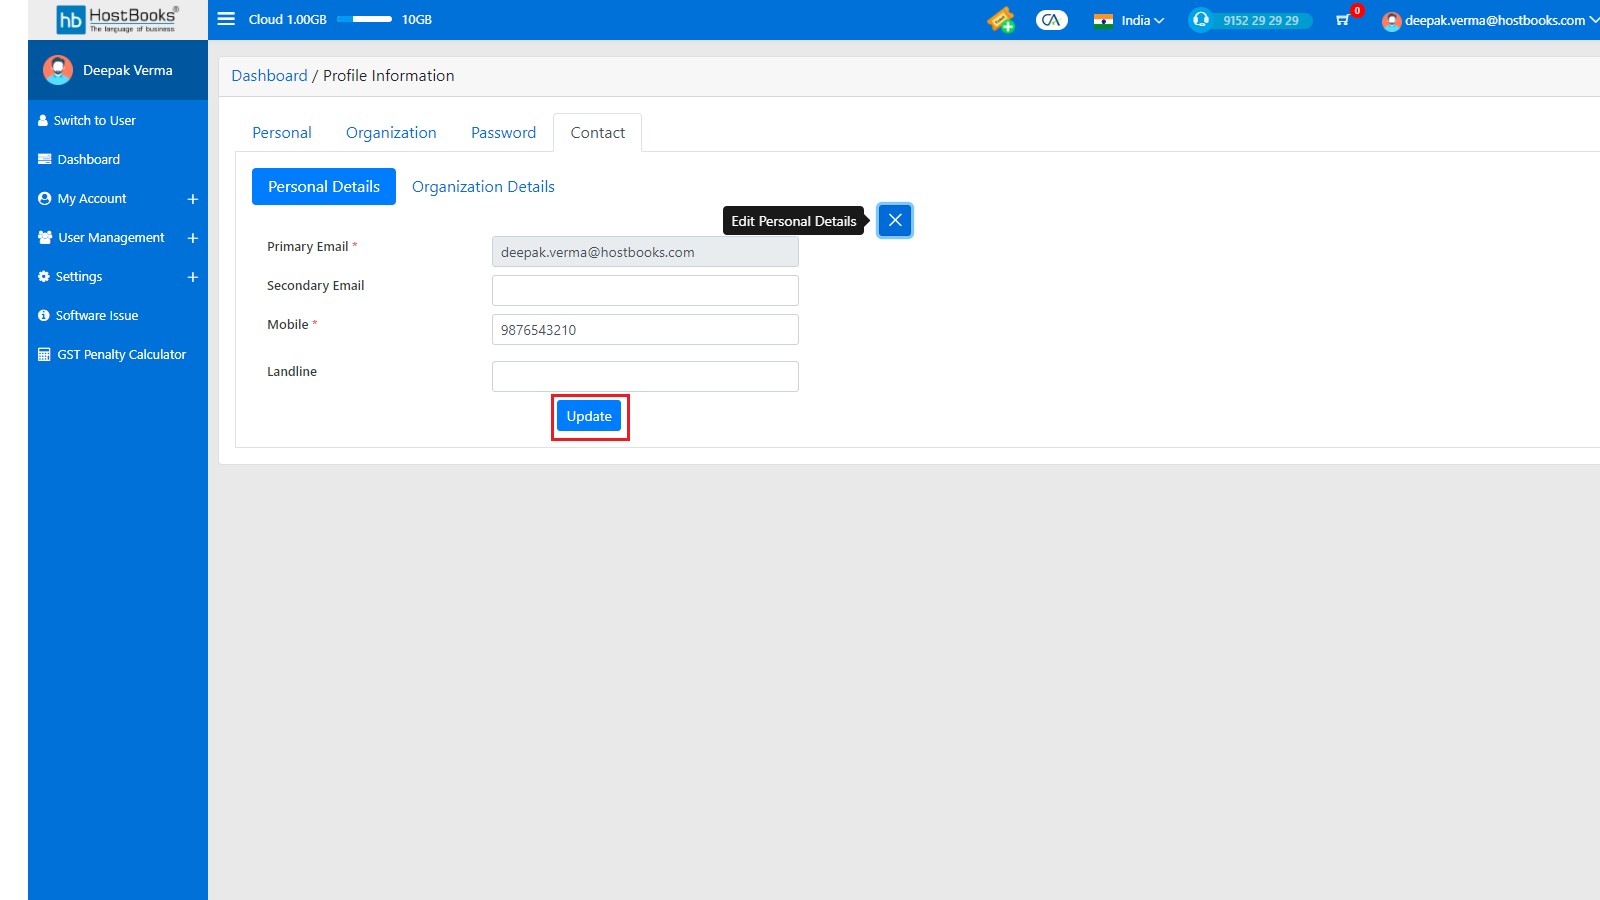
- Navigate to Contact and click on edit icon of Personal Details
You can update the following fields
- Primary Email
- Secondary Email
- Mobile
- Landline
Click on update
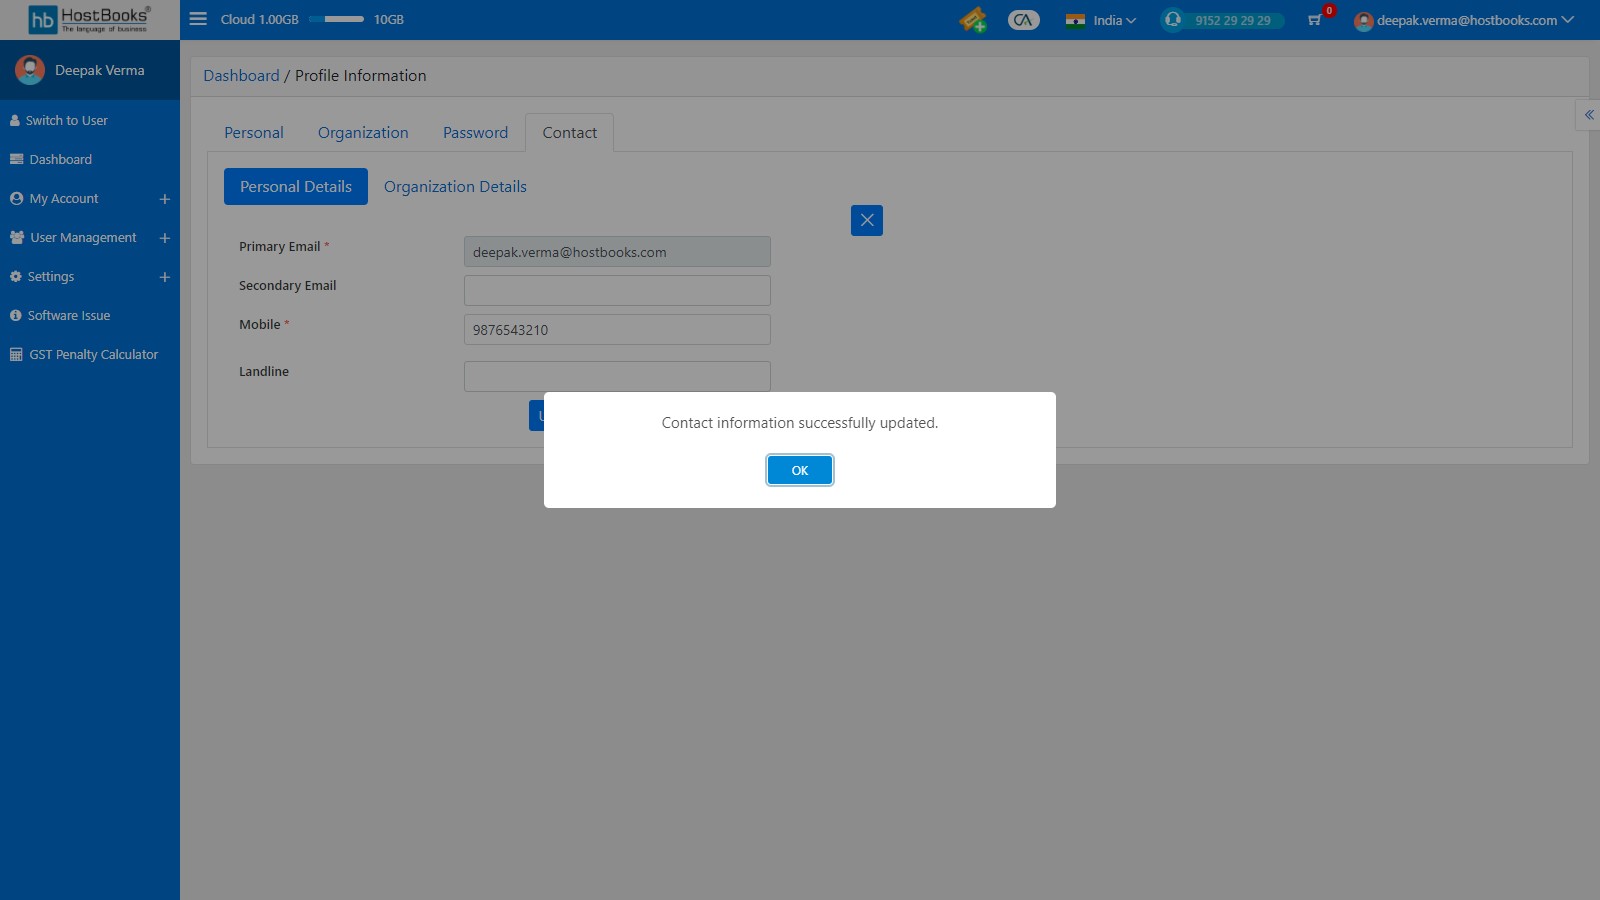
A popup message will appear as "Personal information successfully updated".
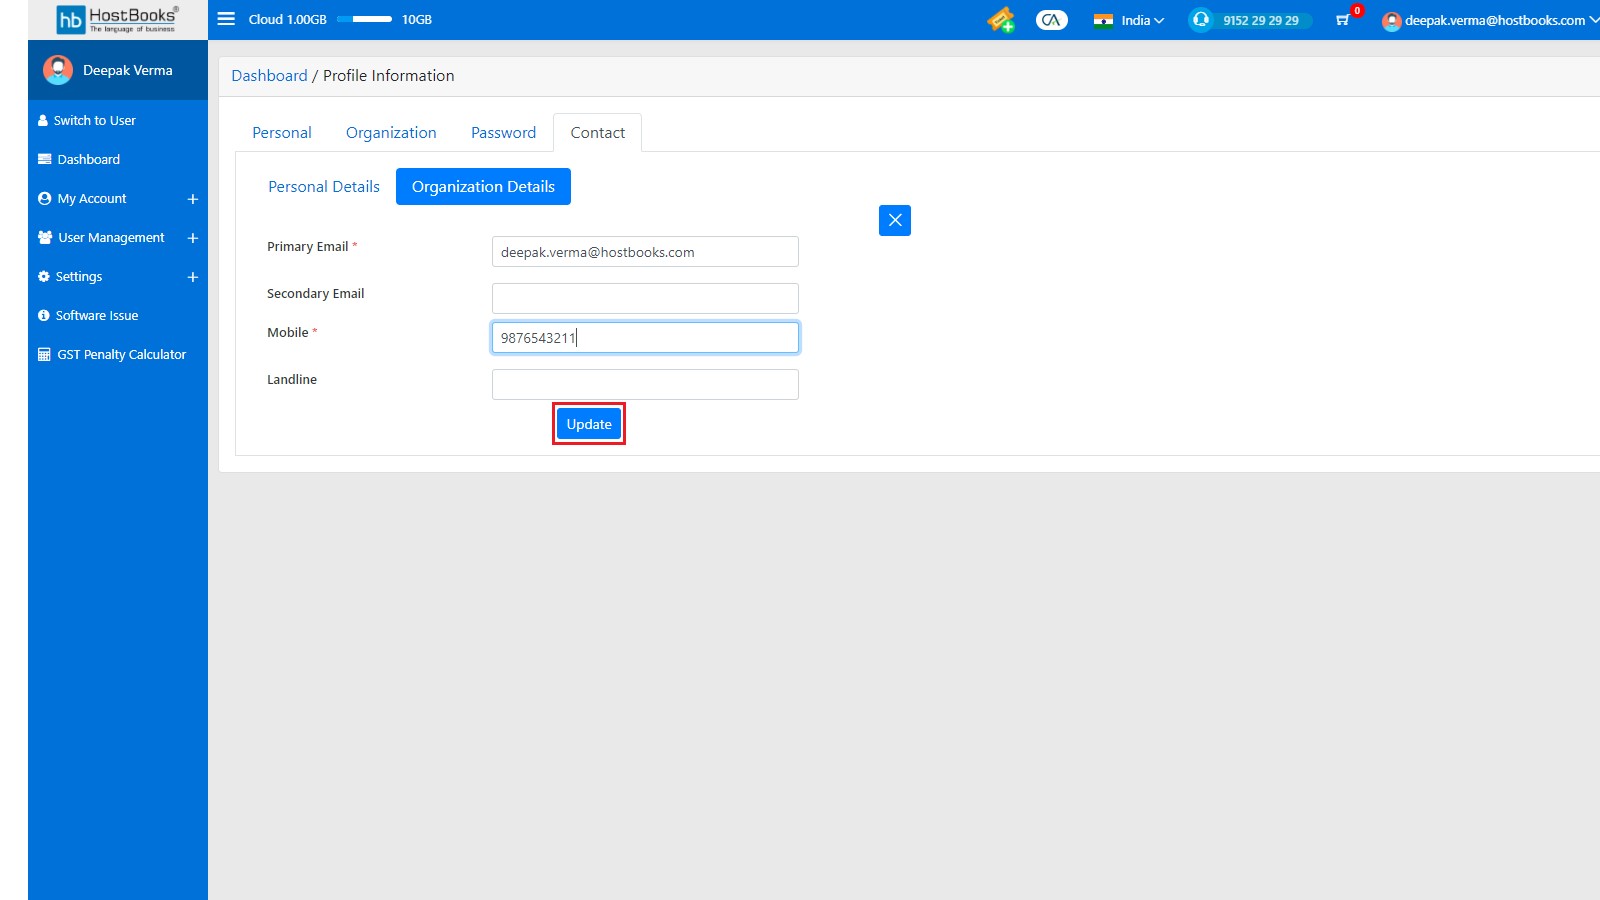
Click edit icon of Organization Details of Contact, you can update the following fields:
- Primary Email
- Secondary Email
- Mobile
- Landline
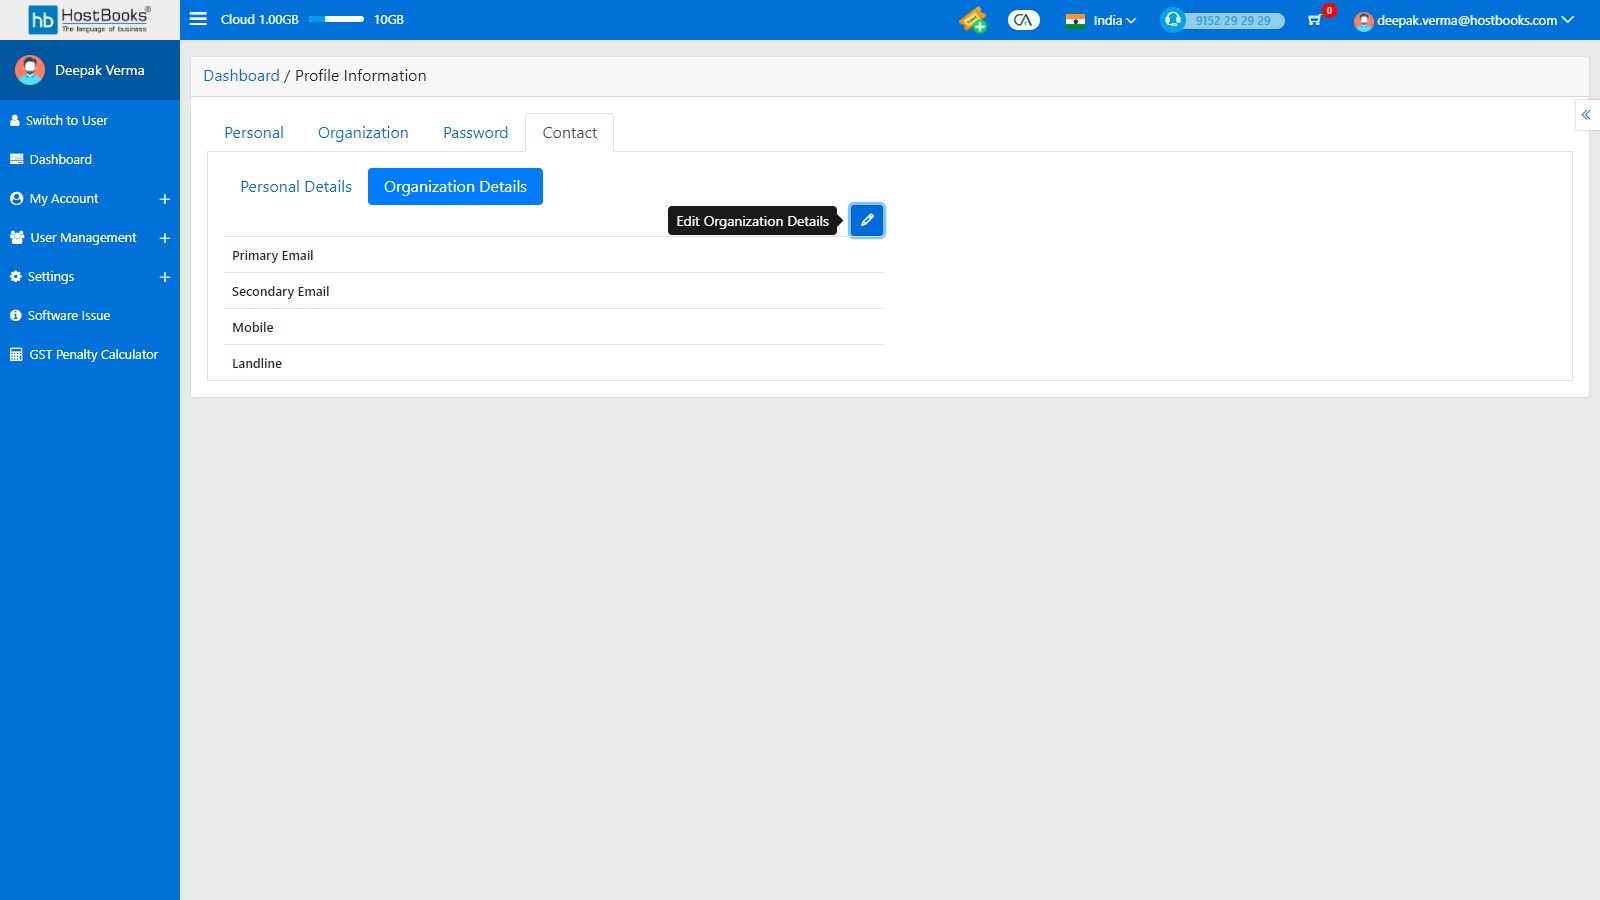
Click on update
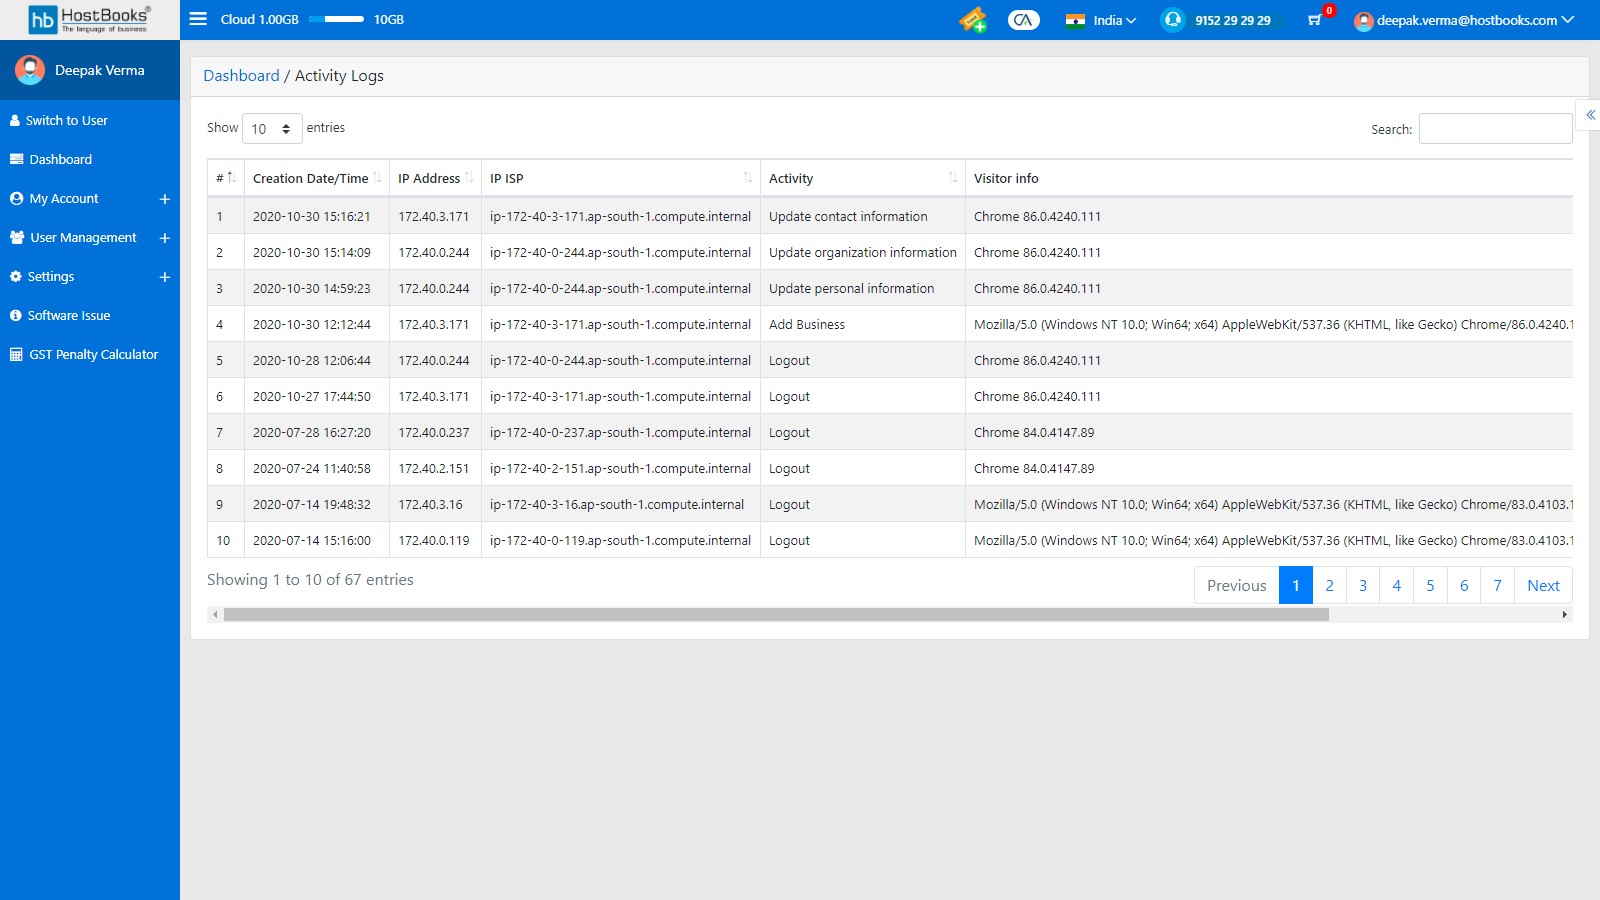
How can I check the Activity Logs?
Take the mouse on Email ID and Click on Activity logs.

After clicking you will be able to see the logs
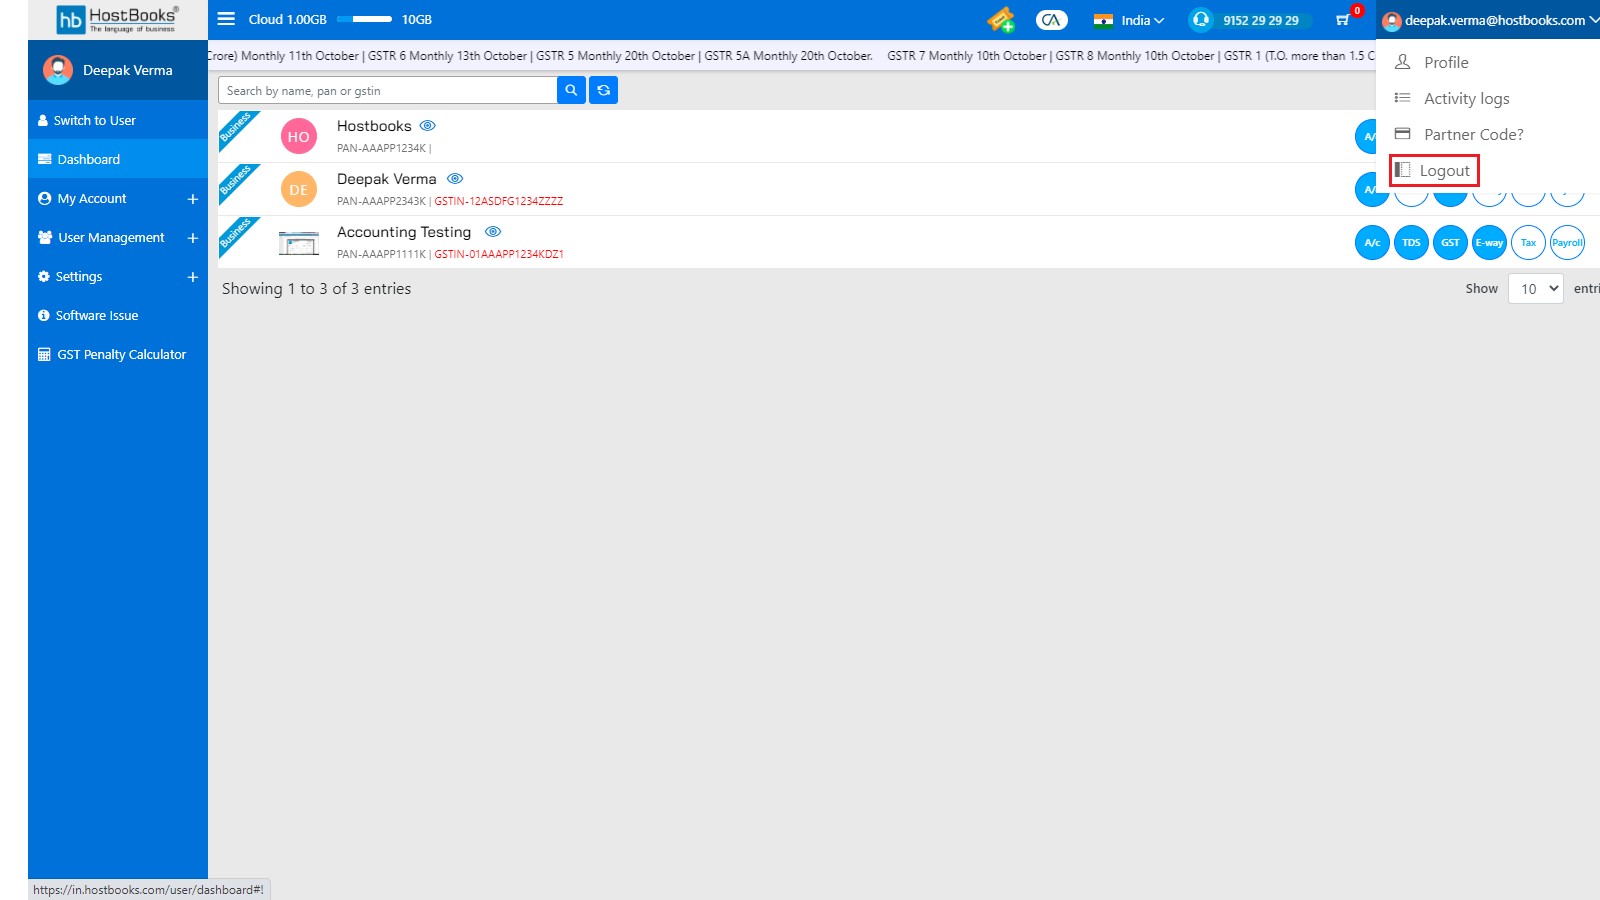
How can I Logout from the Application?
Take the mouse on Email ID and Click on Logout. After clicking you will be logout from the Indian Accounting.